
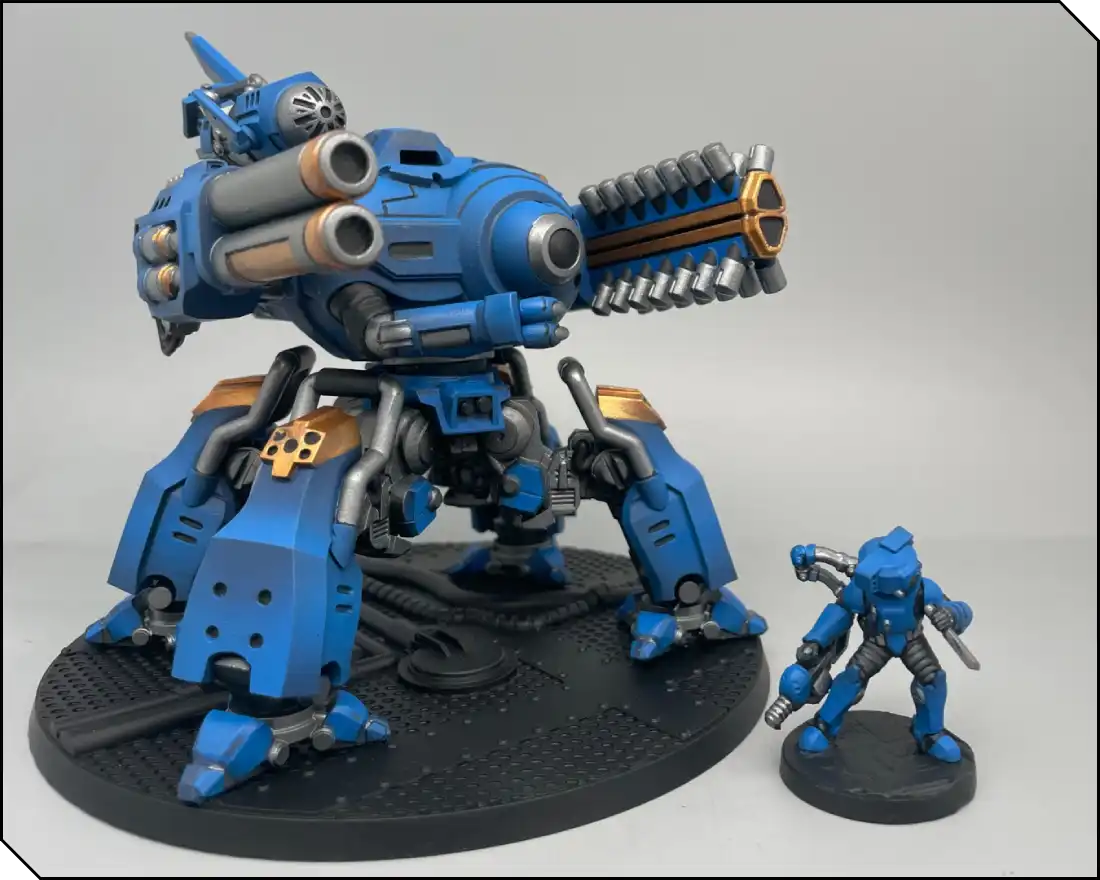
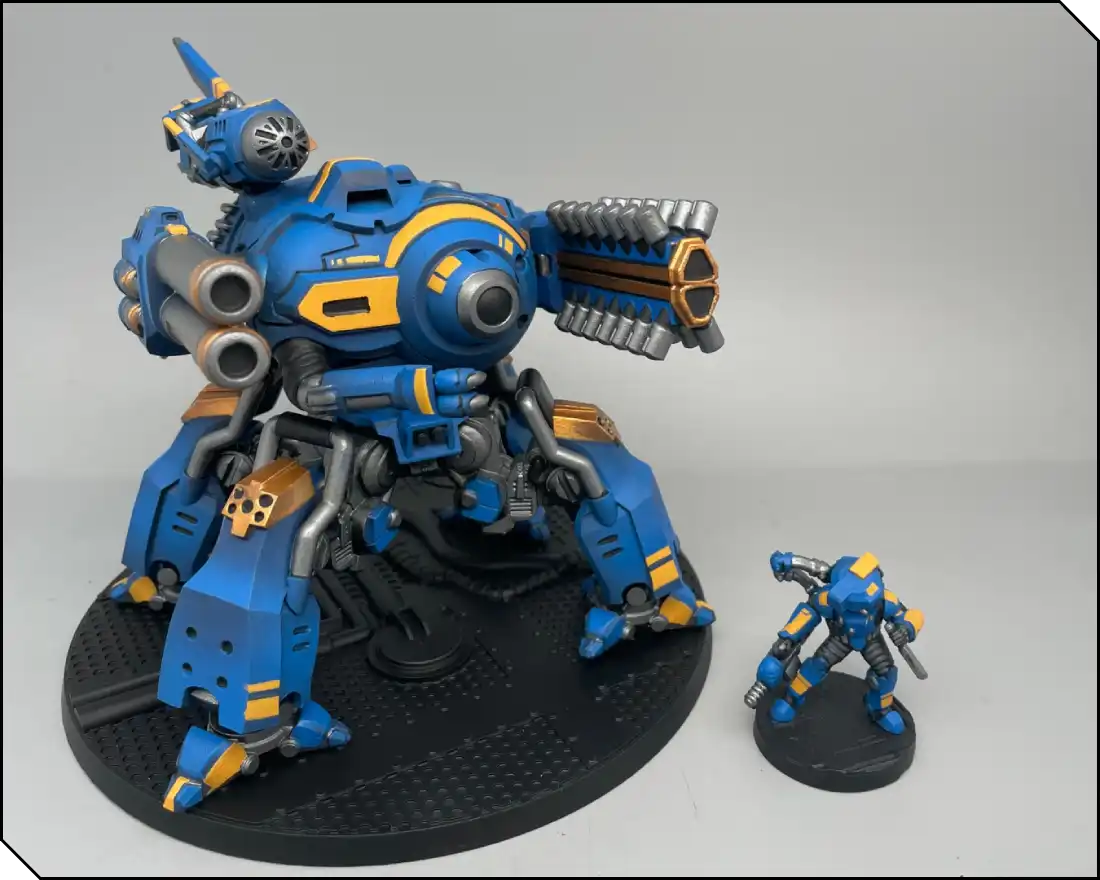
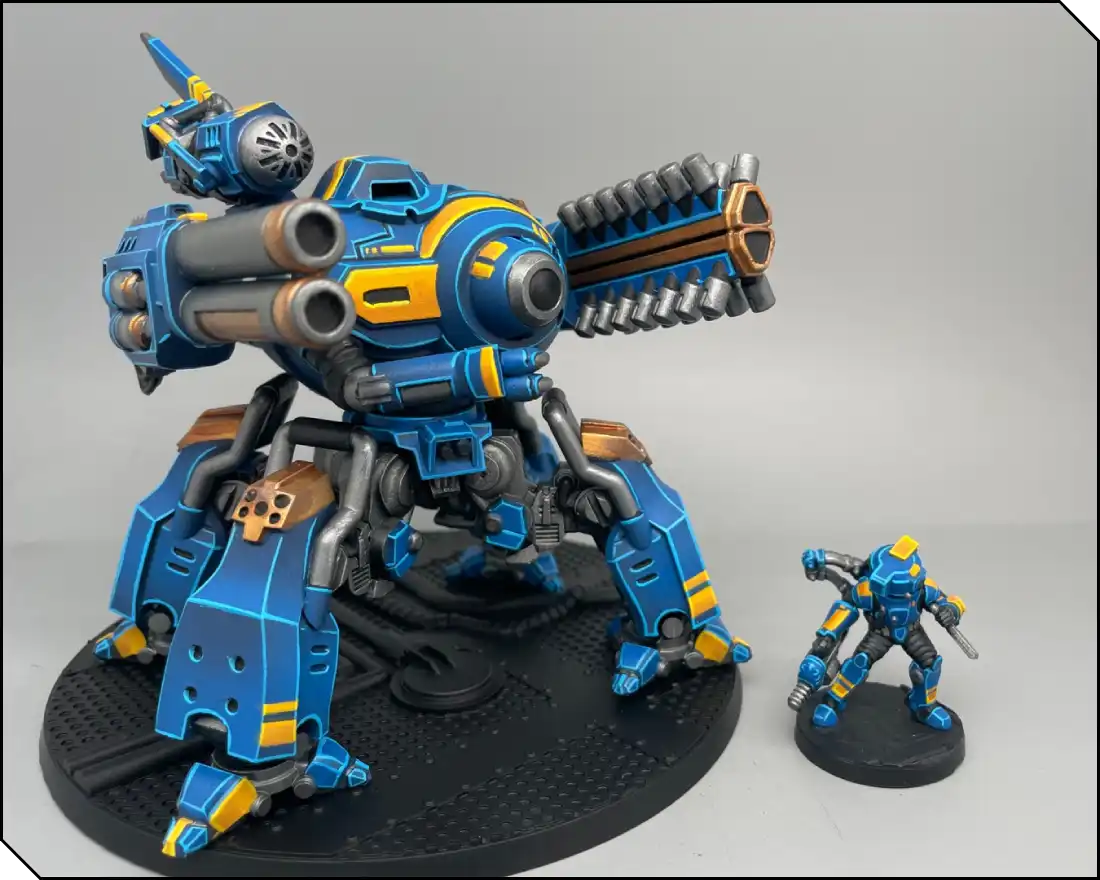
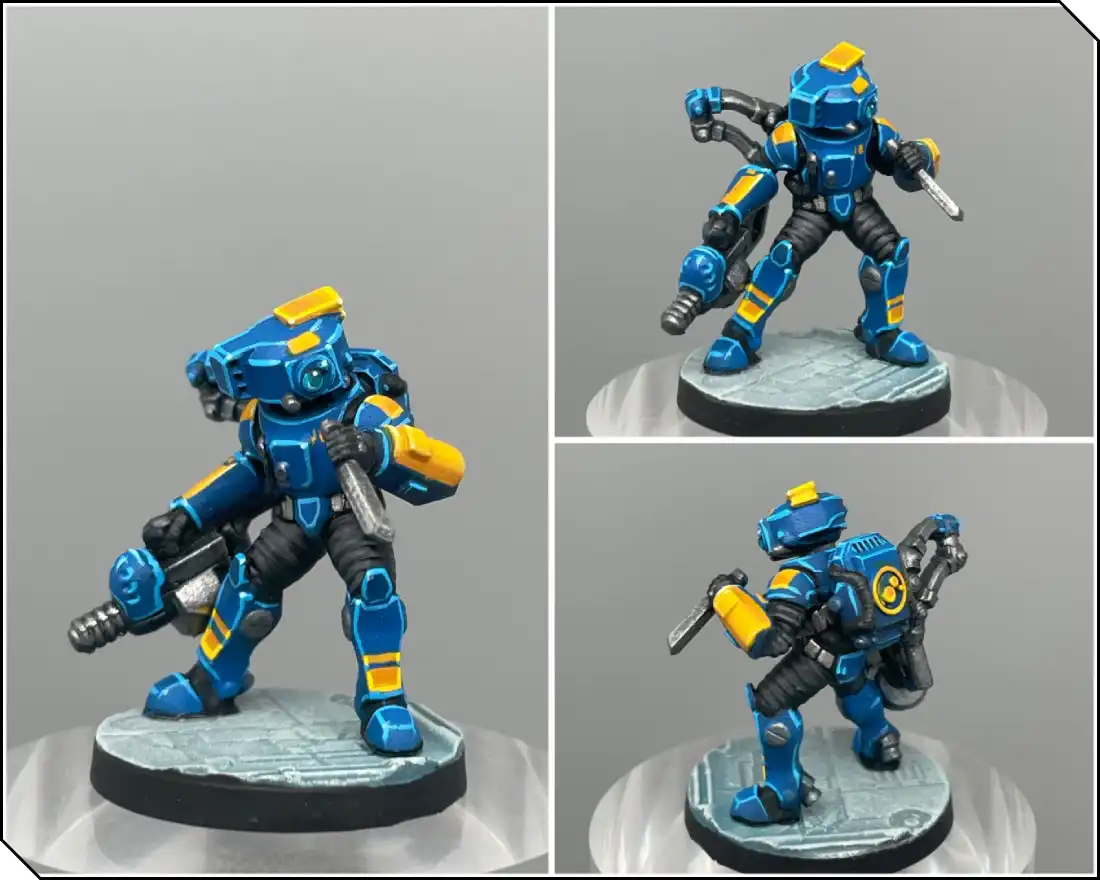
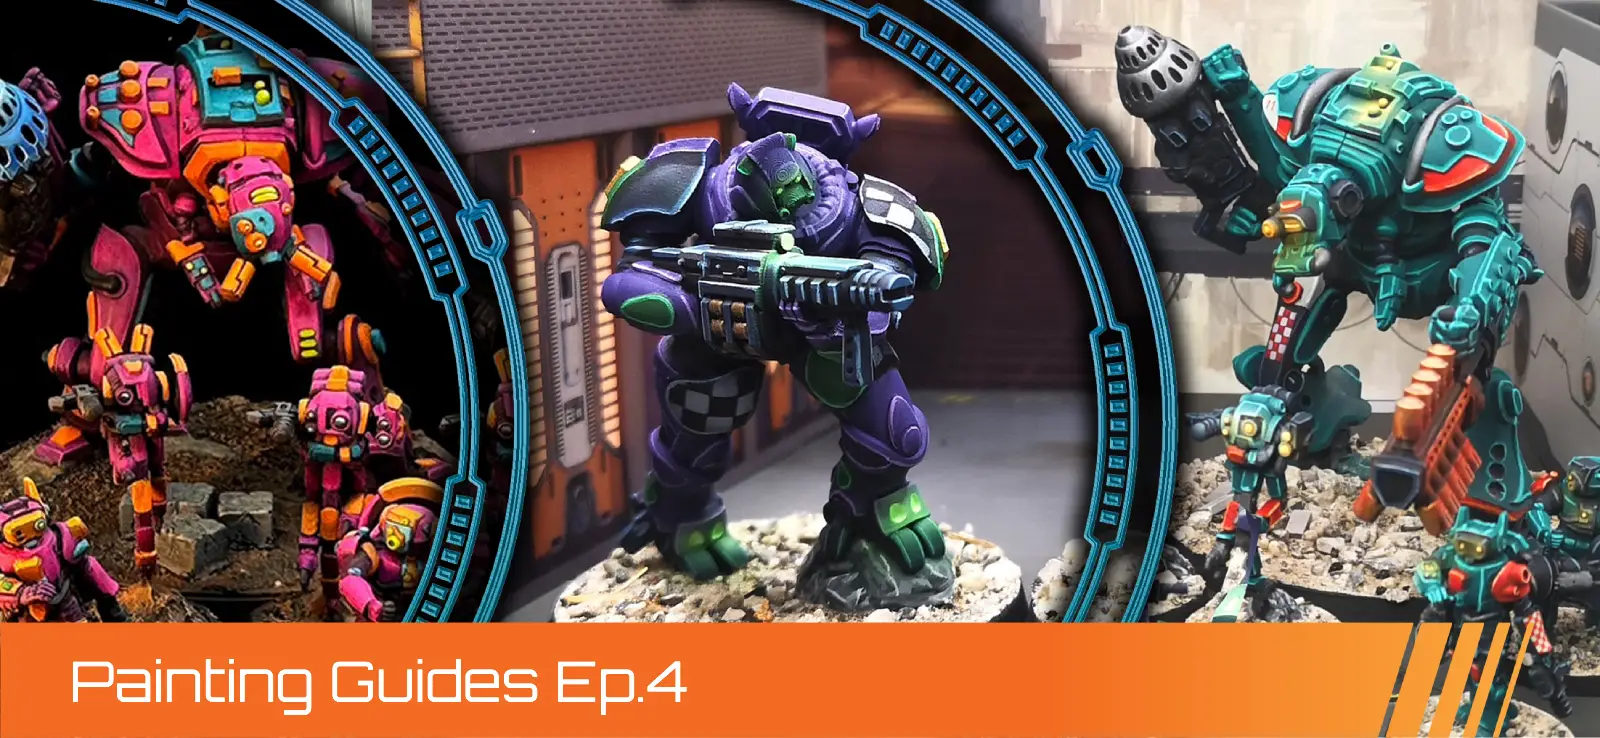
Pact OSSU Blockade Crew - Deep Space Prospector Color Scheme
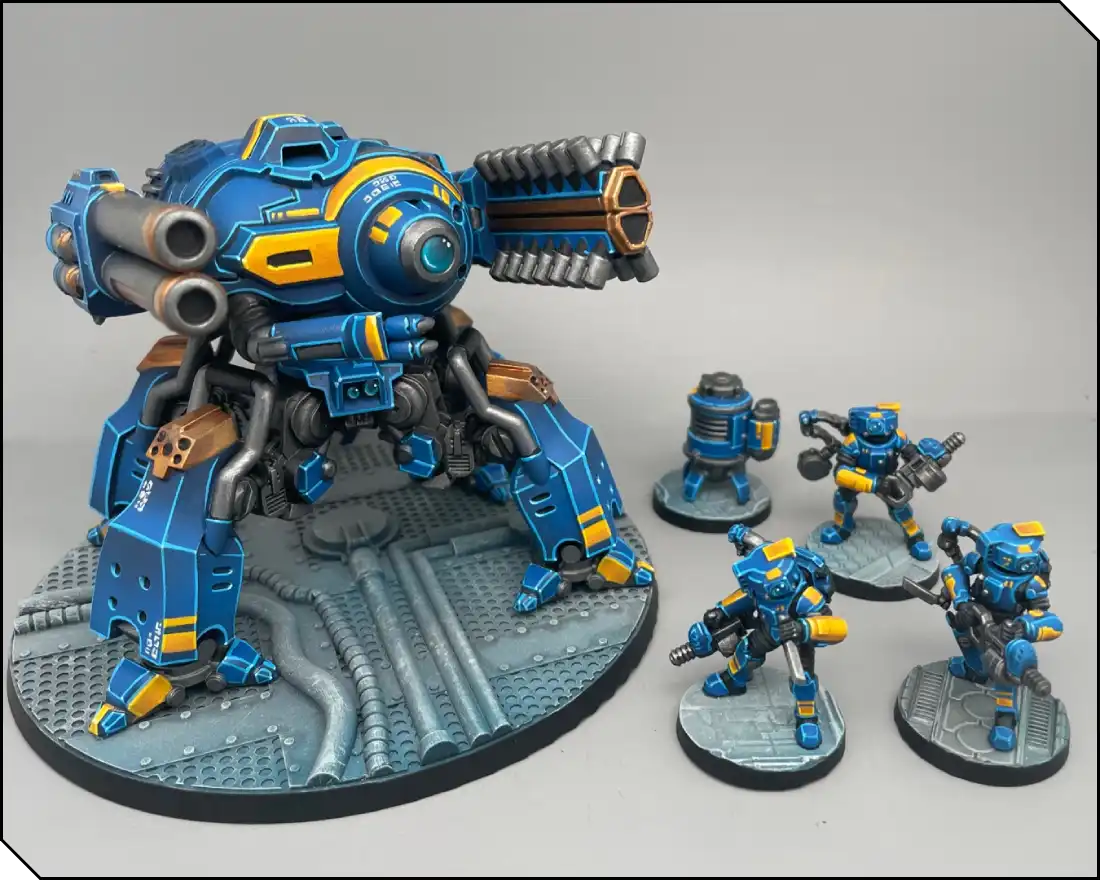
For this color scheme, I chose a deep blue as the main color and a warm yellow as a secondary accent. These two colors create a strong contrast since both are primary colours. It reminds me of a naval uniform, and is a nice twist compared to a red and gold scheme.
Here is the list of paints I used. I mainly work with Citadel paints, but I’ve included alternatives from AK Interactive and Vallejo for certain steps.
- Kantor Blue
- Caledor Sky / Ak Deep blue
- Lothern blue / Ak Ducat blue
- Tyran Blue (wash)
- Incubi Darkness
- Sotek Green
- Temple guard blue
- Blue horror / Ak Sky blue
- White Scar / Ak White
- Averland Sunset
- Yriel Yellow / AK Volcanic Yellow
- Deathclaw Brown
- Flash Gitz Yellow / AK Deep Yellow
- Eshin grey
- Mechanicus Standard Grey
- Dawnstone
- Leadbelcher / Vallejo Gunmetal
- Nuln Oil (wash)
- Runefang Steel / Vallejo Light Steel
- Scorpion brass
- Retributor Gold
- Reikland Fleshshade (wash)
- Liberator gold
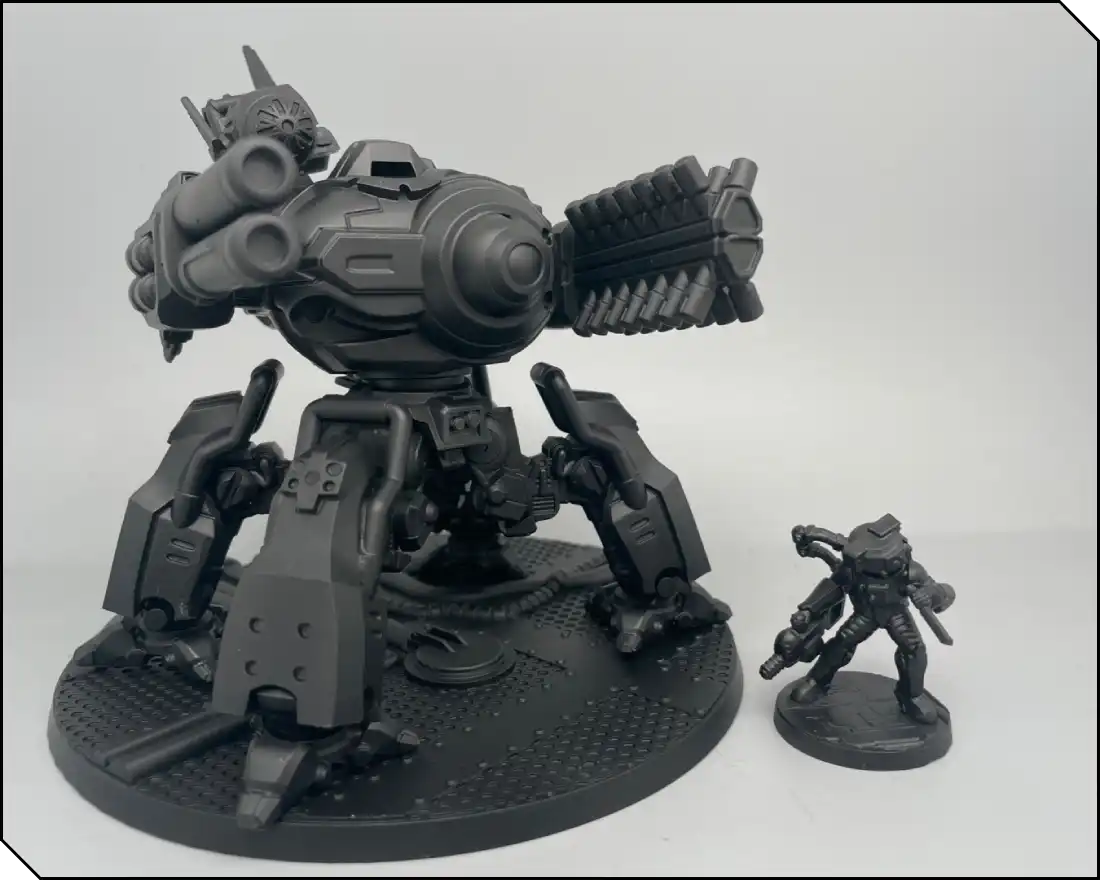
Priming the Models
Once I assembled the miniatures, I primed the entire set black for this tutorial. Black tends to be more forgiving and is more widely available.
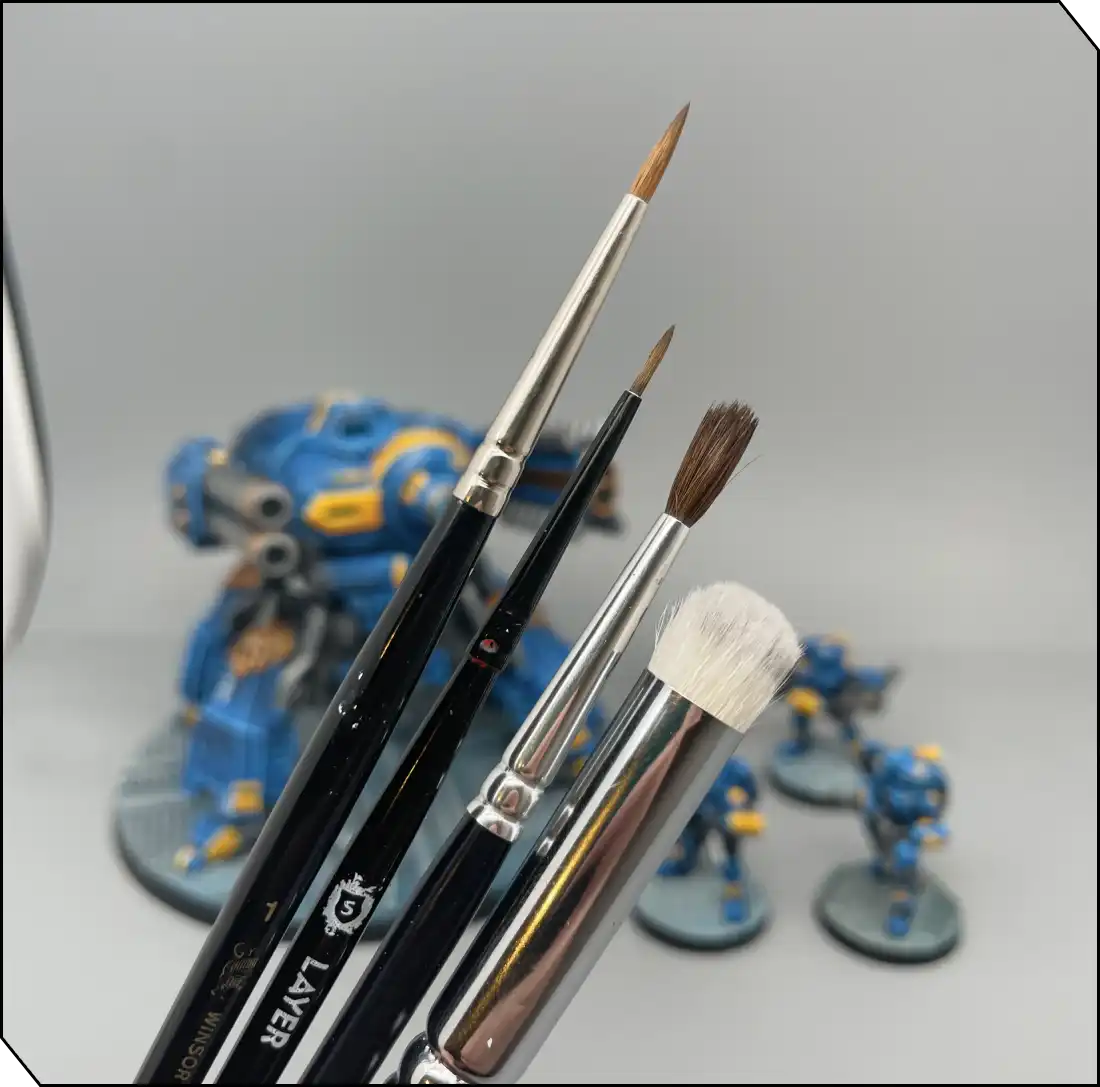
Preparing Tools & Thinning Paints
I mainly use four brushes:
- A large brush for basecoat and layering (Citadel Base M, or Raphael 8404 size 1 or 2, or Windsor & Newton Series S). The wider belly of the brush helps retain more paint for these longer steps.
- A small brush for finer details (Citadel Layer S, or Raphael 8404 size 0). You don’t actually need an ultra-small brush—the sharp tip does the precision work well. The longer hair helps with clean edge highlights and prevent the paint from drying too soon.
- A cheaper and larger brush for washes. Pony-hair brushes are usually cheaper and hold a good amount of paint, which is ideal for these more fluid steps.
- And finally one for drybrushing. An old, worn brush will work well, and a flat shape can help. You can also use stubby drybrushes designed specifically for this technique (most brands now have them in their range).
Apart from these, you’ll need some water, paper towels, and a palette. Both wet and dry palettes have their advantages, and with a bit of experimentation you’ll quickly find which suits you best.
Base Colors - Part 1
Let’s get started on the main base colors! We’re aiming for a clean and smooth basecoat. Simply add a small amount of water (or medium) to your paint and apply two to three successive thin layers. The goal for this step is to achieve an even coverage of the paint, without obscuring any details. Be patient between layers—this might be one of the longest steps, but it builds the foundation for everything that follows, so take your time.
For the blue armored panels, we’re using Kantor Blue (Citadel), a dark blue with excellent coverage. For the metallics, I like Vallejo Gunmetal (Leadbelcher from Citadel works fine too) for steel, and Brass Scorpion (Citadel) for the gold parts. For the support model’s clothes, pants, and sleeves, I used Eshin Grey (Citadel).
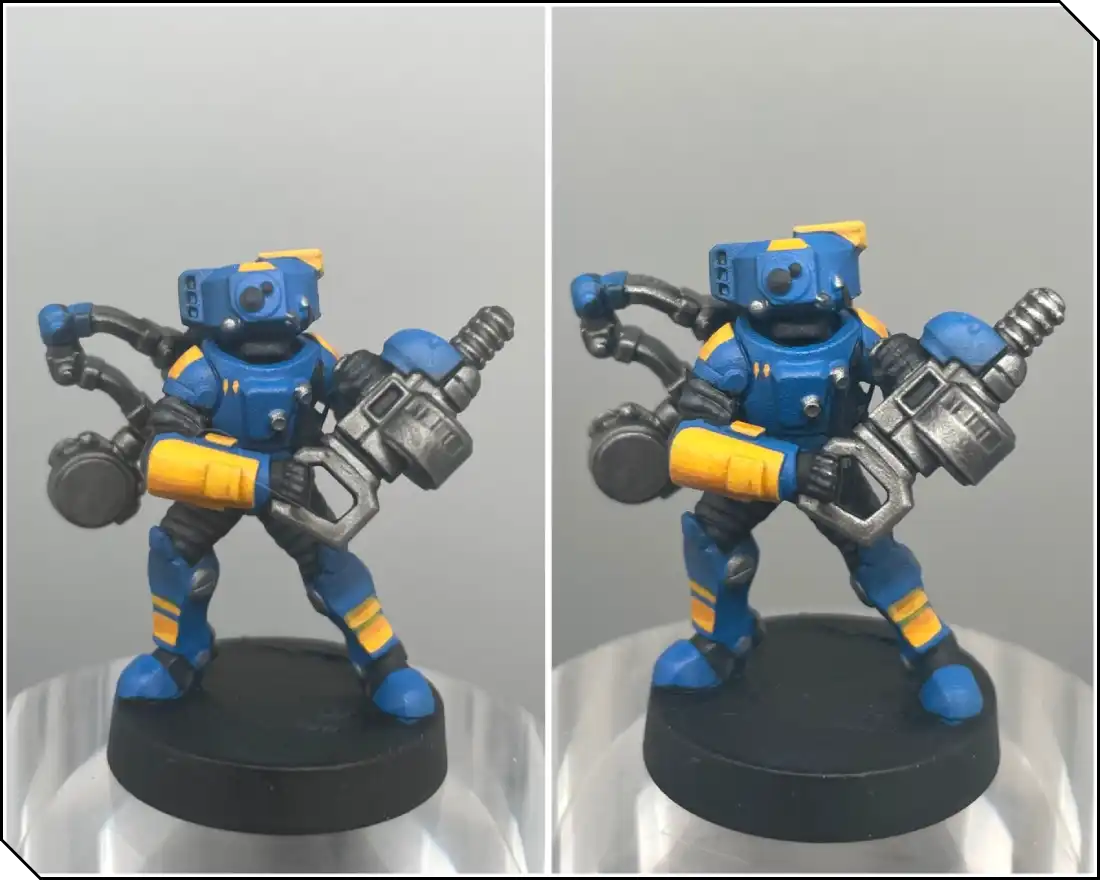
Base Colors - Part 2
Now this is where the fun begins. In this second step, we start building volume and light on our miniatures. There are a lot of ways to paint a smooth transition between two colors, but most commonly, layering goes like this:
Thin your paint more than before and work with successive thinned coats. Begin by painting larger areas and progressively reduce the painted surface as you move towards the lightest zones. Wait for the paint to be fully dry between layers, and you’ll see the volumes appear quickly.
You can also experiment with other ways to achieve the transitions: either gradually mixing one color to the other on your palette in between layers, or try wet blending, or even airbrushing. Try different approaches and find the one that suits your needs best.
On this second stage, I used:
- Caledor Sky for the blue armor panels.
- Retributor Gold and Mechanicus Standard Grey for the clothes.
- I left the steel parts untouched for now.
Don’t hesitate to go back to the previous color if needed; layering often involves painting back and forth between the two tones.
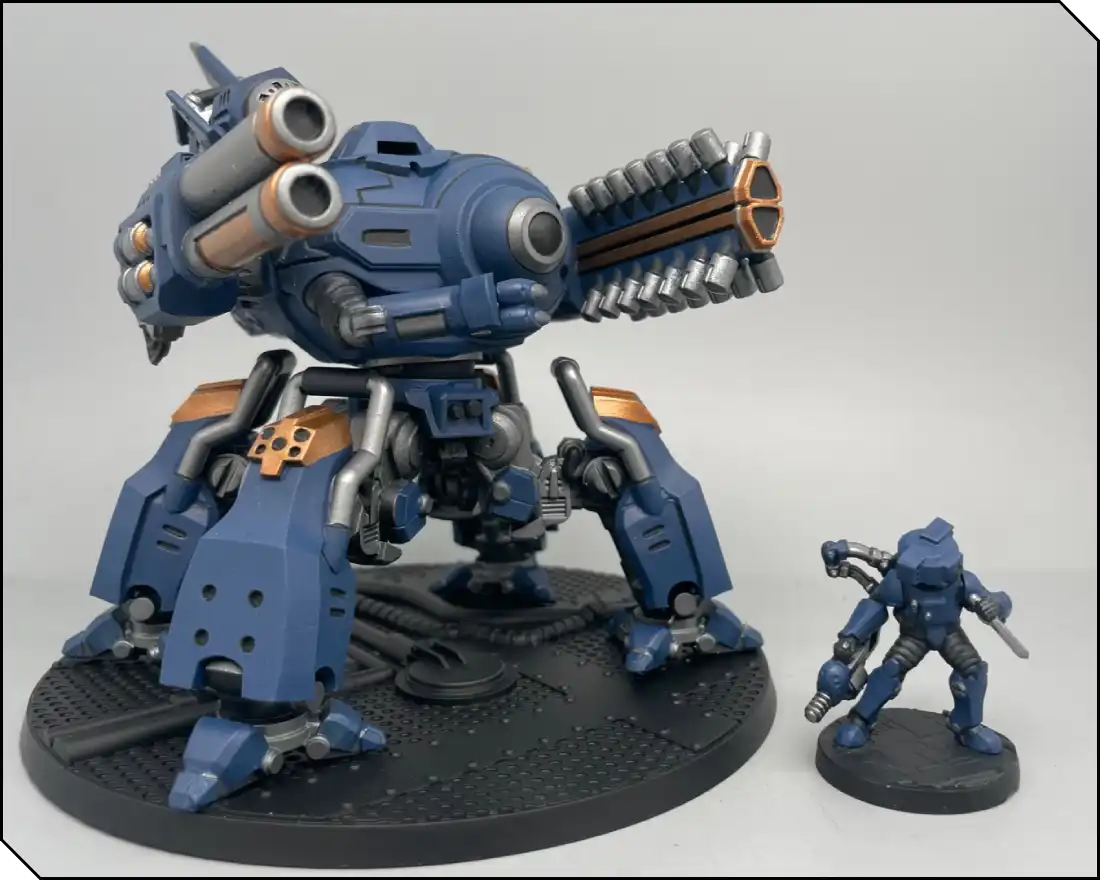
Base Colors - Part 3
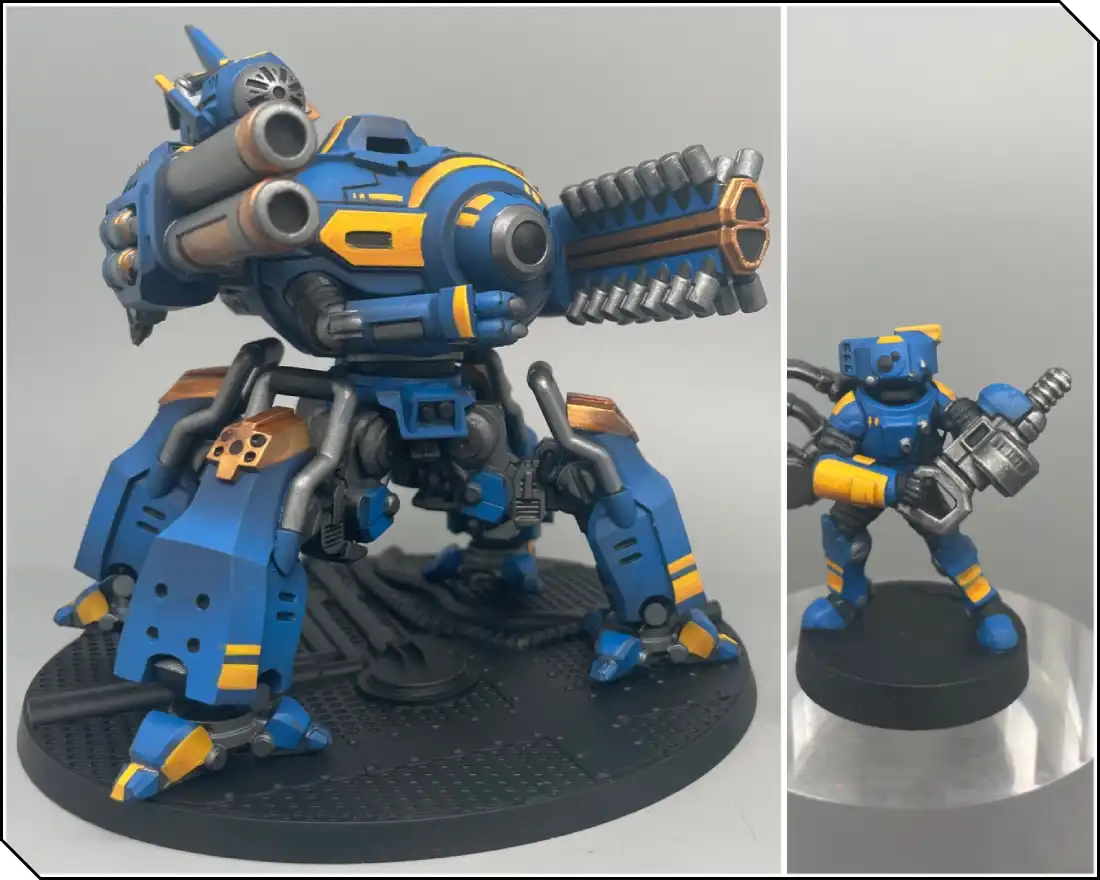
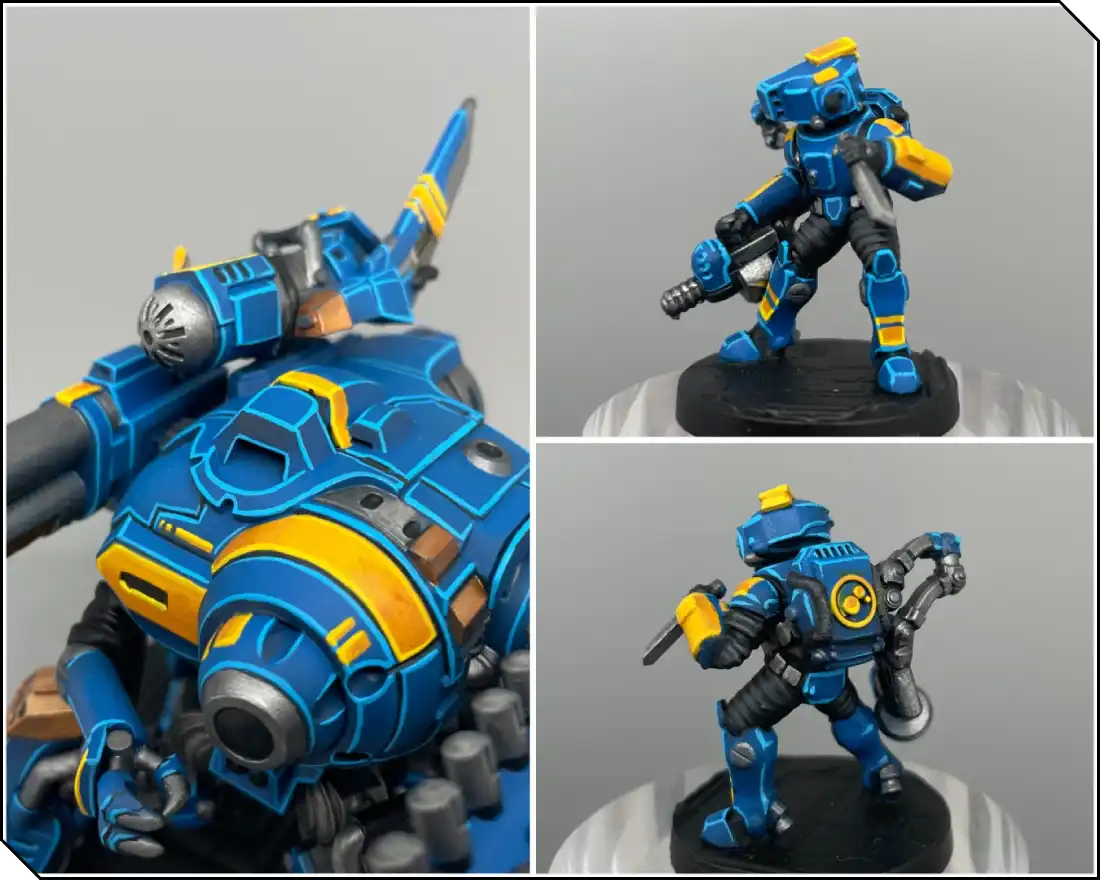
Now that our miniature is looking more three-dimensional, let’s have fun with our secondary color: yellow! I painted some entire armor panels with it and added fun freehand markings on other blue ones.
For the basecoat, I used Averland Sunset, again aiming for two smooth thinned coats. Remember that this is the foundation for the layering, so it needs to be as clean as possible.
I then highlighted up towards Yriel Yellow using the same layering techniques as before, then shaded down towards Deathclaw Brown. This nice gradient from orange to bright yellow gives the armor a really striking look.
Shades
Let’s use some shades (or washes) now! We’ll apply them in two different ways:
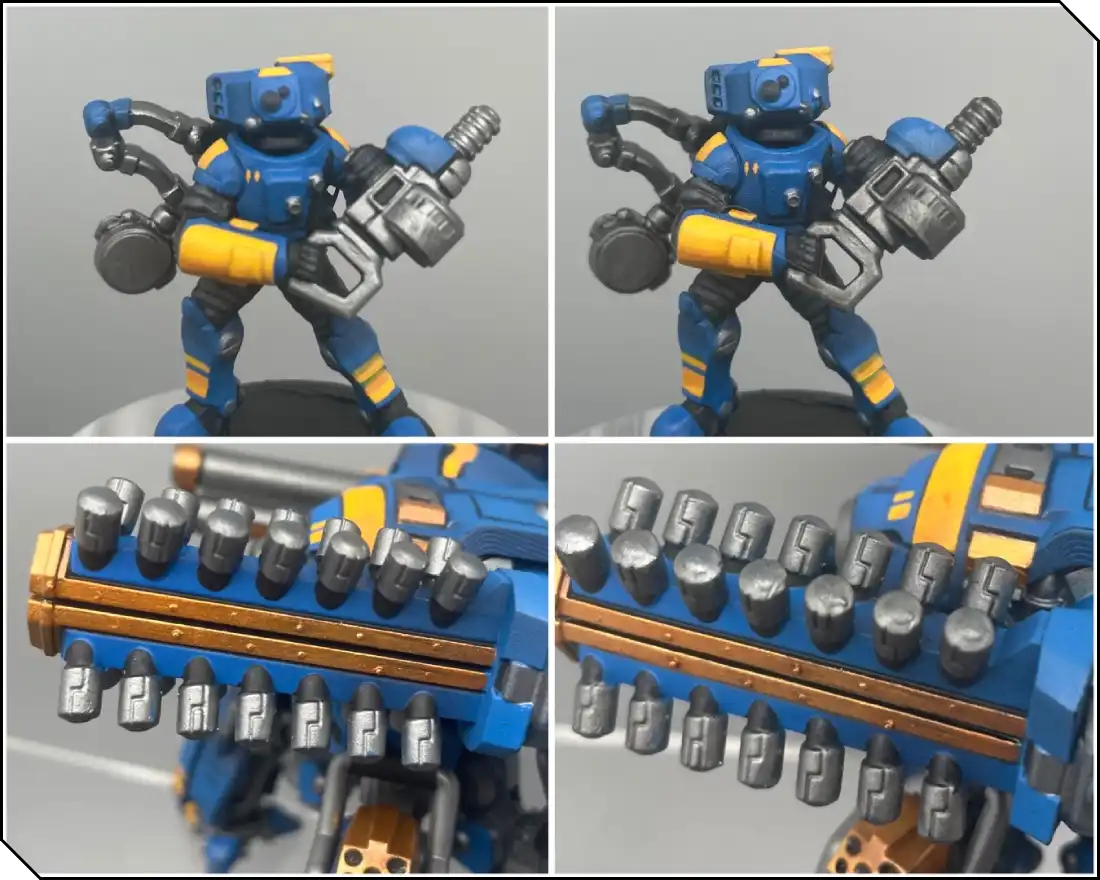
First, on the metallics, we’ll be applying a coat of Nuln Oil to the steel parts, and Reikland Fleshshade to the gold ones. Notice how the wash flows into the recesses and really underlines them—it emphasises the details, making our miniature more defined. It also slightly tints the metallics, which will be useful before the next step: drybrushing.
Be mindful not to let the wash pool excessively, as it can dry patchy or leave greyish stains.
Another way to use washes is glazing. For this, we’ll use Tyran Blue and Cassandora Yellow— two very saturated washes. The goal here isn’t to focus on recesses, but to apply a thin color filter on our previous layering, to help blend it a bit further. That way, it will help smooth the result of our work. Thin the paint heavily, remove most of it from your brush using a paper towel, then gently pass the glaze over the previous layers.
Drybrushing
In this next step, we’re going to focus on the metallics. Once our previous wash is fully dry, we’re gonna take our old (or dedicated) brush for some drybrushing. Load some paint on your brush and remove almost all of it using a paper towel.
Apply the paint on your miniature using light back-and-forth brush strokes, painting with the side of the bristles across the edges. You’ll really quickly see that it naturally highlights all of the miniature’s details, adding another layer of definition to the model!
For the steel, I used Light Steel (Vallejo, Runefang Steel from Citadel works well, too) and Liberator gold for…you guessed it, the gold areas!
Drybrushing works particularly well with heavily textured surfaces, like mechanical parts or other materials like fur, chainmail, wood, etc.
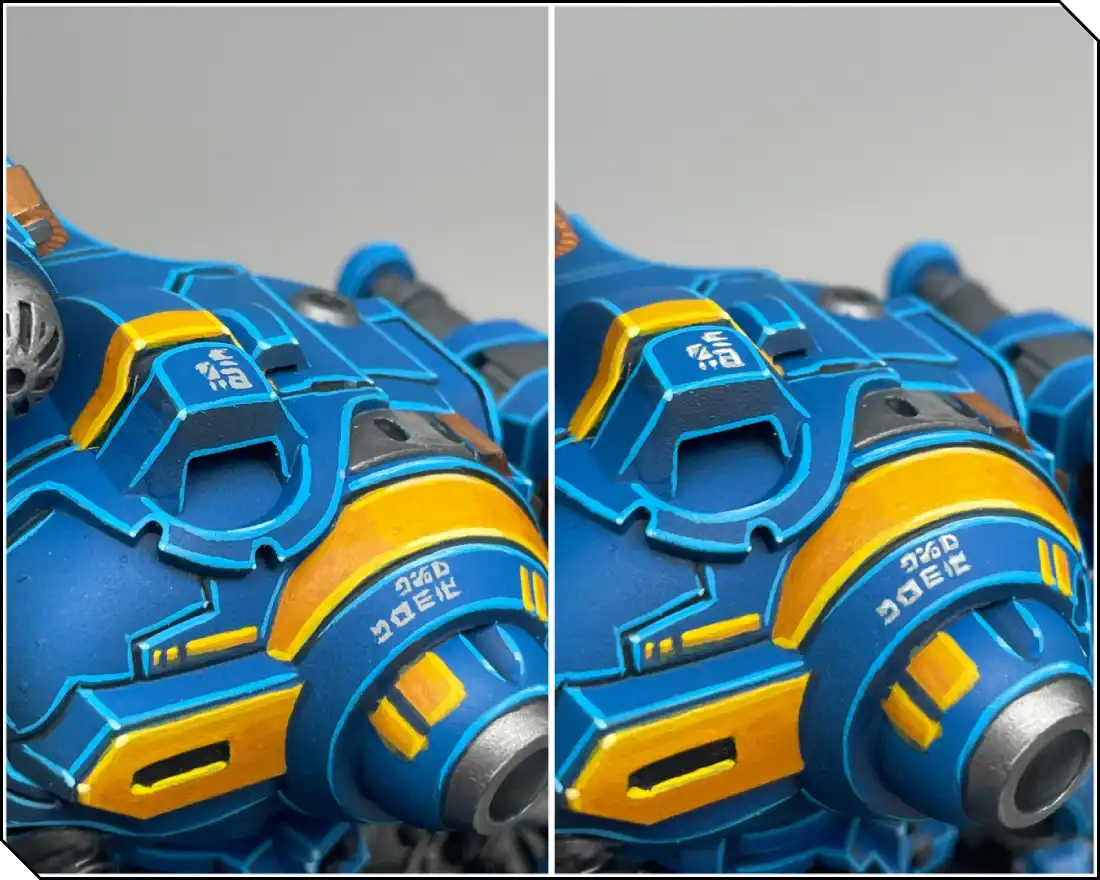
Painting Highlights
Now onto edge highlights! This technique sharply defines the volumes of the miniature, making it easier to read clearly on the tabletop. You can paint it by using the side of your brush and running it along the edges of the model to create a clean, sharp line.
For this stage, I used AK Ducat Blue (or Citadel Lothern Blue), and AK Deep Yellow (or Citadel Gitz Yellow).
Painting Details - Part 1
We can add an extra step to our previous edge highlights to make them stand out even more: add a small dot of almost white paint to every sharp corner of the edges. In this case, I used AK Sky Blue (or Citadel Blue Horror) and Dorn Yellow. It’s an especially satisfying step that pushes the highlights further.
On large armor panels, like those on the Zeo, you can have some fun adding some freehand markings. I like to do it in two steps: light grey (Celestra Grey) and then white to make them pop a bit more.


Painting Details - Part 2
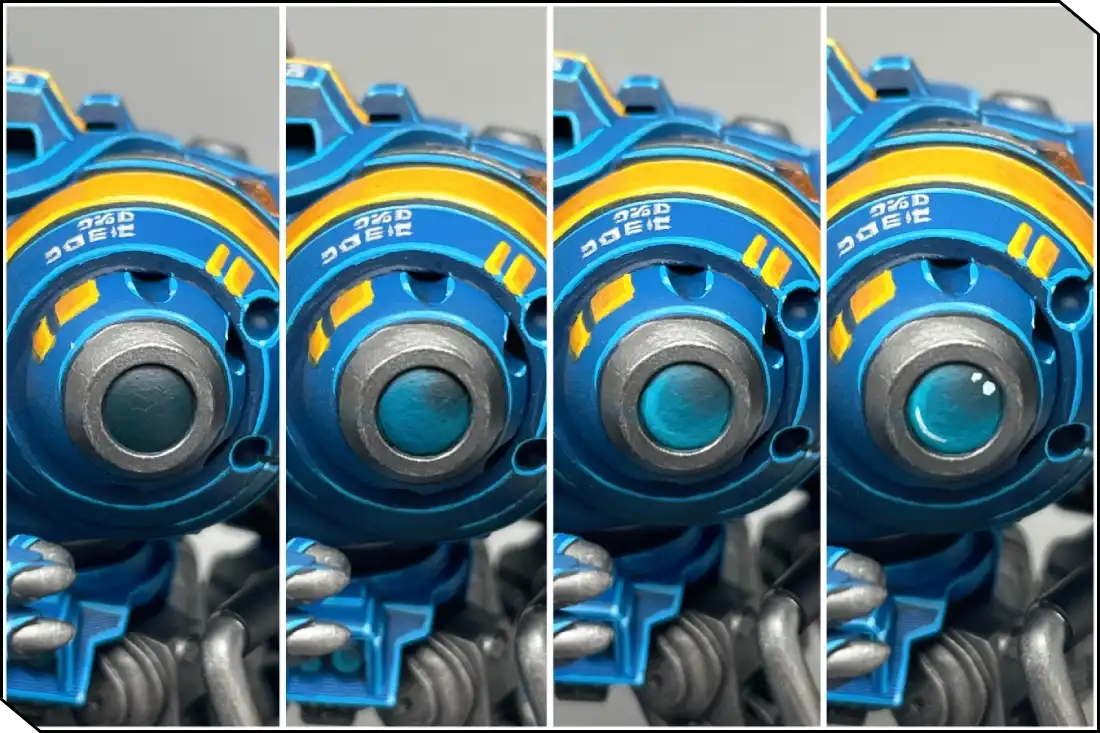
I saved the lenses of both the Zeo and supports for the last step!
Painting light on a lens works the opposite way of a normal volume: the lower part (opposite the light source) is the brightest, the upper part remains darker, and a small white dot or line represents the reflection of light entering the lens. This helps simulate the refraction and reflection of glass.
In our case, we’re going to basecoat the lens with Incubii Darkness or any dark green-blue color. Then we’re painting a gradient towards Sotek Green in the lower-left area, using any of the layering techniques seen previously. Follow this with a second smaller layer of AK Aquatic Blue (or Citadel Temple Guard Blue). Work in thin successive layers to achieve smooth transitions. Finally, add a white dot on the opposite upper-right corner of the lens, et voilà!
Basing
For the base, I started with a basecoat of Dawnstone, then highlighted it with Dawnstone mixed with white using an airbrush. I also added a touch of color with some AK Aquatic Blue to echo the tint we used on the lens.
I then applied a wash of Mechanicus Standard Grey into the recesses, and finished with a drybrush of Dawnstone and white again, to bring the details back out.
.webp)
Thank you for reading this article! I hope you have fun painting your models, and I encourage you to experiment as much as possible in the process!
Check out more painted minis (and commissions) on Julien’s Instagram and Facebook!


.webp)
.webp)


.webp)


