
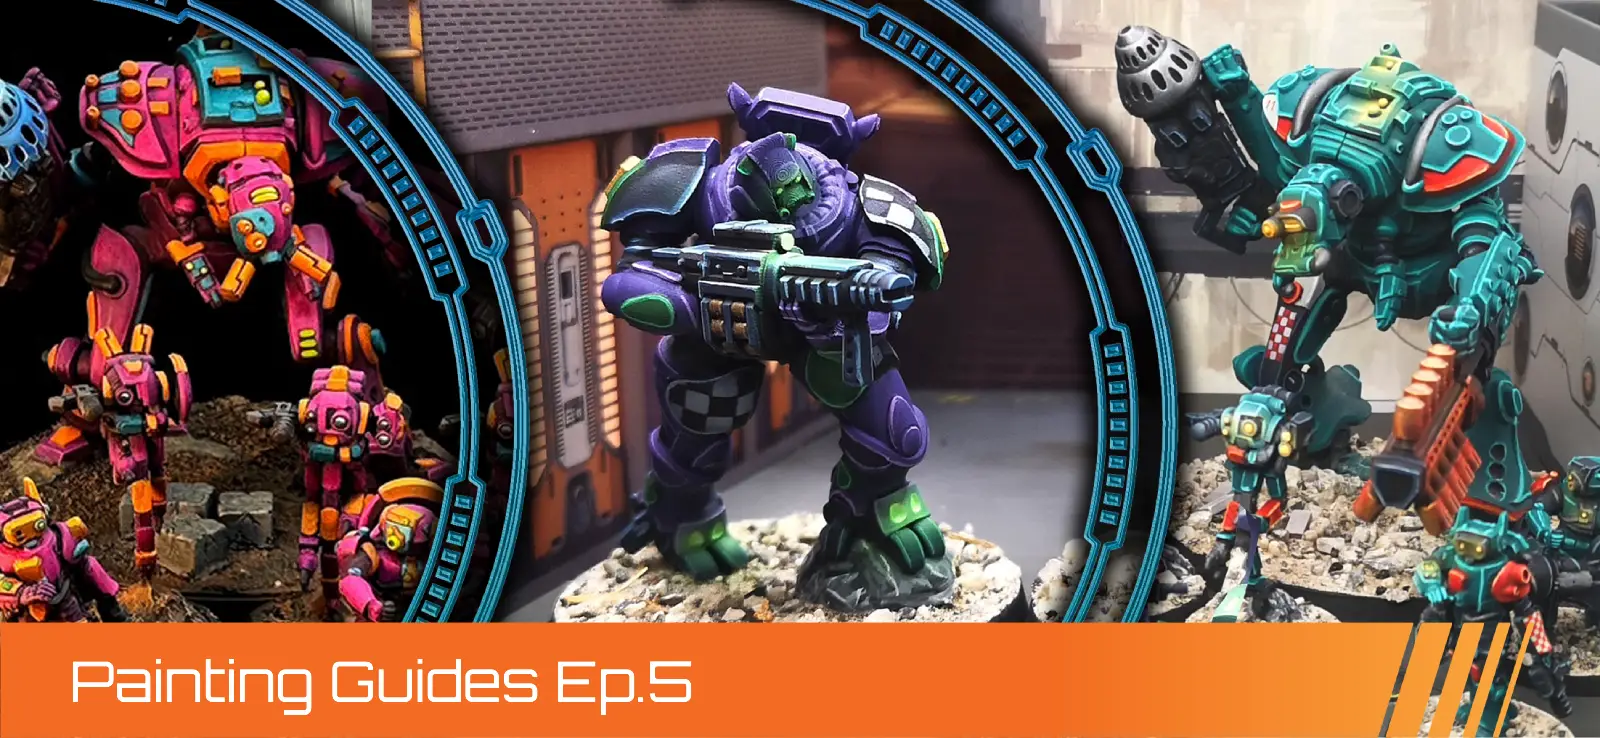
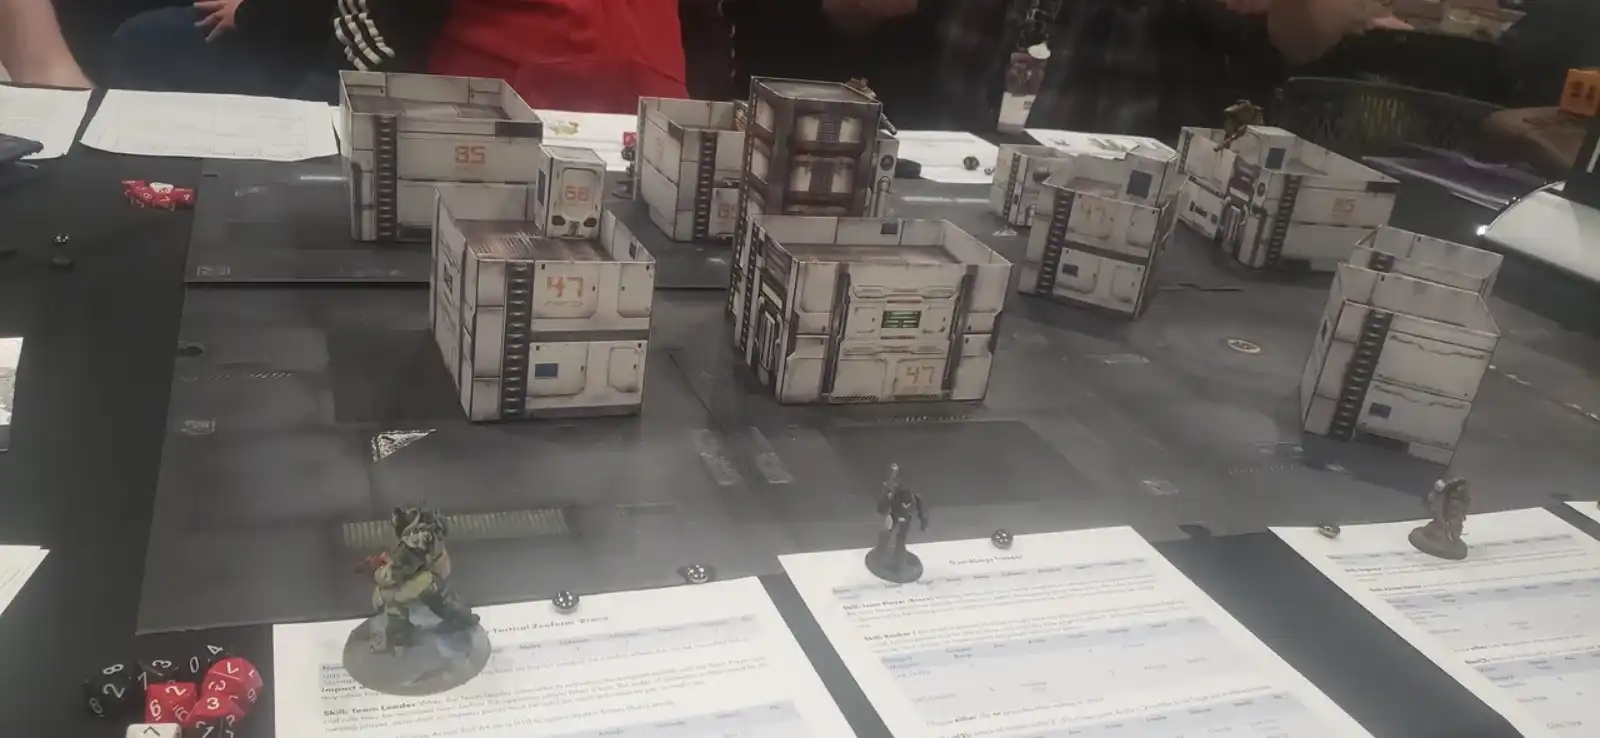
Soldat Tactical Zeoform - Weathered Color Scheme
By Justin "misterjustin" McCoy
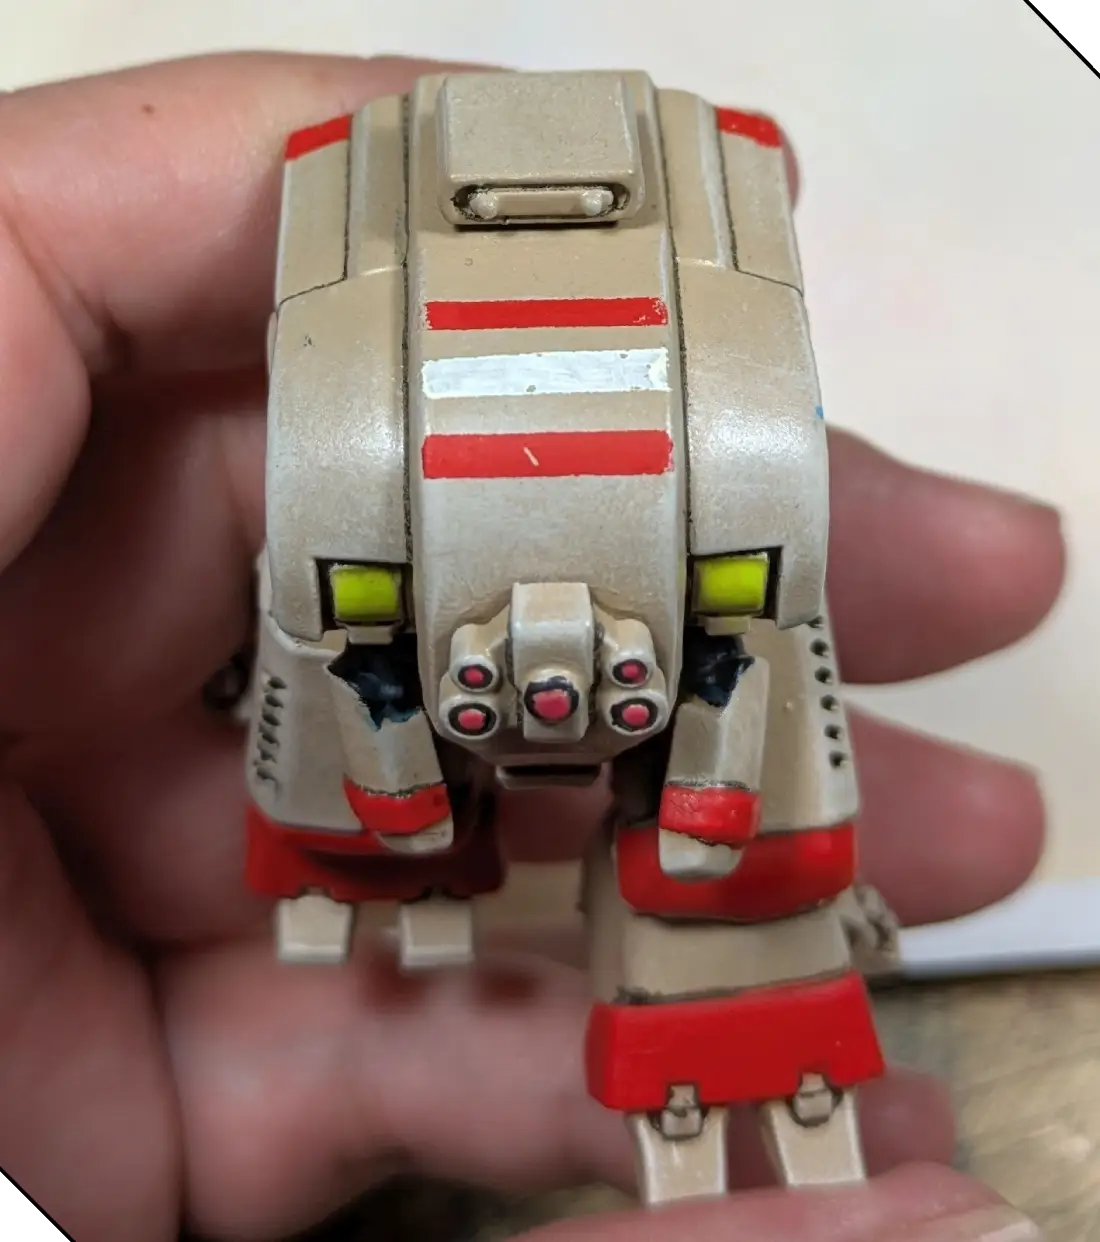
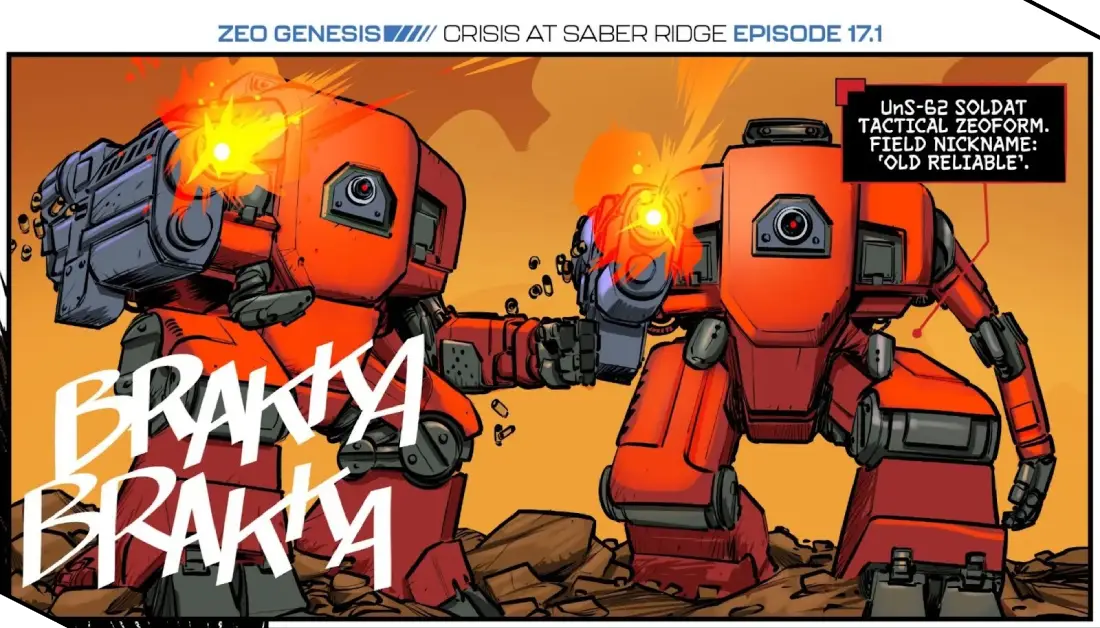
The Soldat Tactical Zeoform is extremely common in backwater garrison postings and second line units, and they’re featured in the webcomic hauling cargo, making it perfect for my vision of a heavily weathered utility vehicle. The standard Soldat loadout is a utility arm on one side and a configurable weapons gimbal on the opposite side of the hull, and I chose the assault rifle. Inspired by the Soldats in the rules and the webcomic, I decided to include red accents to give the model some zazz, but painted it desert tan to help blend into the webcomic environment.
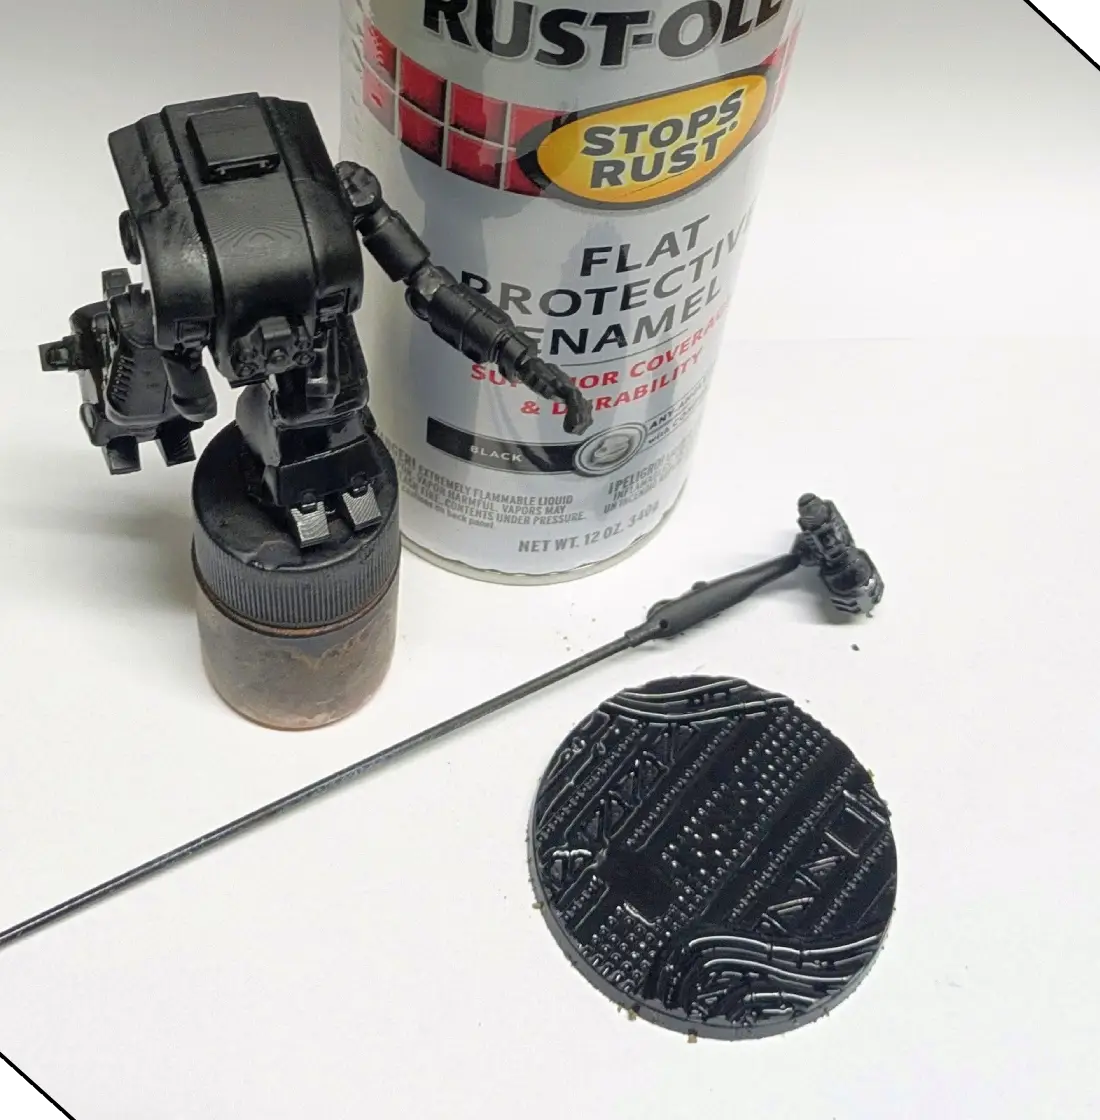
The Rust-Oleum sandable automotive primers are my first choice for resin printed models, and I gave the model and the base a solid coat of flat black.
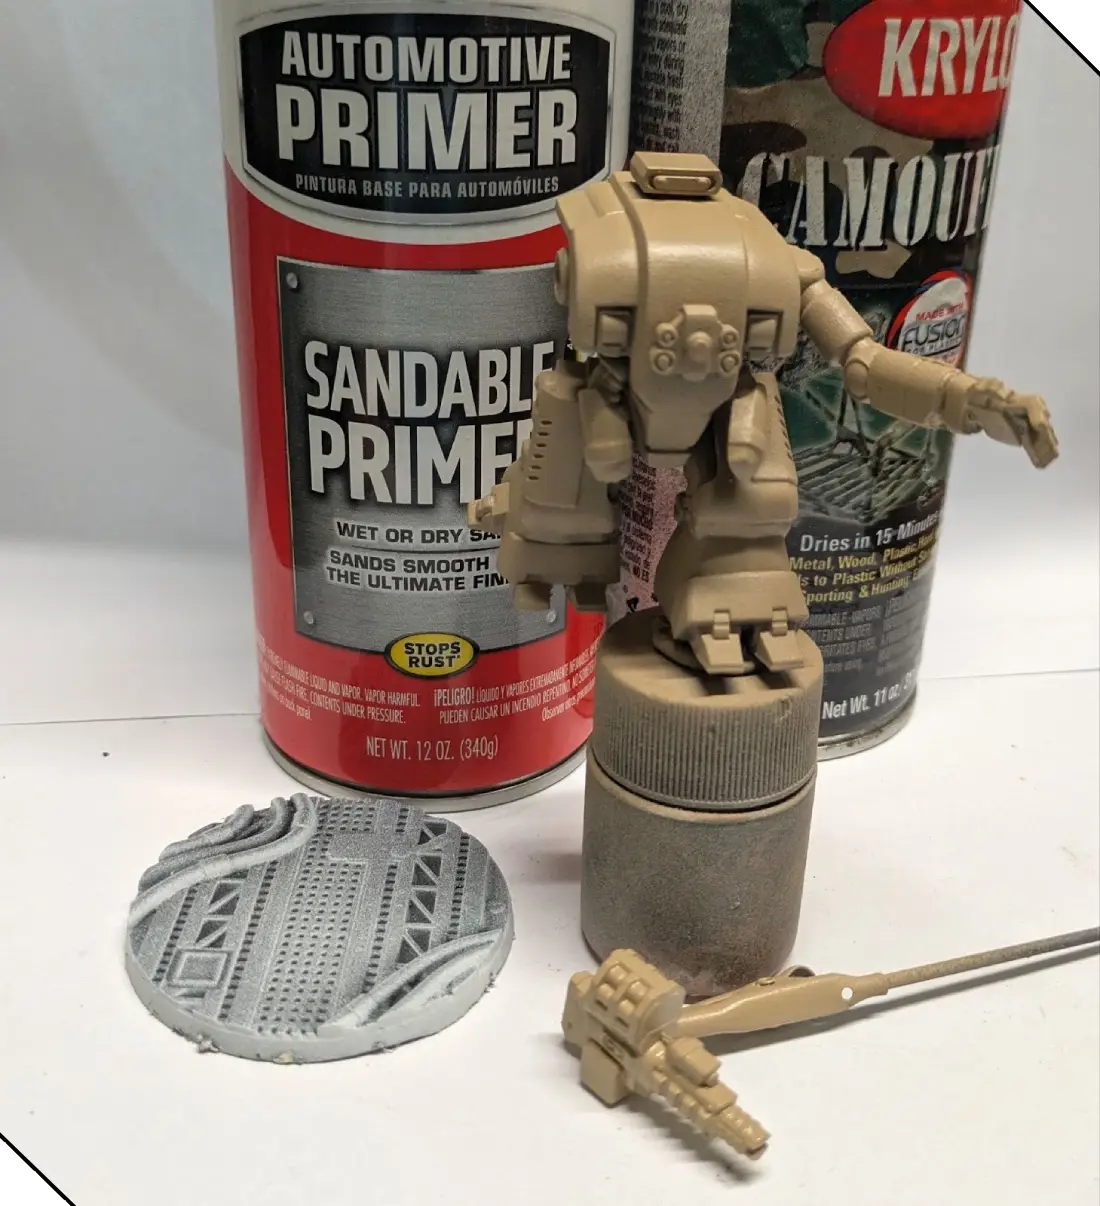
I followed up by spraying a white primer across the surface of the base by aiming across the edge of the base rather than from above, and used the Krylon camouflage tan enamel spray to base coat the Soldat.
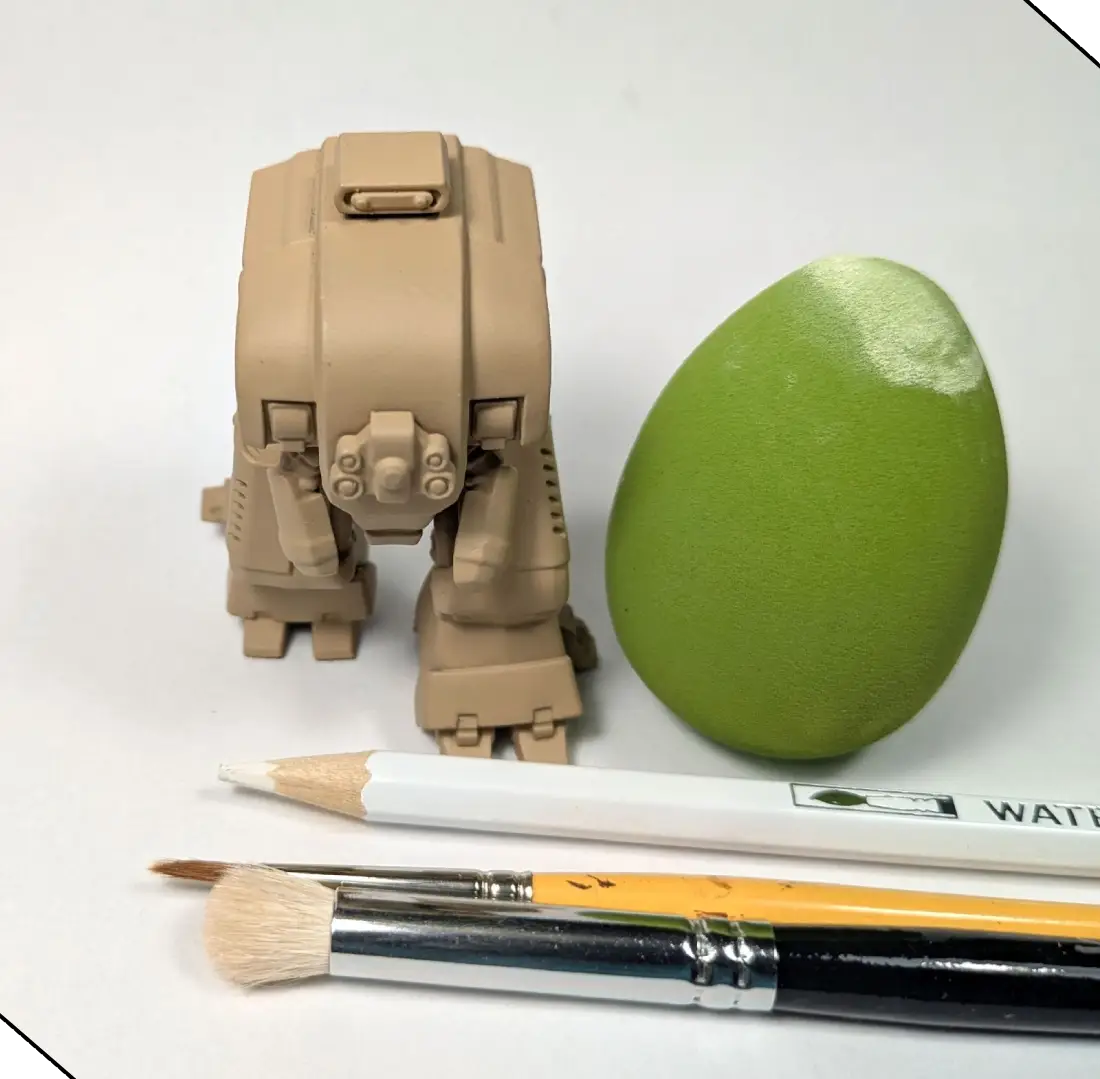
Once the basecoat had fully cured, I used drybrushing to pull out details and lay down soft edges and surface highlights, and then used the edge of a white watercolor pencil to quickly and easily add additional sharp edge highlighting. There are a LOT of ways to drybrush a model, so use whichever you’re most comfortable with, and if you don’t have any watercolor pencils, you can use the edge of your paintbrush to achieve the same result.

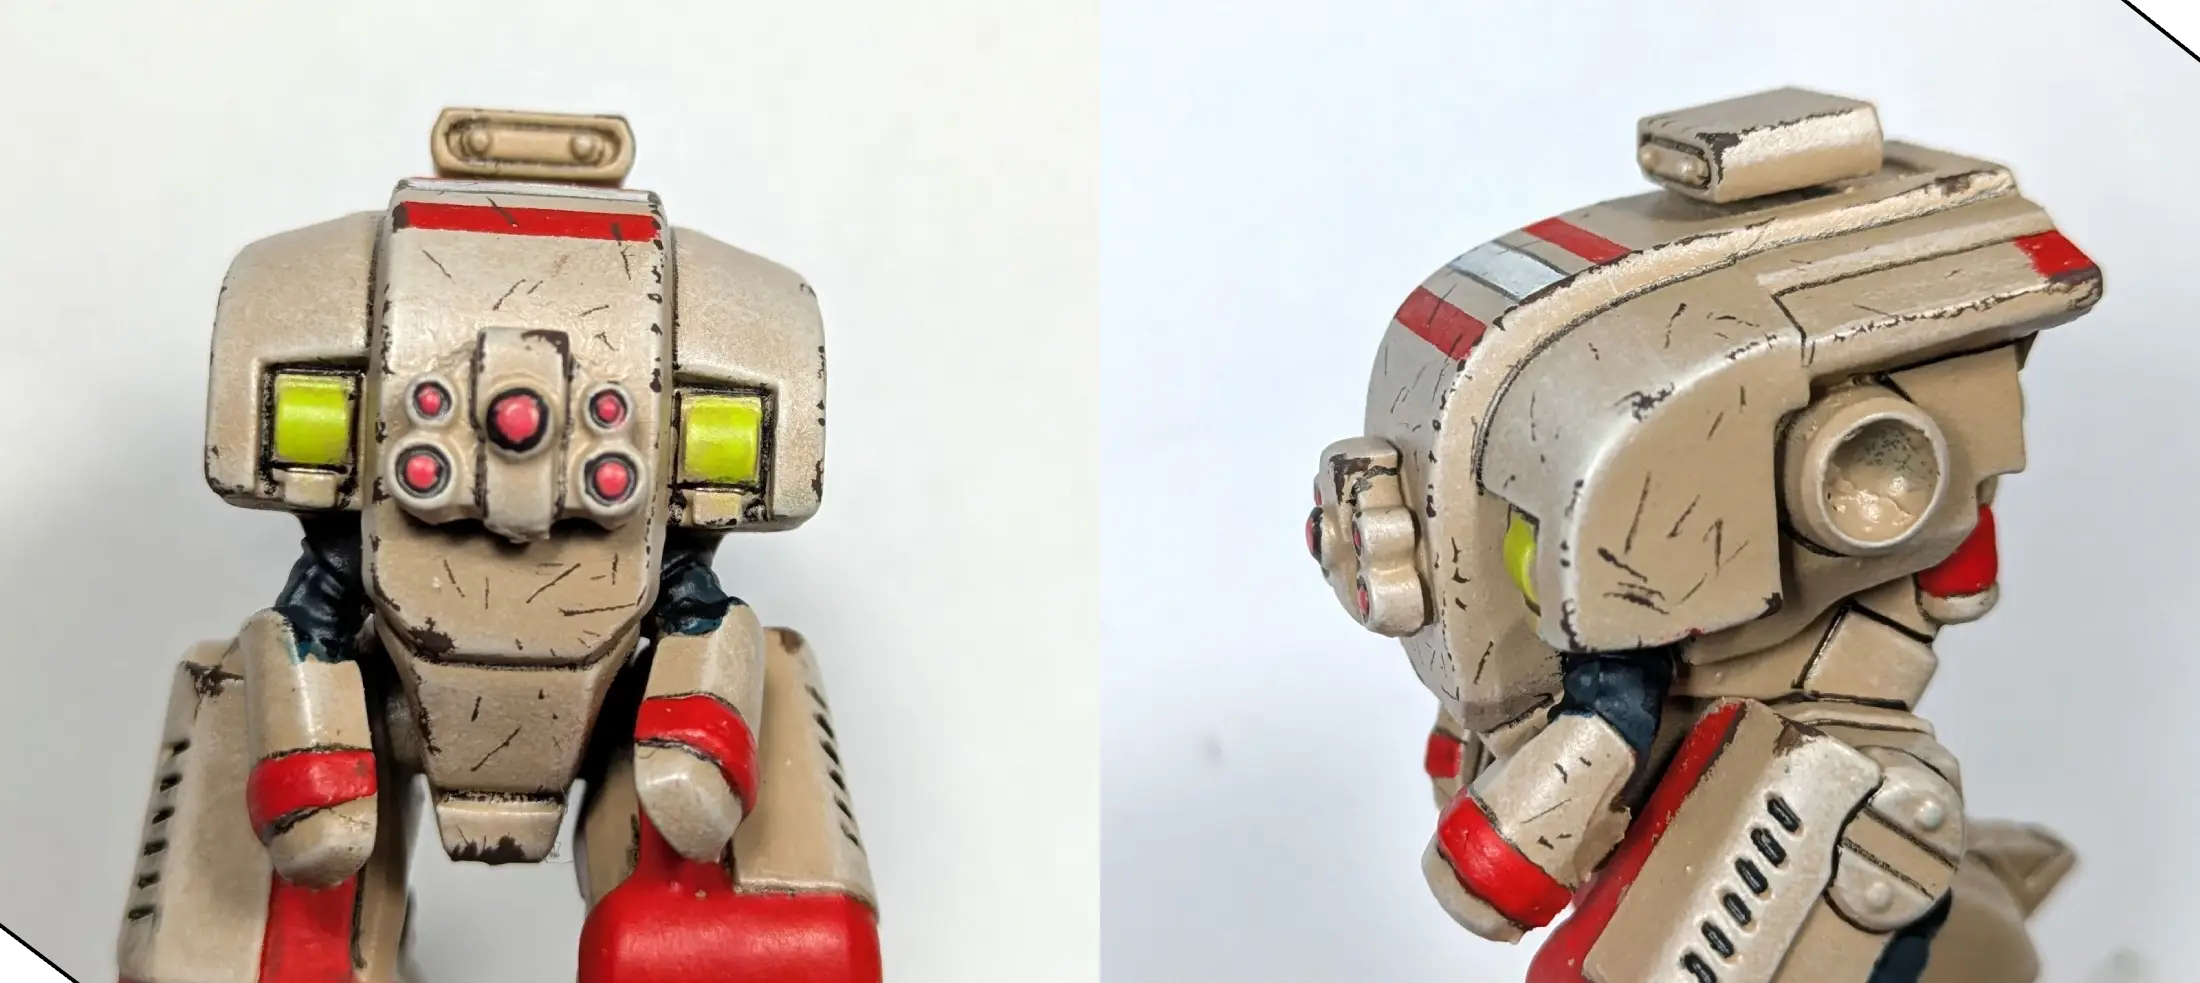
I really wanted to capture the feel of the incredible webcomic that Gav Thorpe and team are creating, and so I chose to add strong black outlines on each surface. I chose to use a 0.5mm pen—and made sure to use one with archival, acid-free ink—but you can achieve the same effect with a thin black wash applied to the recesses.
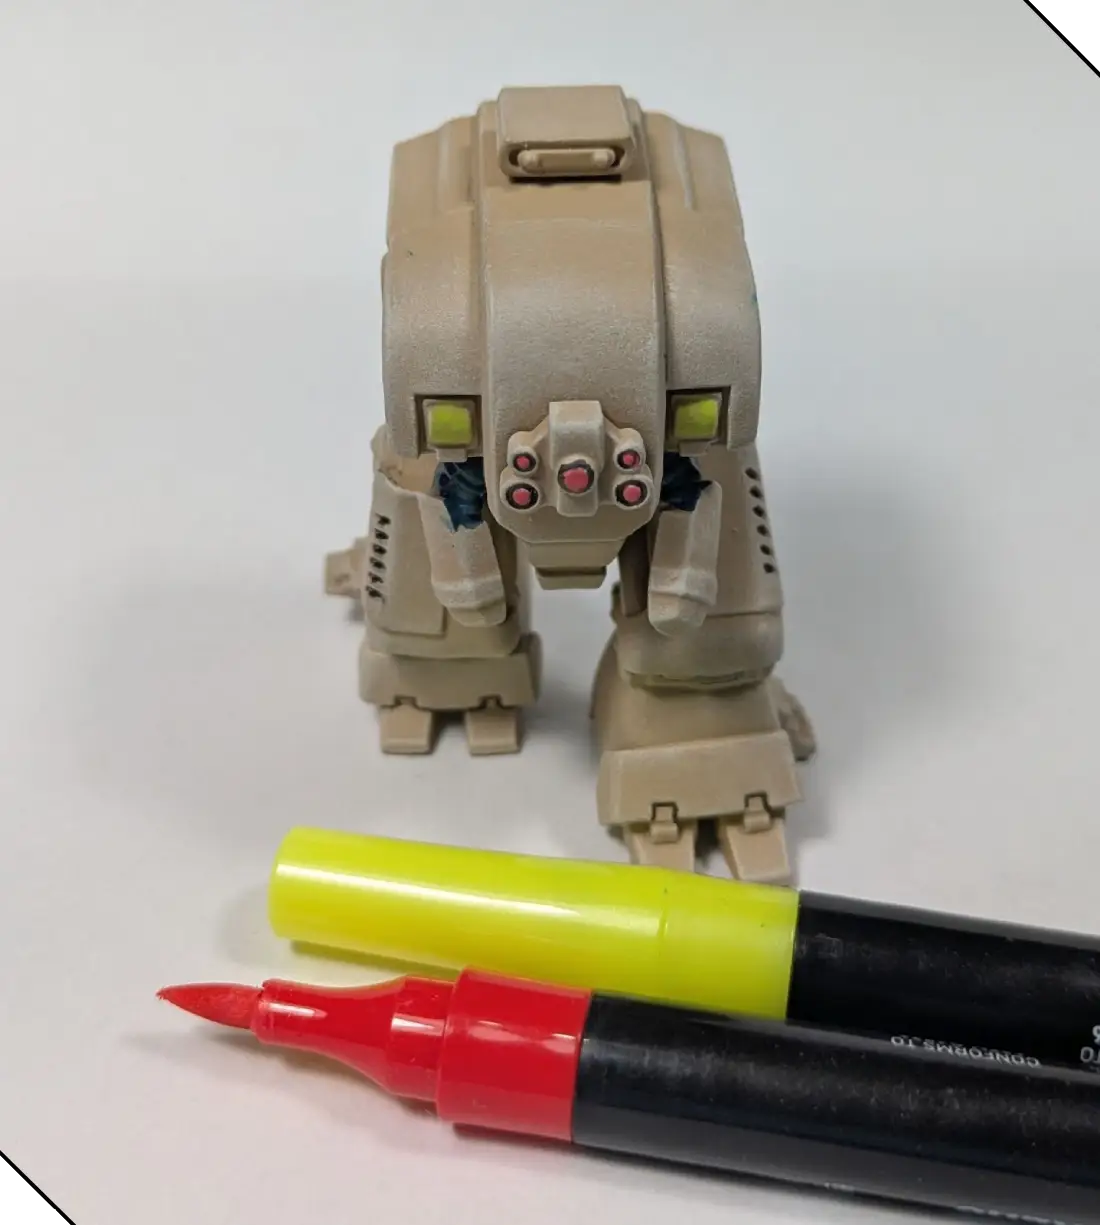
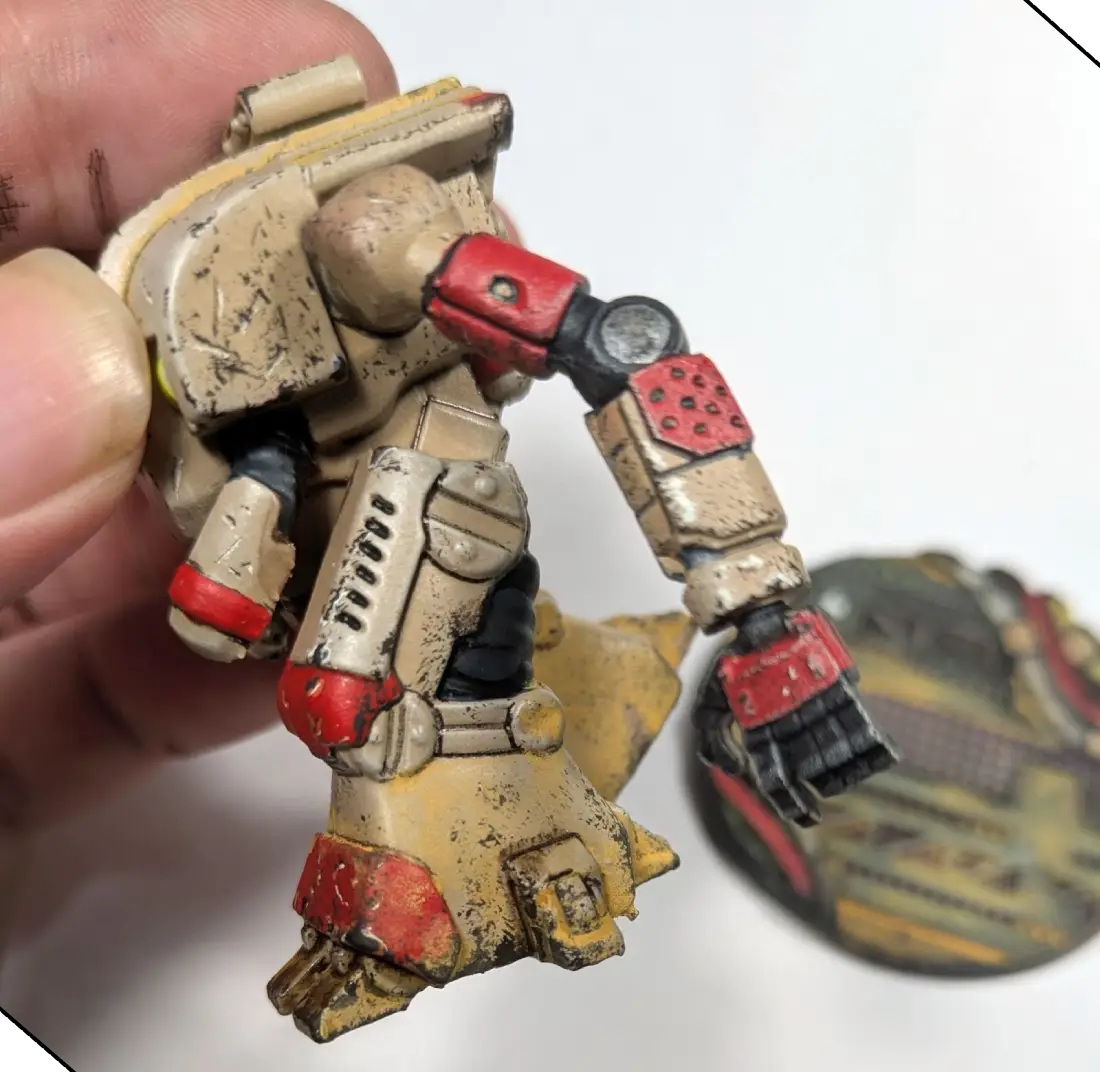
When it comes to painting my armies, I am perhaps the laziest miniature painter in the entire world. I blocked in the basic colors of the lenses, lights, and flexible sections using brush tip acrylic markers. When I’m just using a spot of color, I really enjoy the ease of acrylic markers, but you can create the same effect with a fine tip brush and the yellow, red, and blue/black of your choice.
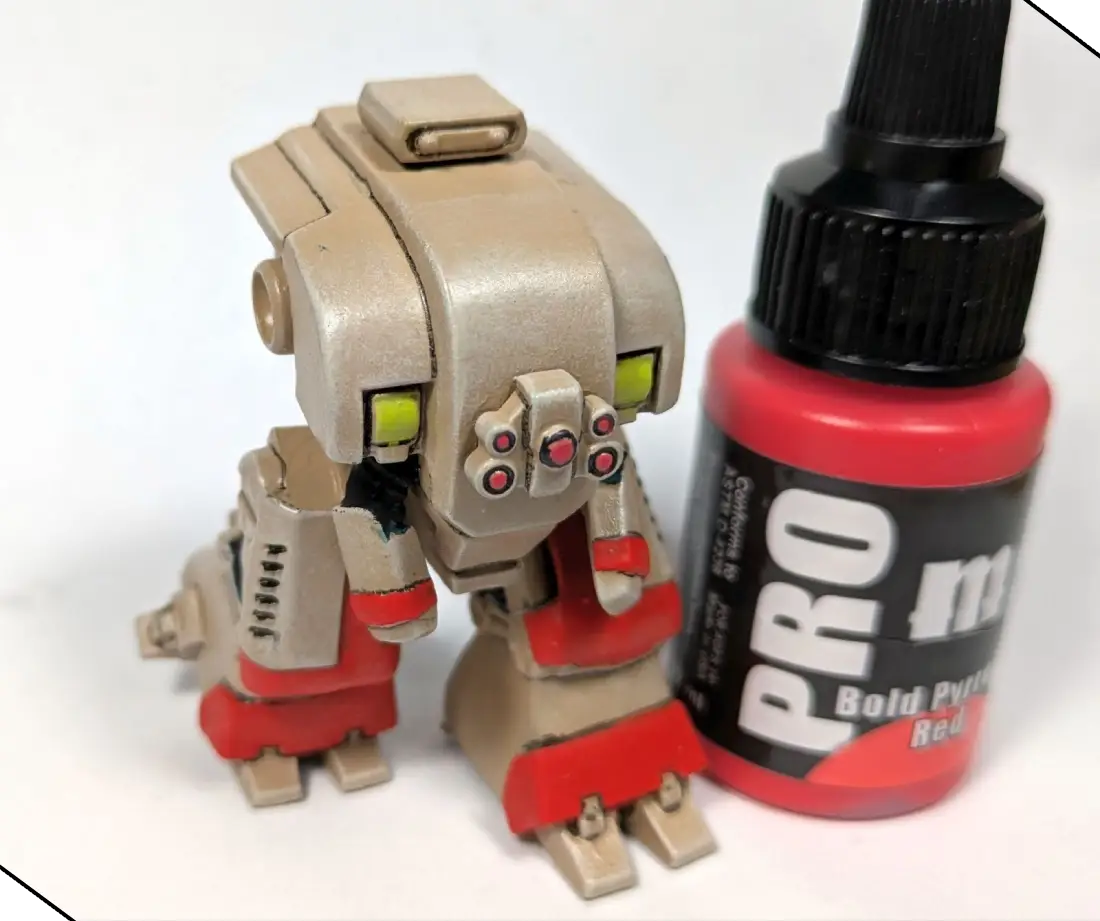
When I’m painting reds, I almost always choose my brightest highlight as the base coat so that I can focus on shading, and avoid risking an orange or pinkish highlight. I used Pro Acryl Bold Pyrrole Red, but any bright red will do. Using the brush pen on the lenses has also given me two distinct reds, and you can accomplish the same effect by using two different reds, or even using a bright orange for the lenses.
I used some putty for a quick dry fit test to see how all of the elements were coming together. There are a couple of messy spots, which I would normally clean up at this stage, but I’m going to add weathering in the next step, which will make some (or all) of the cleanup unnecessary.
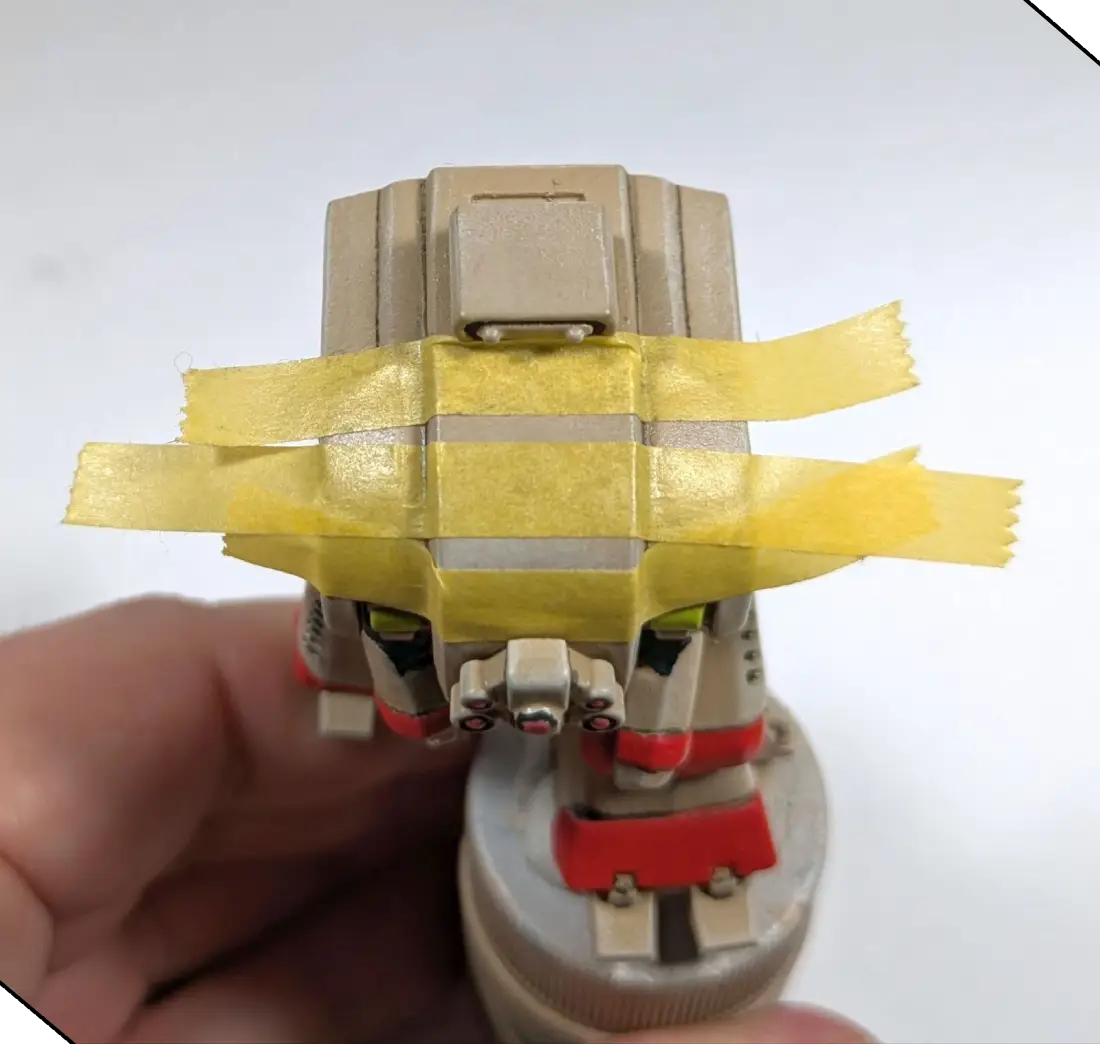
After seeing the model on the base, I decided that the big top panels needed a little bit more visual interest, and so I invented some quick unit markings and used tape to mask the surface before painting the Pro Acryl red that I used for the panels on the top of the upper plate.
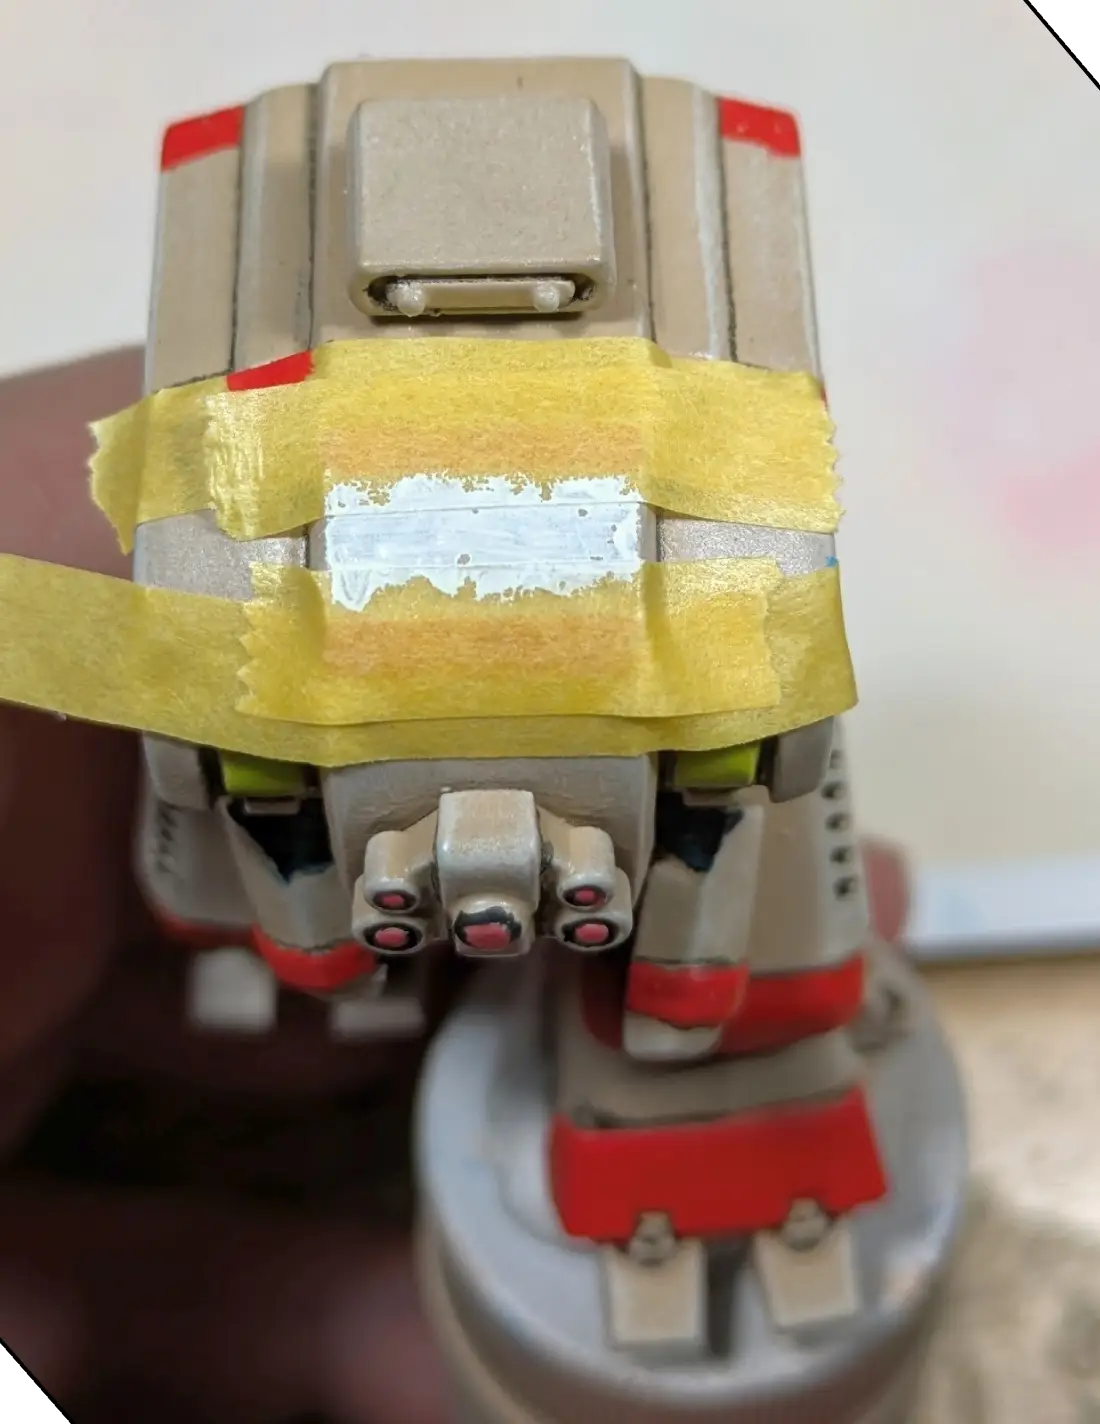
After the red stripes dried, I decided that the open space needed a white stripe.
At this point I wasn’t totally convinced, so let us know on social media what you think of the stripes.
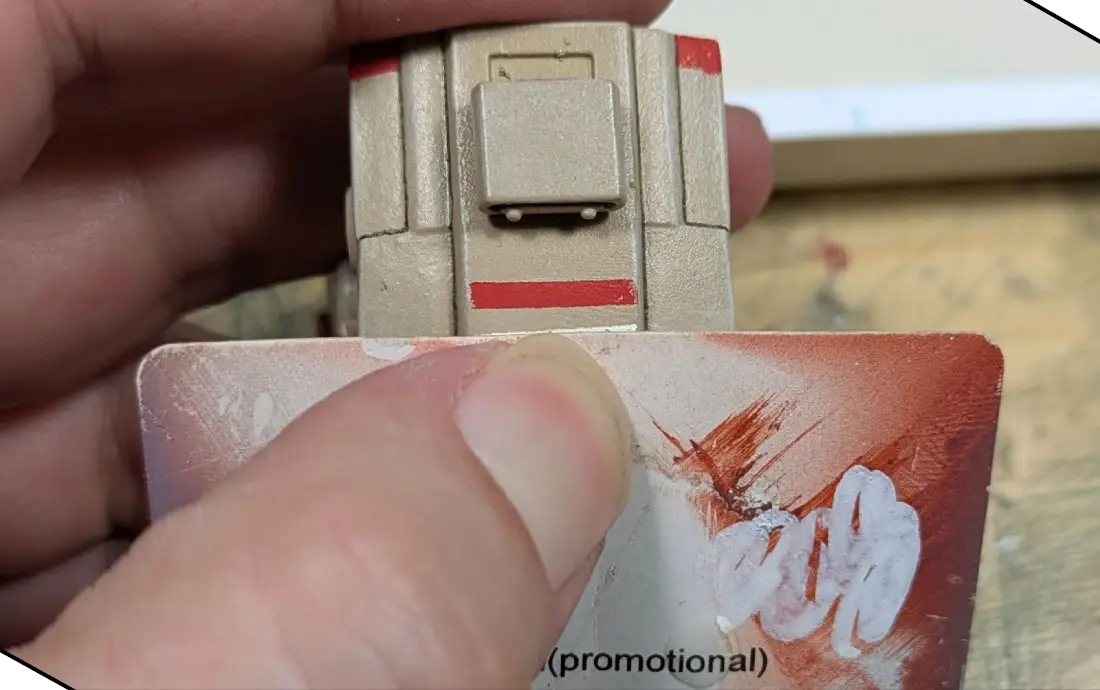
To apply the comic-book-style outline on the stripes, I used the edge of a playing card sample, but any business card, scrap of thin plasticard, or other flexible material with a straight edge makes it easy. You can also use tape, then use your brush or pen to follow the edge.
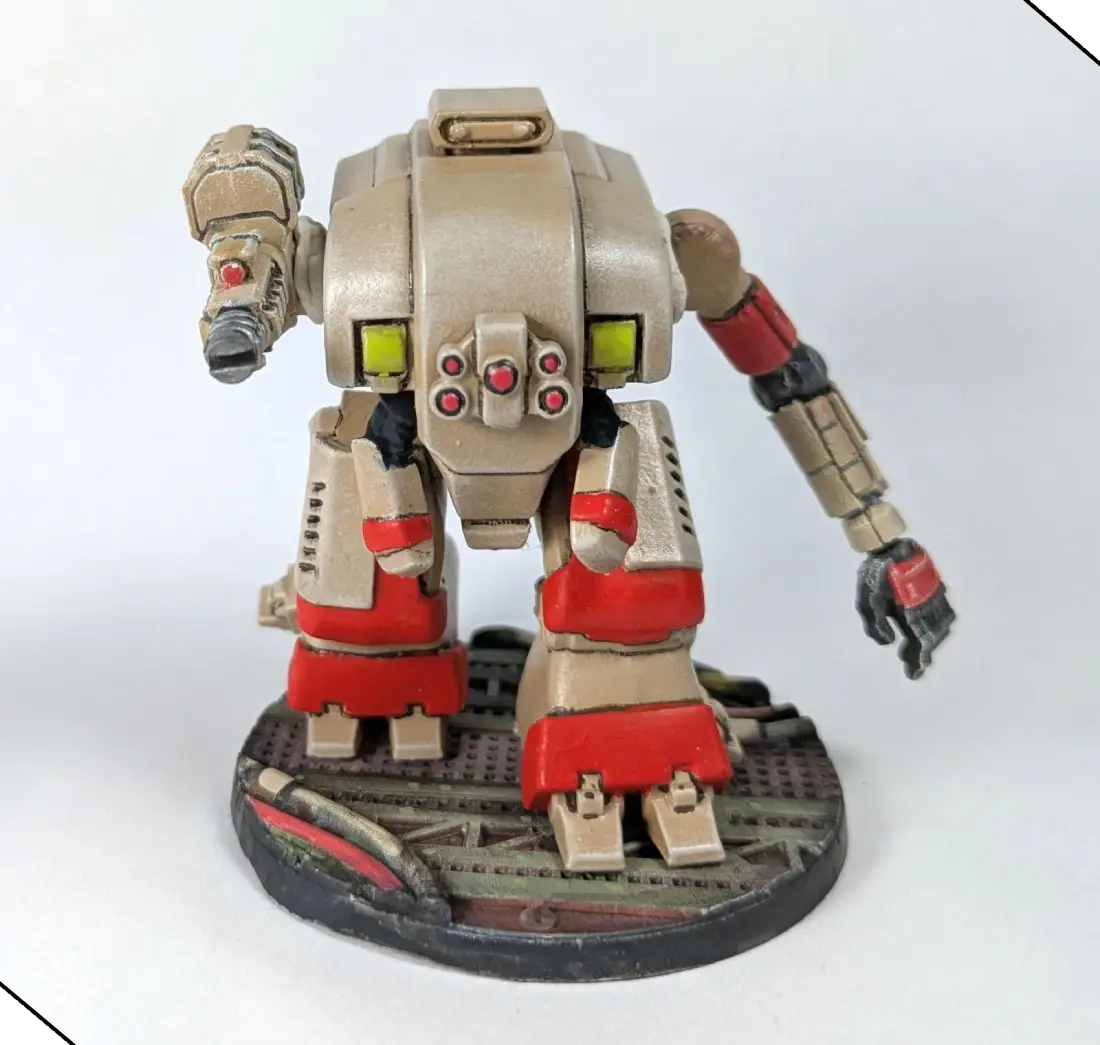
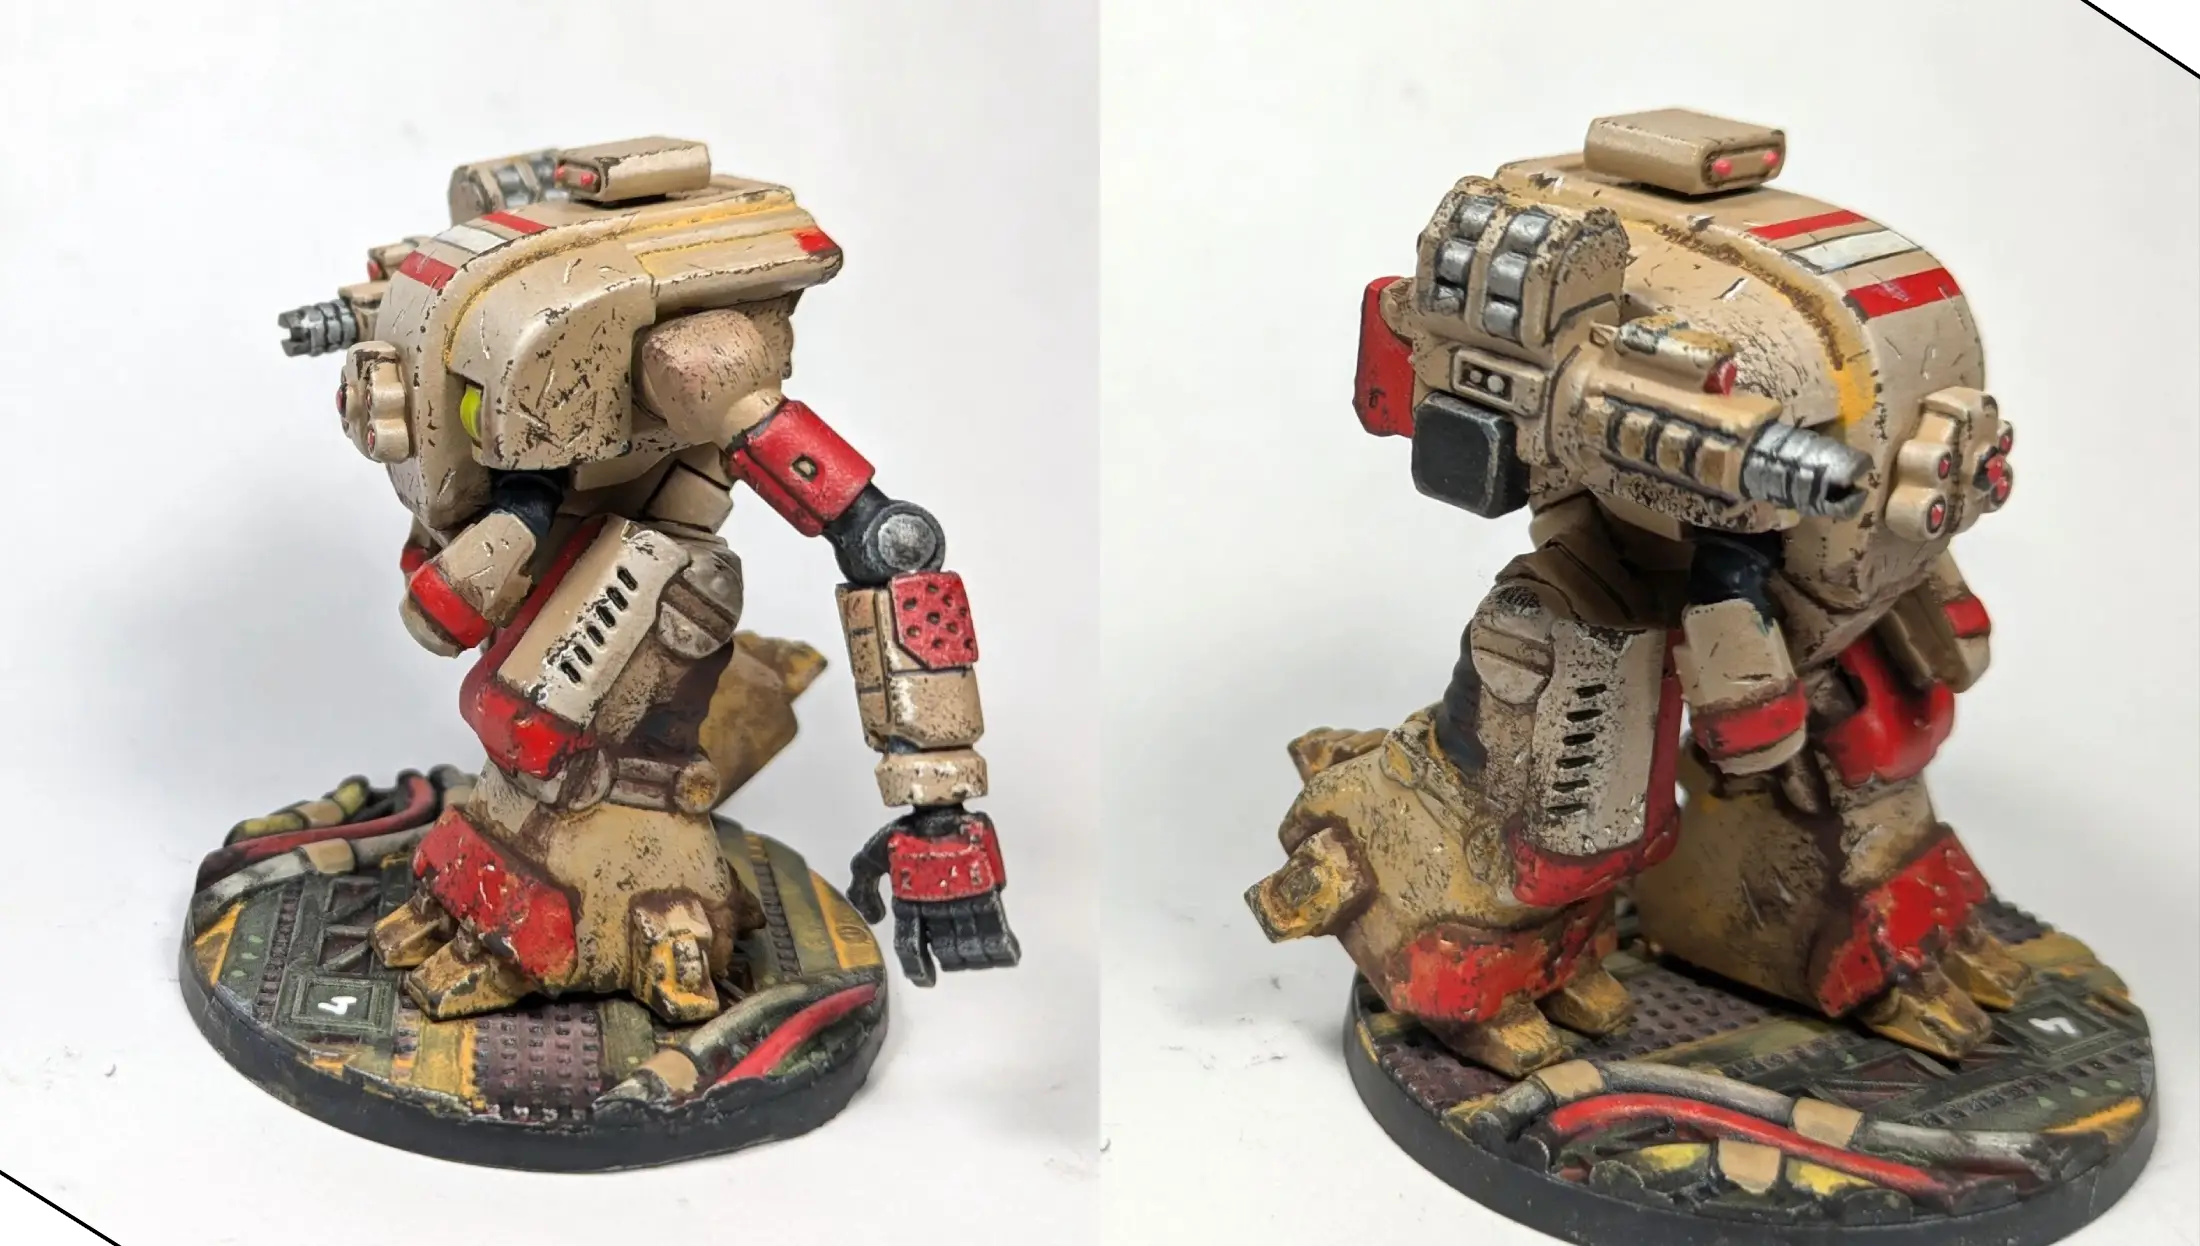
I don’t love the outline on the white stripe, and I’ll change that later, but at this point I have a tabletop-ready Soldat. If I were going to stop at this stage, I would do some cleanup on the blacklining, and add a bit of additional highlighting, but I’m going to add two different types of weathering instead. I cover the base at the end of the article, but you can stop here and be ready to play.

To add chipped paint, I’m going to use a combination of brushwork, a 0.5mm archival ink pen, and a bit of foam from one of my old army bags.
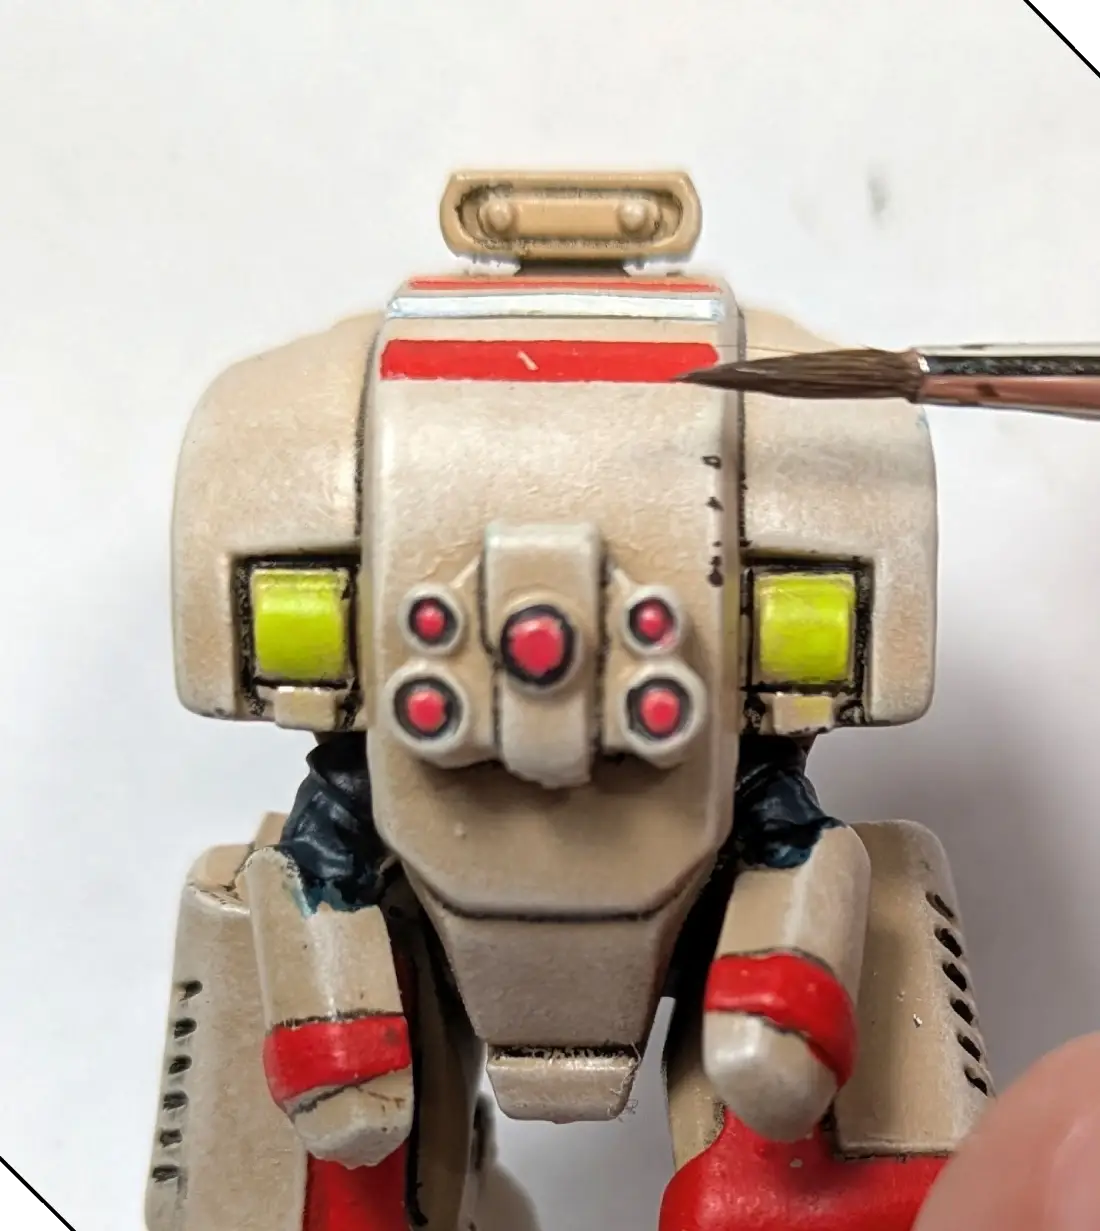
I start by using the side of my brush to create chips along the edges, with a black/brown mixed from Pro Acryl Coal Black and Dark Umber. Although I am starting with my dark color, it is often easier to start with your white highlight and then place your chips, but for this model I want fewer of the chips highlighted, and so I’m starting with my dark color.
With just a few strokes of my 0.5mm pen, and some edge strokes from my brush, I have created some simple weathering to help this old machine look like it has seen some action.
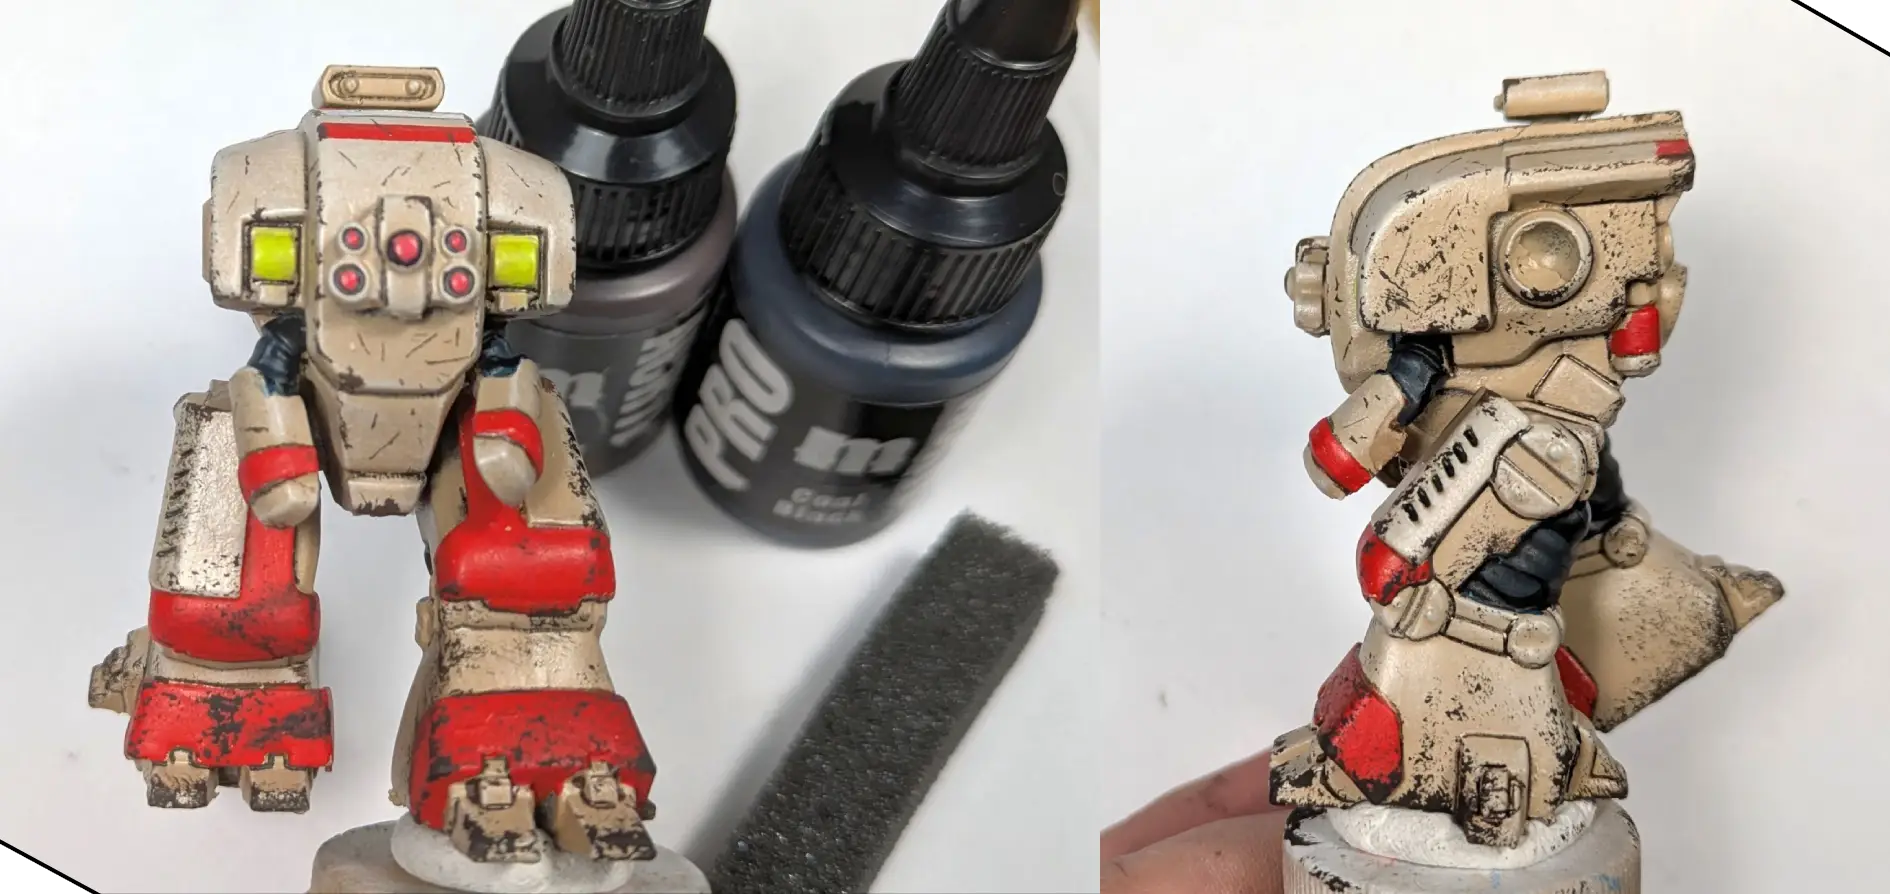
Once I have the smaller chips taken care of, I use my black/brown mix and some pluck foam to create areas of heavier chipping. You can also use the sharp edges on a piece of foam like this to easily create straight lines of tiny chips.
For the final step, I used the tip of my brush to carefully apply highlights—although you can also use white enamel or acrylic pens, or a white watercolor pencil for this step—and I used Bright White to highlight the chips on both the red and tan areas.
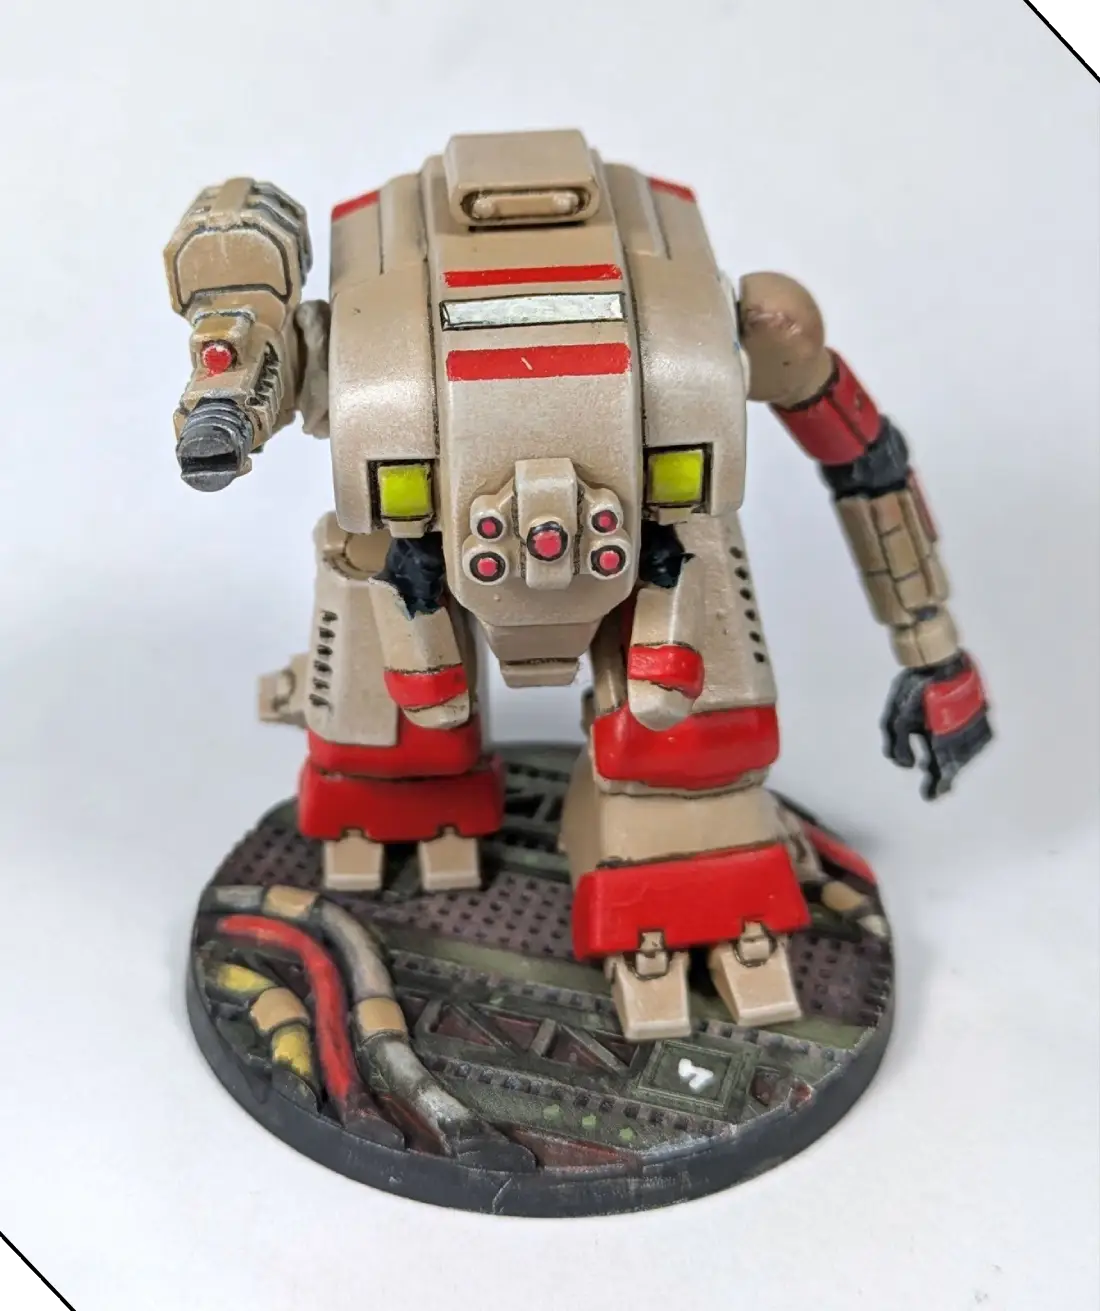
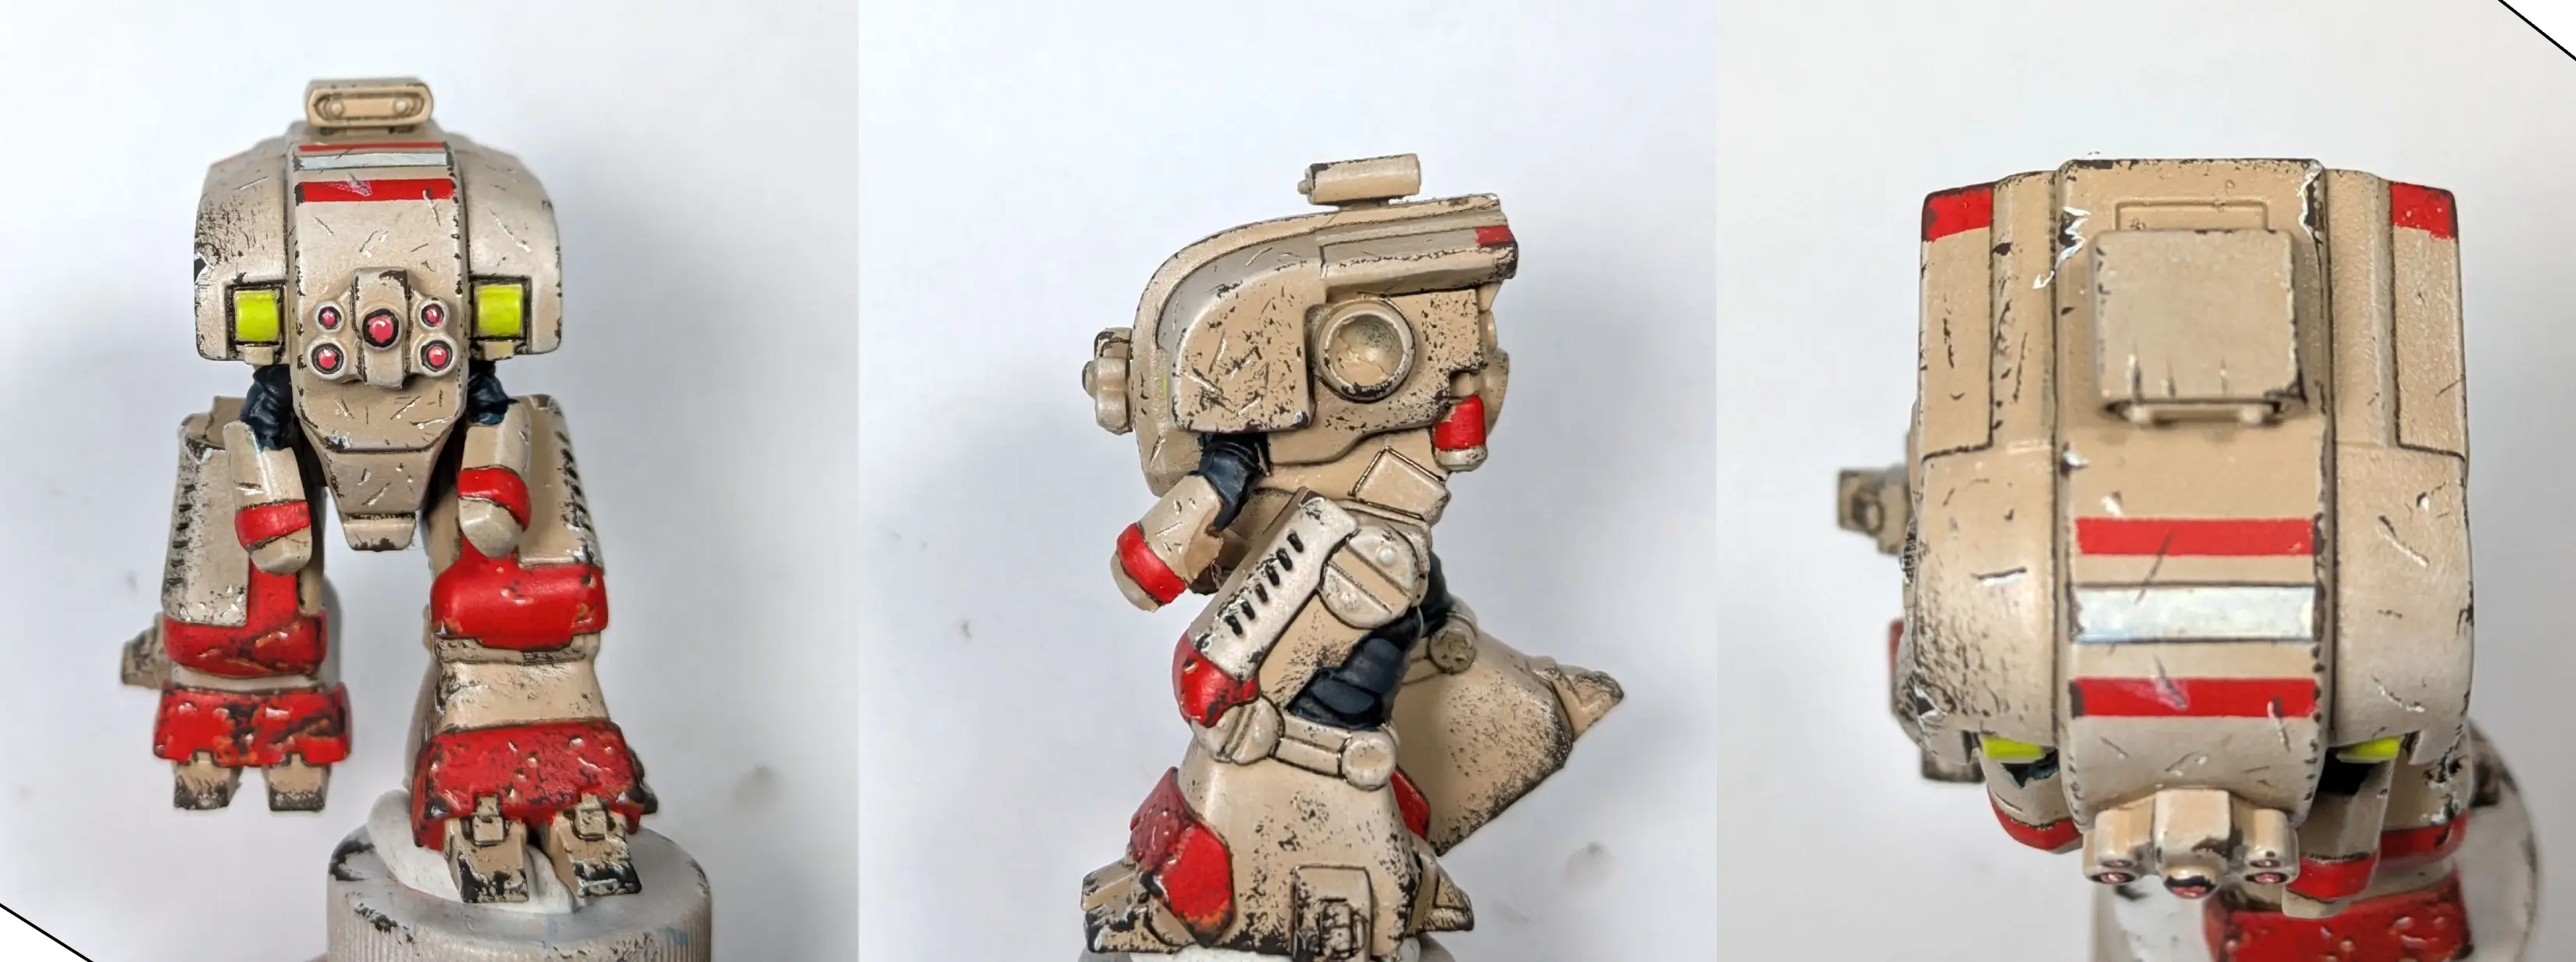
At this point I have a battleworn suit that is ready to take on any Pact threat, but we can dial it up another notch and bring the two pieces together with some dry pigments.
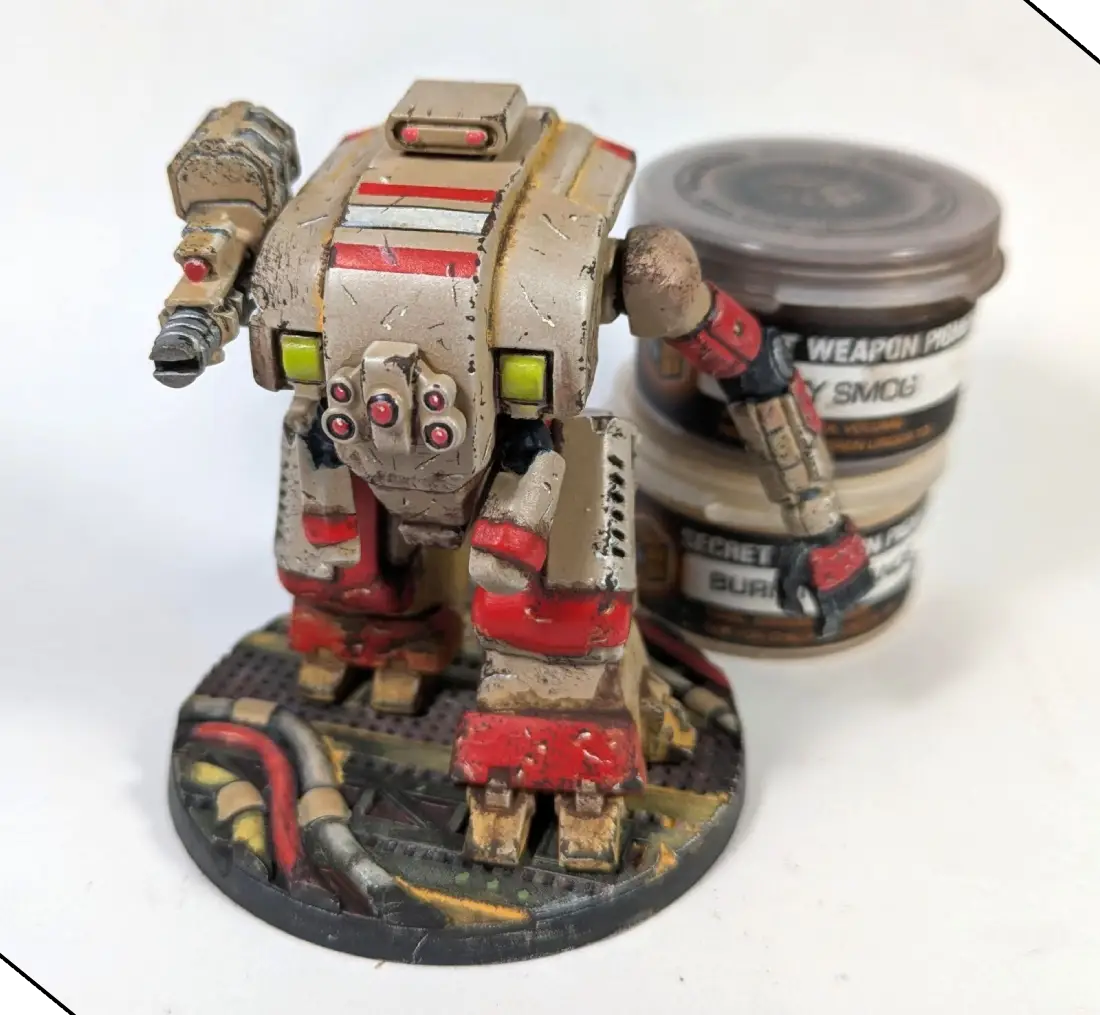
I used the Secret Weapon Burning Sands and Heavy Smog pigments, but any warm yellow and dark brown weathering pigments will work. I applied mine by making a wash with pigment and 99% isopropyl—but if you use alcohol, remember to gently dab the pigment onto the model, and allow it to flow into recesses, because if you brush it on, you run the risk of stripping your paint! You can use water, but it tends to pool—otherwise, follow the instructions of the pigment fixative available from the same brand as your pigments for best results.
PRO TIP: A few minutes in 99% isopropyl is the most effective way to strip acrylic paint—and most hobby enamels—from your model.
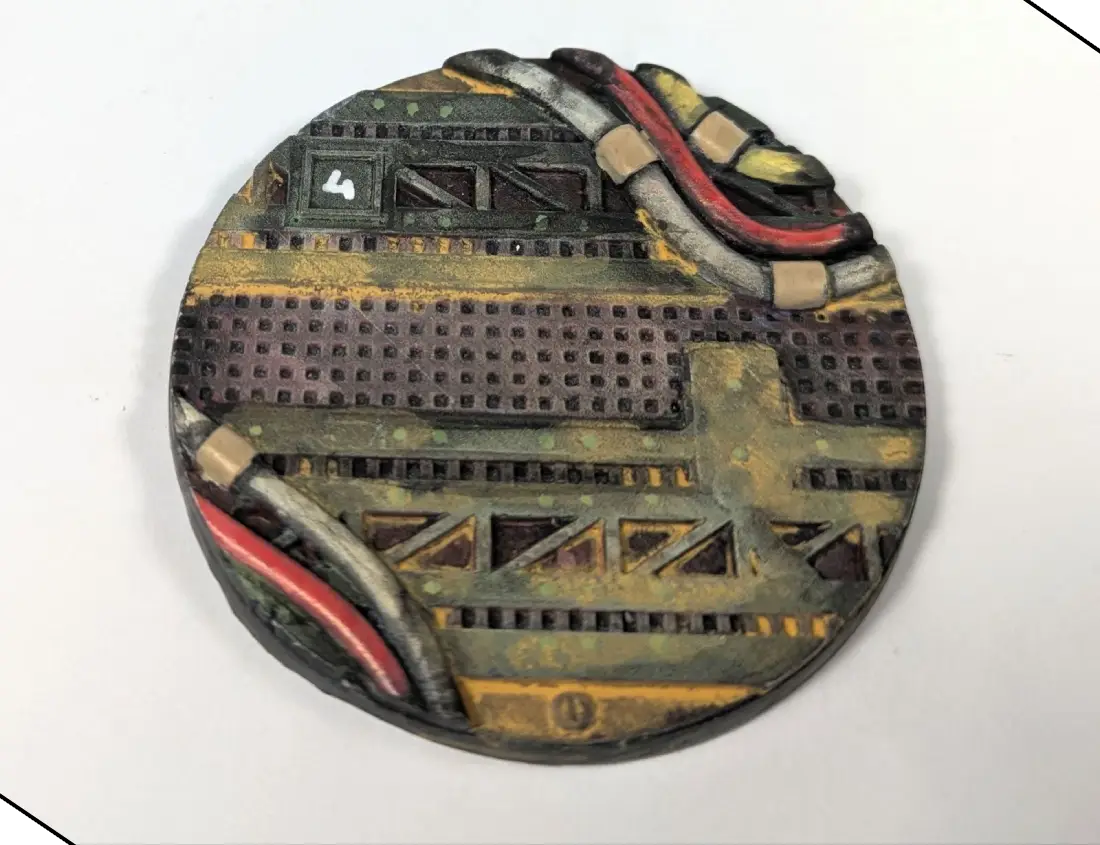
I applied a heavy wash of the Burning Sands pigment to the lower legs, the base, and the inside edges of the top panel, to provide color harmony with the yellow, and to unify the setting so that the model and base look like they belong together.
For the second pigment wash, I used the Heavy Smog along the recesses of the lower legs, and in random spots along the main body, to provide additional shadow and grime. I’m happy with how they came together, but I’m already thinking about what I’ll do differently for the next one.
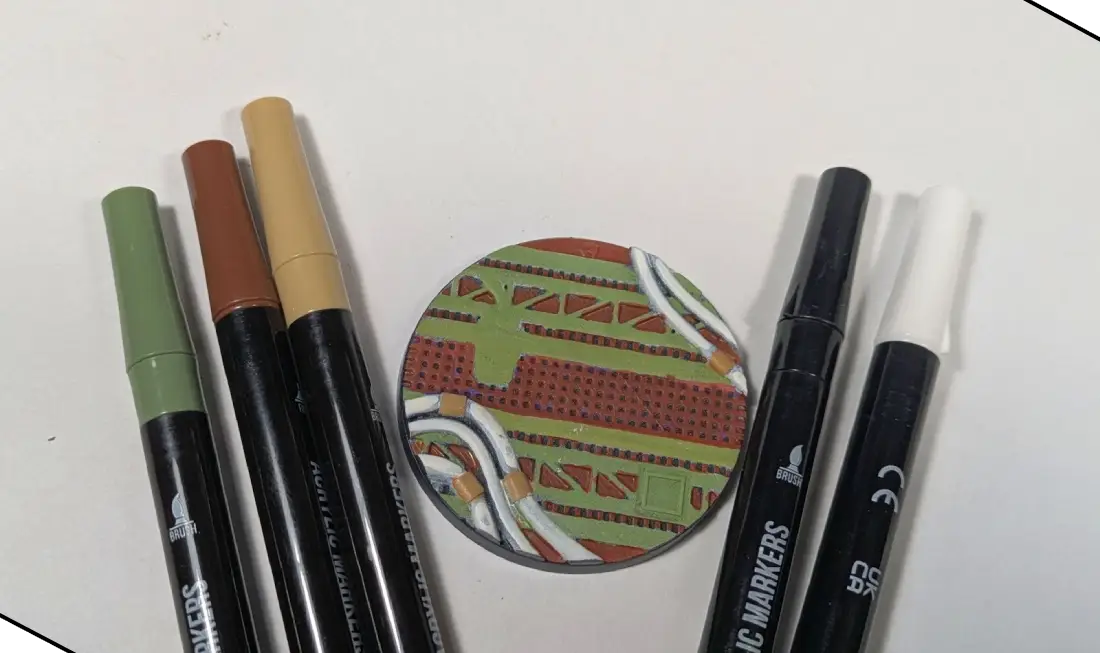
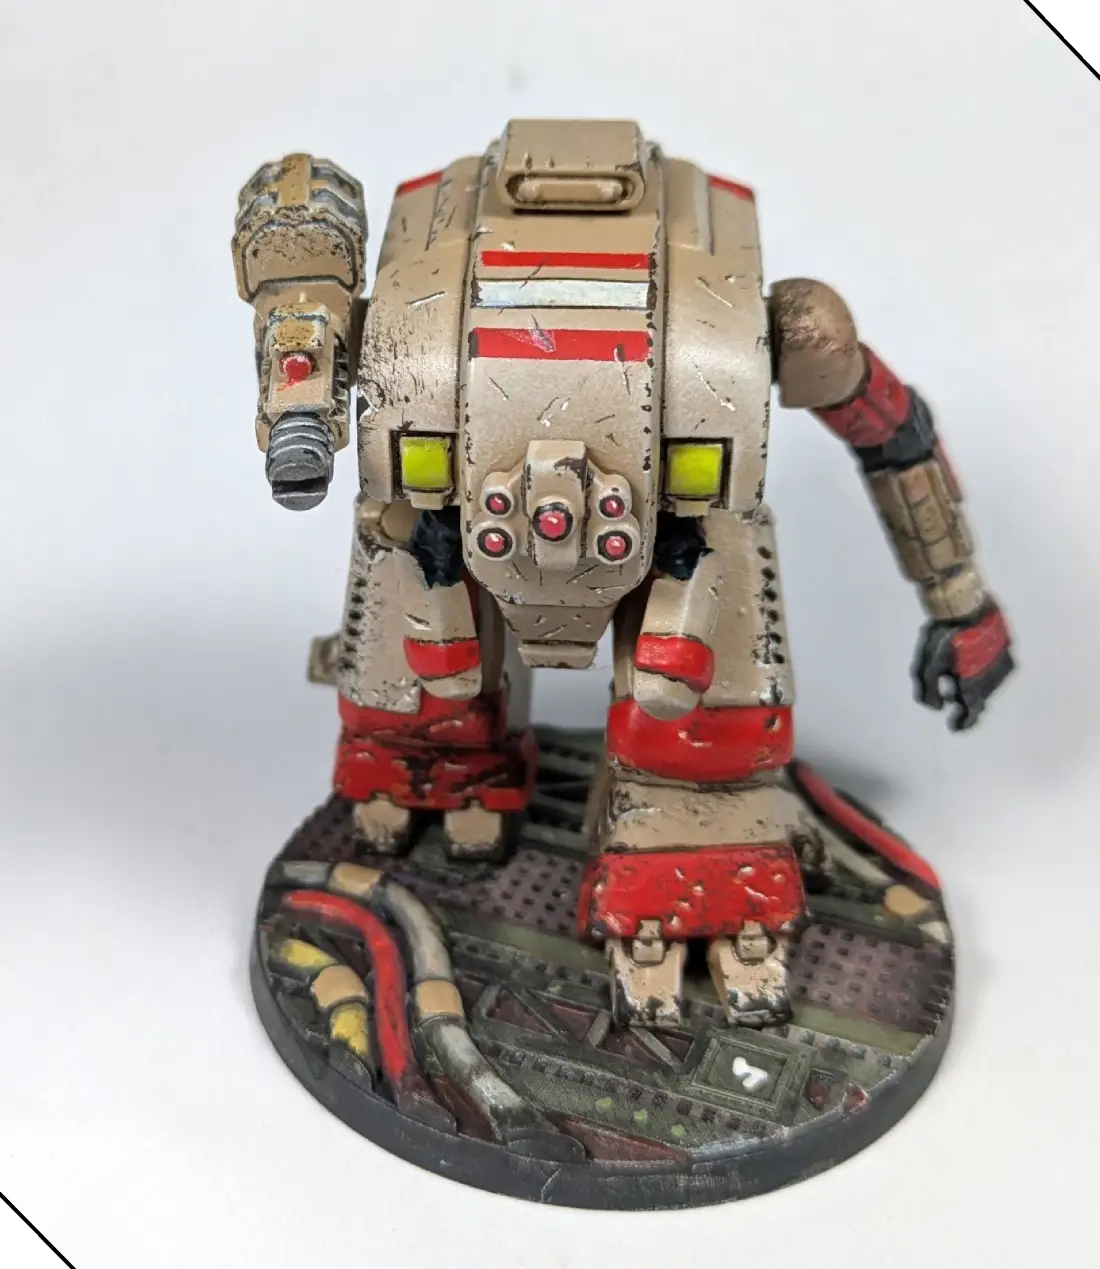
For the base I started with olive, brown, tan, black, and white acrylic brush pens—but any similar colors will work for brush painting. It’s a bit messy, but I’ll make that work for us as I go.
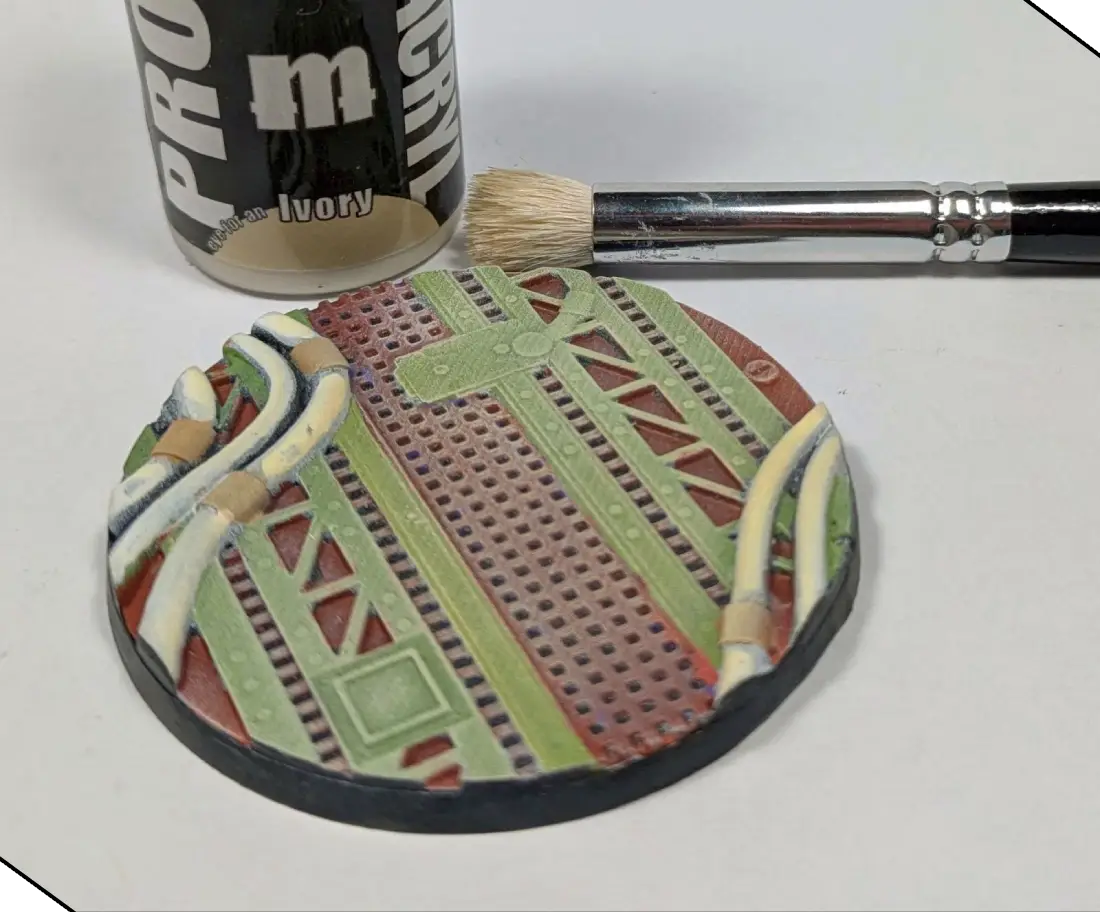
I gave the base a light drybrush with Pro Acryl Ivory.
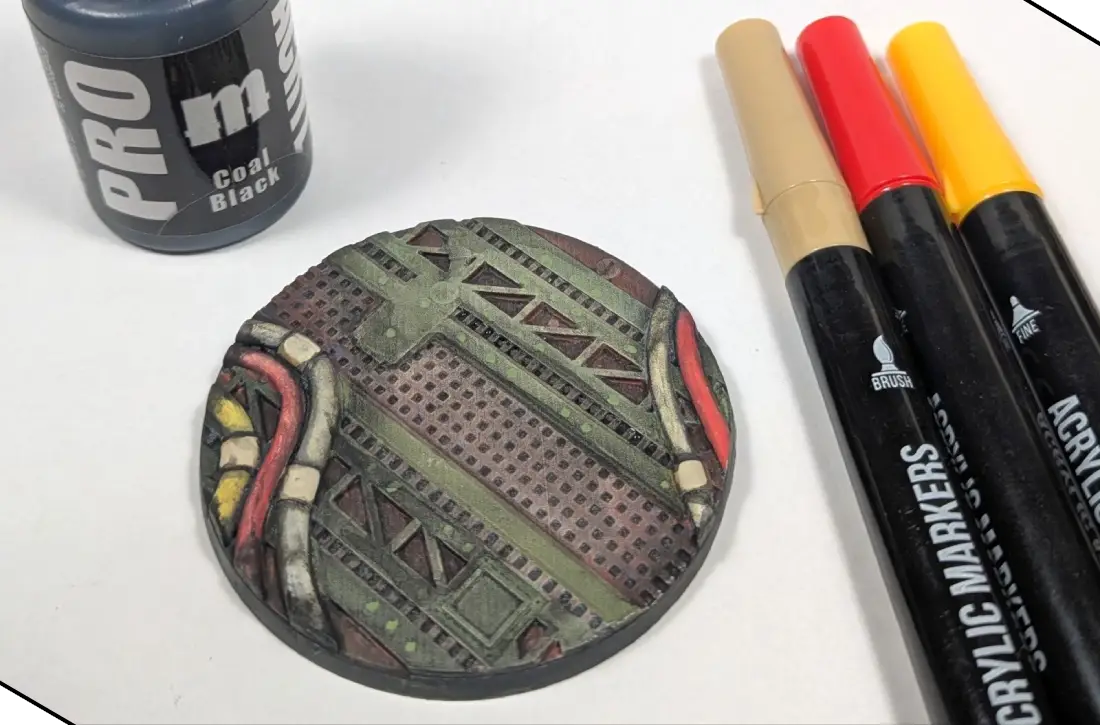
I used red and yellow acrylic brush pens to pick out some of the tubing, and used the tan for the couplings to provide additional color harmony with the model. After that, I applied several layers of Pro Acryl Coal Black wash to the model to create shading and grime.
For the last step, I used a heavy wash of the Burning Sands pigment to highlight the edges and help unify the base with the model.
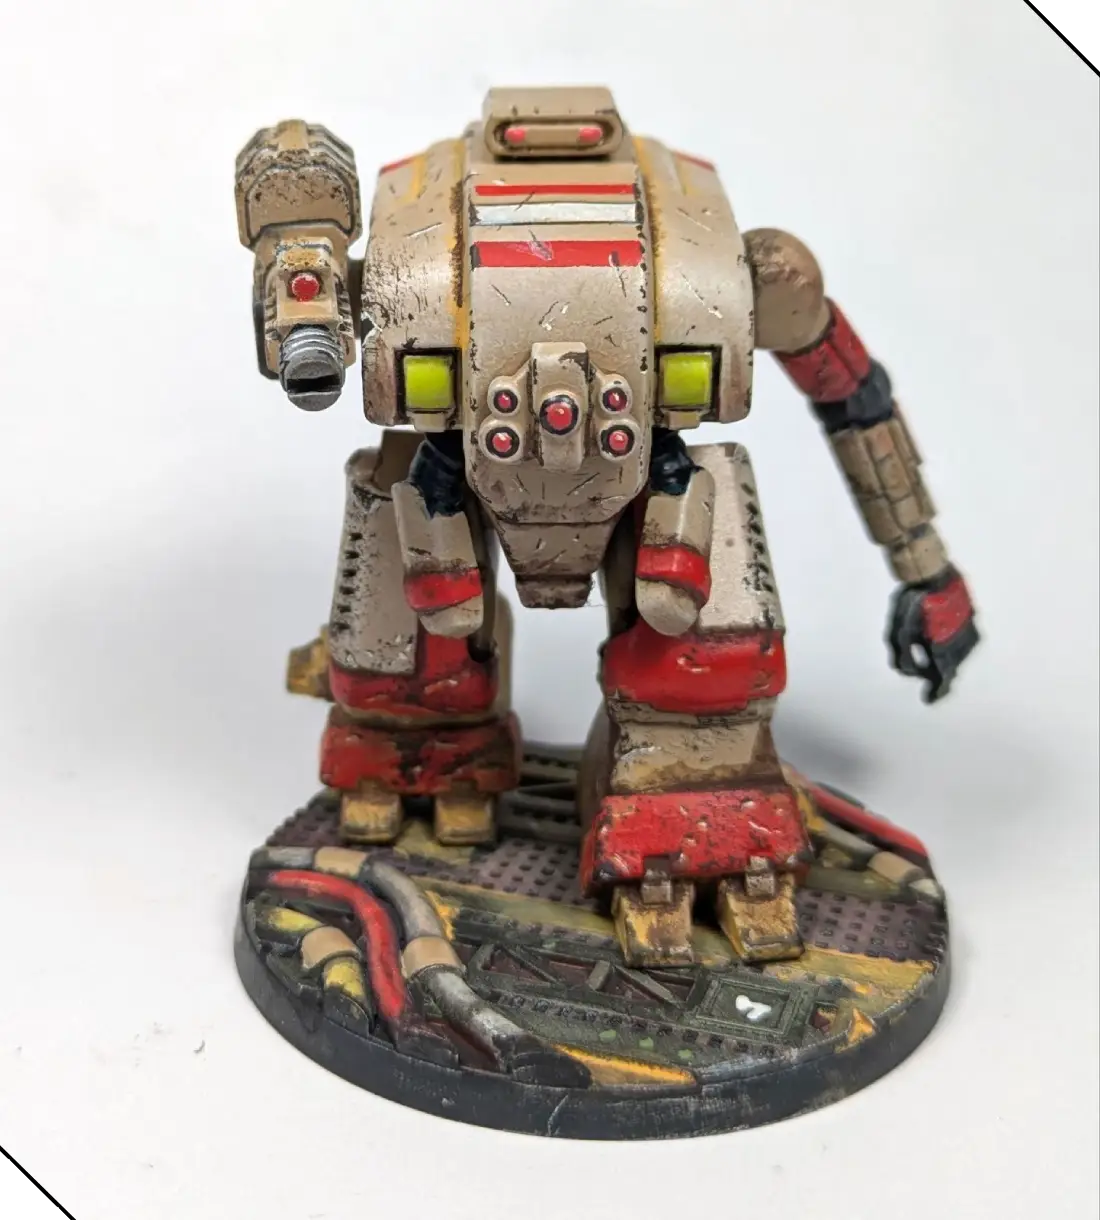
This Soldat looks like it saw hard use as a cargo hauler before being pressed into service, and thanks to the webcomic I already know exactly how I want to paint my next one.


.webp)
.webp)


.webp)


