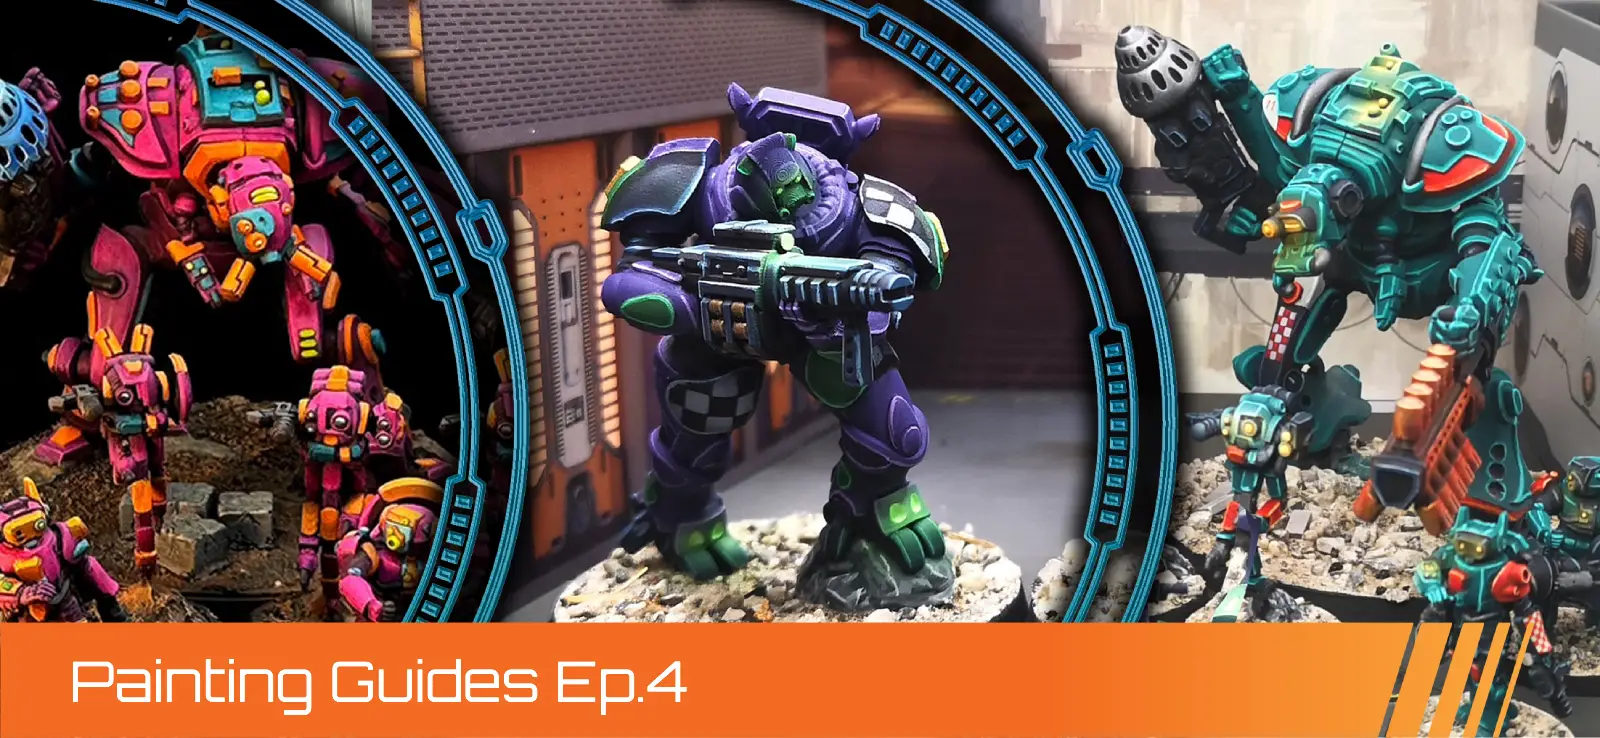
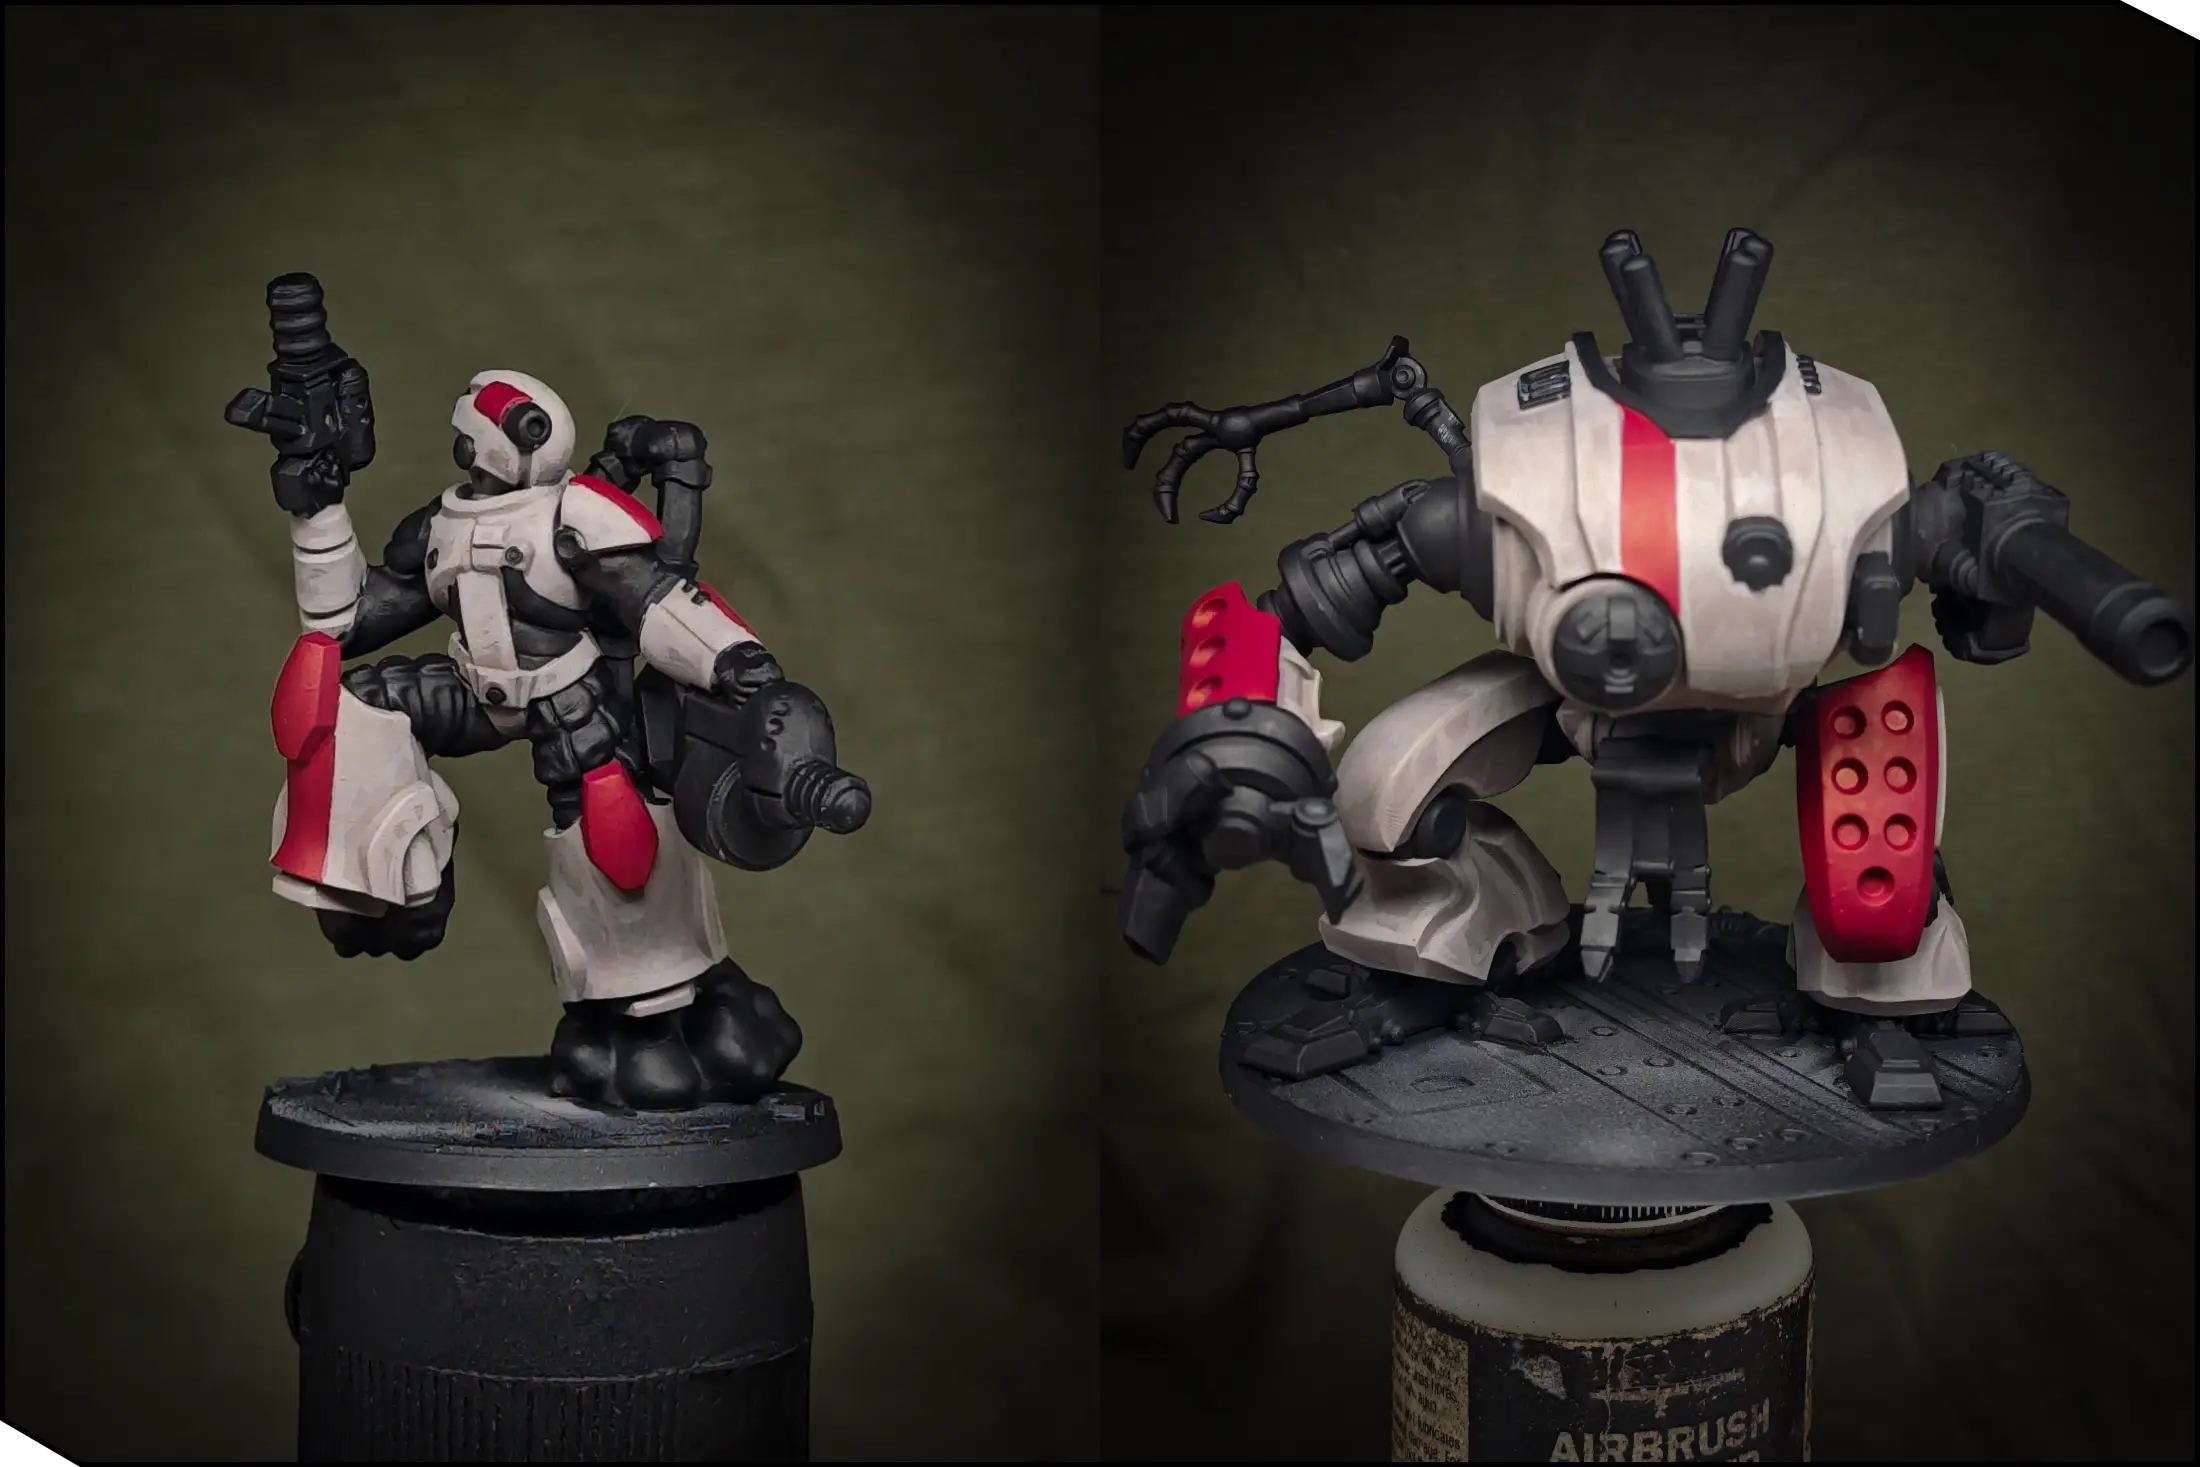
Pact Direct Action Cell - Battle-Tested Color Scheme
By Stan “The Exalted Wargamer” Trenin
Hello, everyone! I'm Stan, and in this tutorial I'm going to show you how I painted miniatures from the Pact Direct Action Cell.
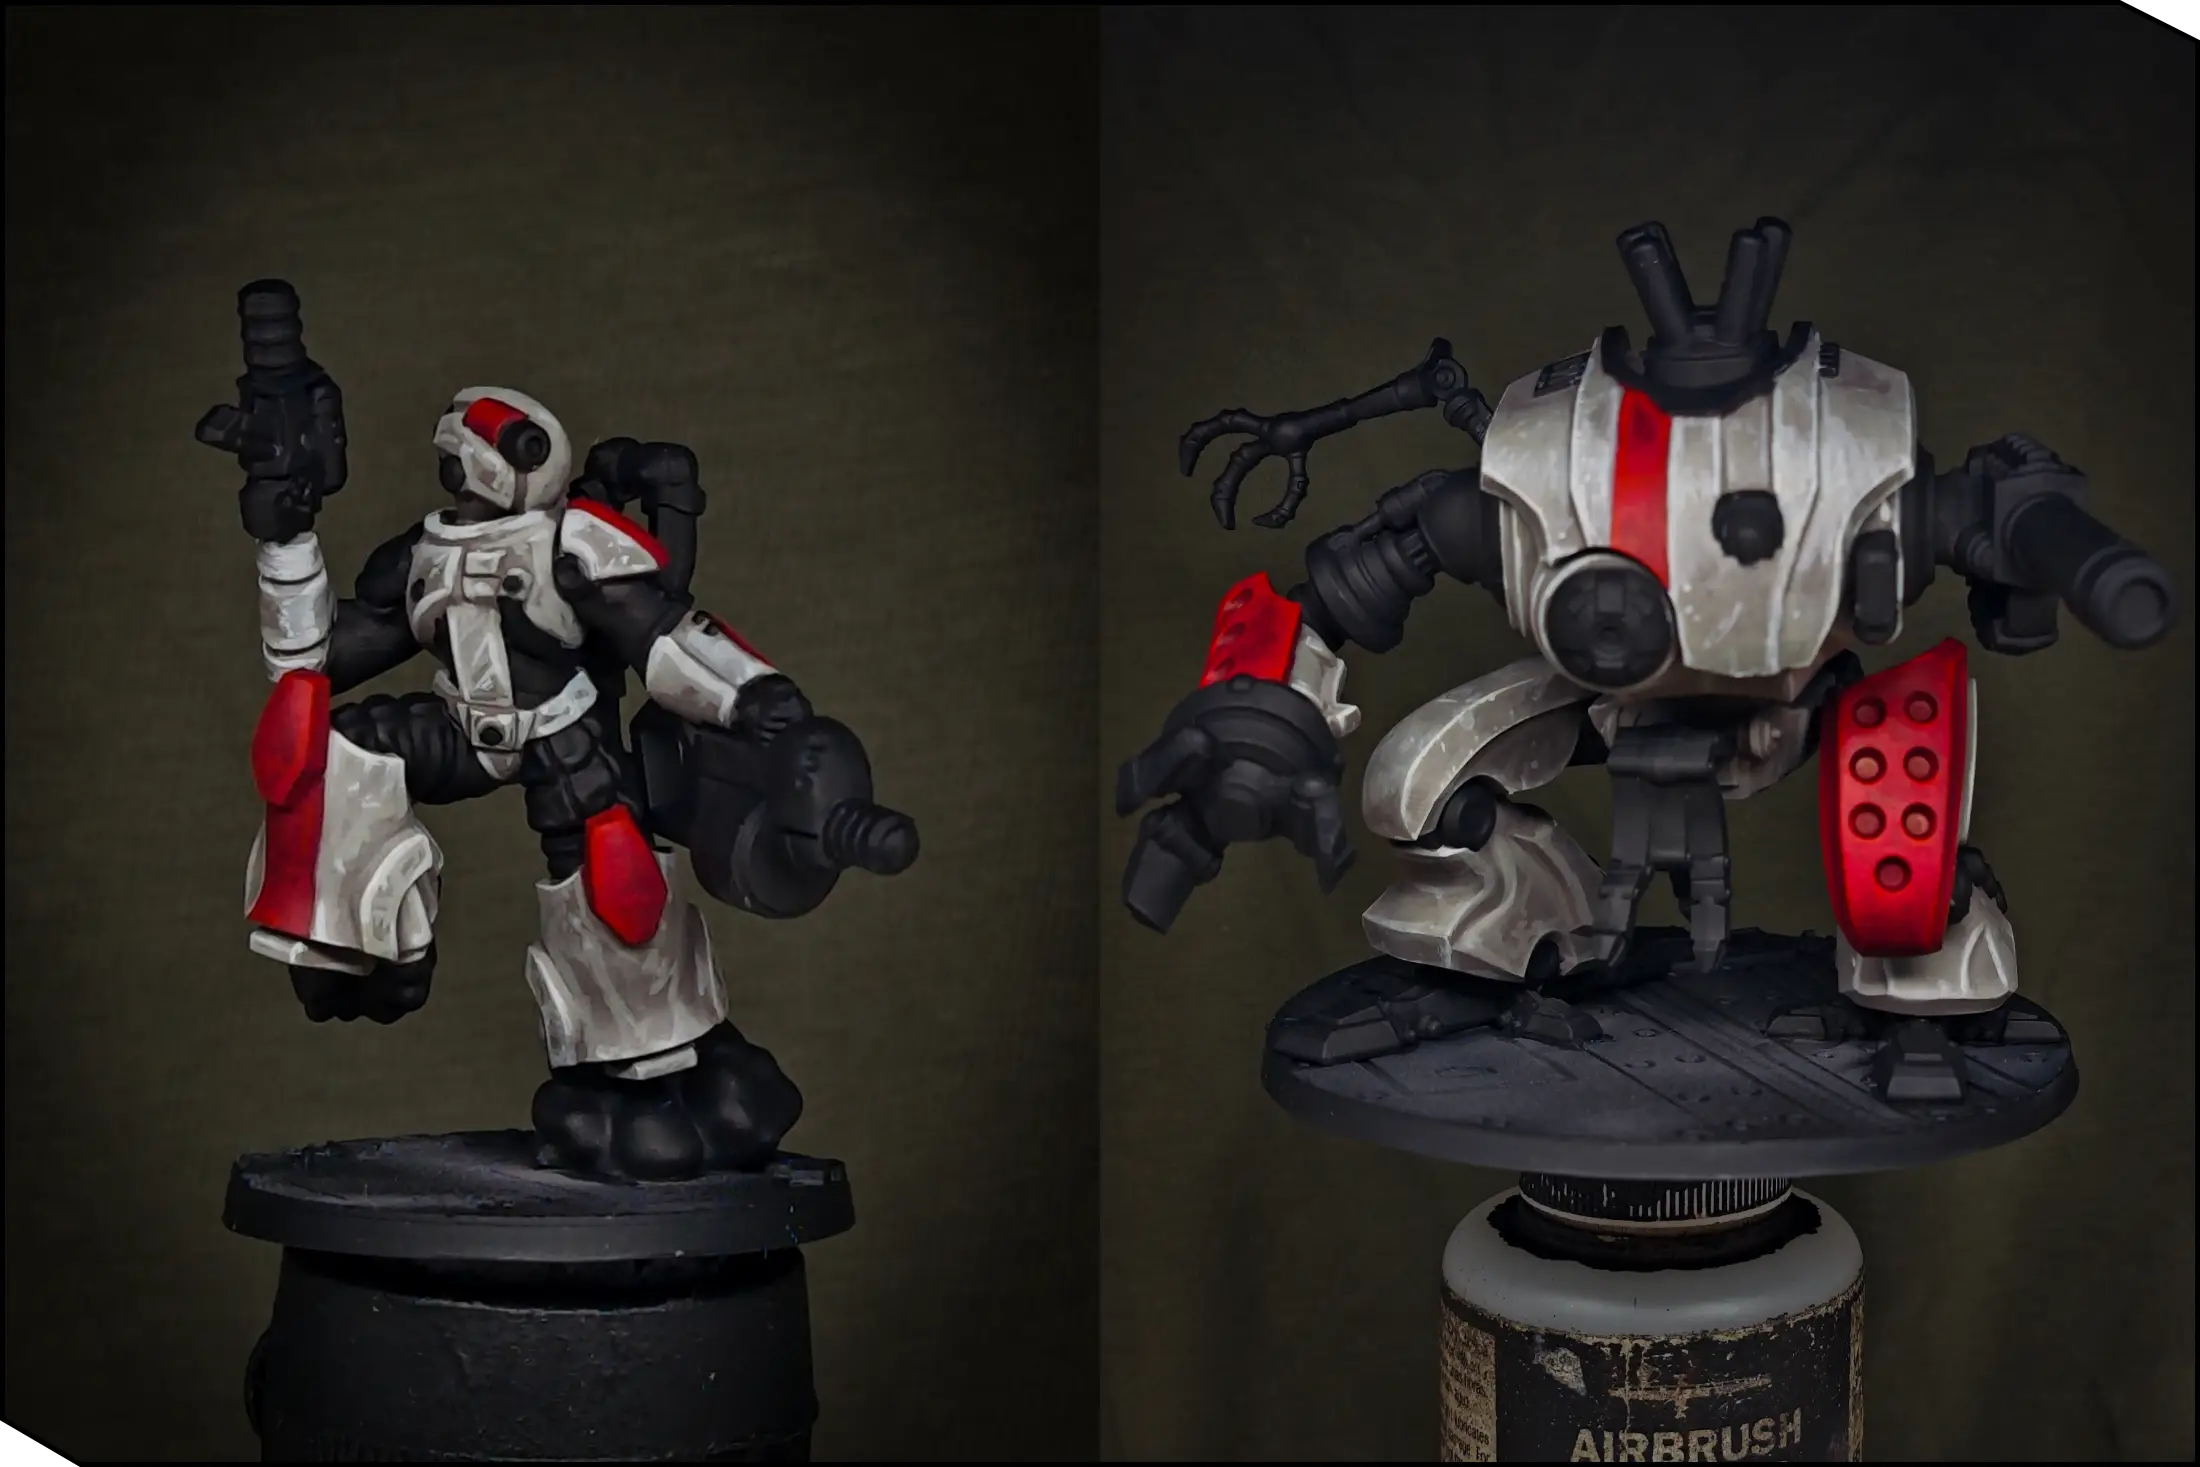
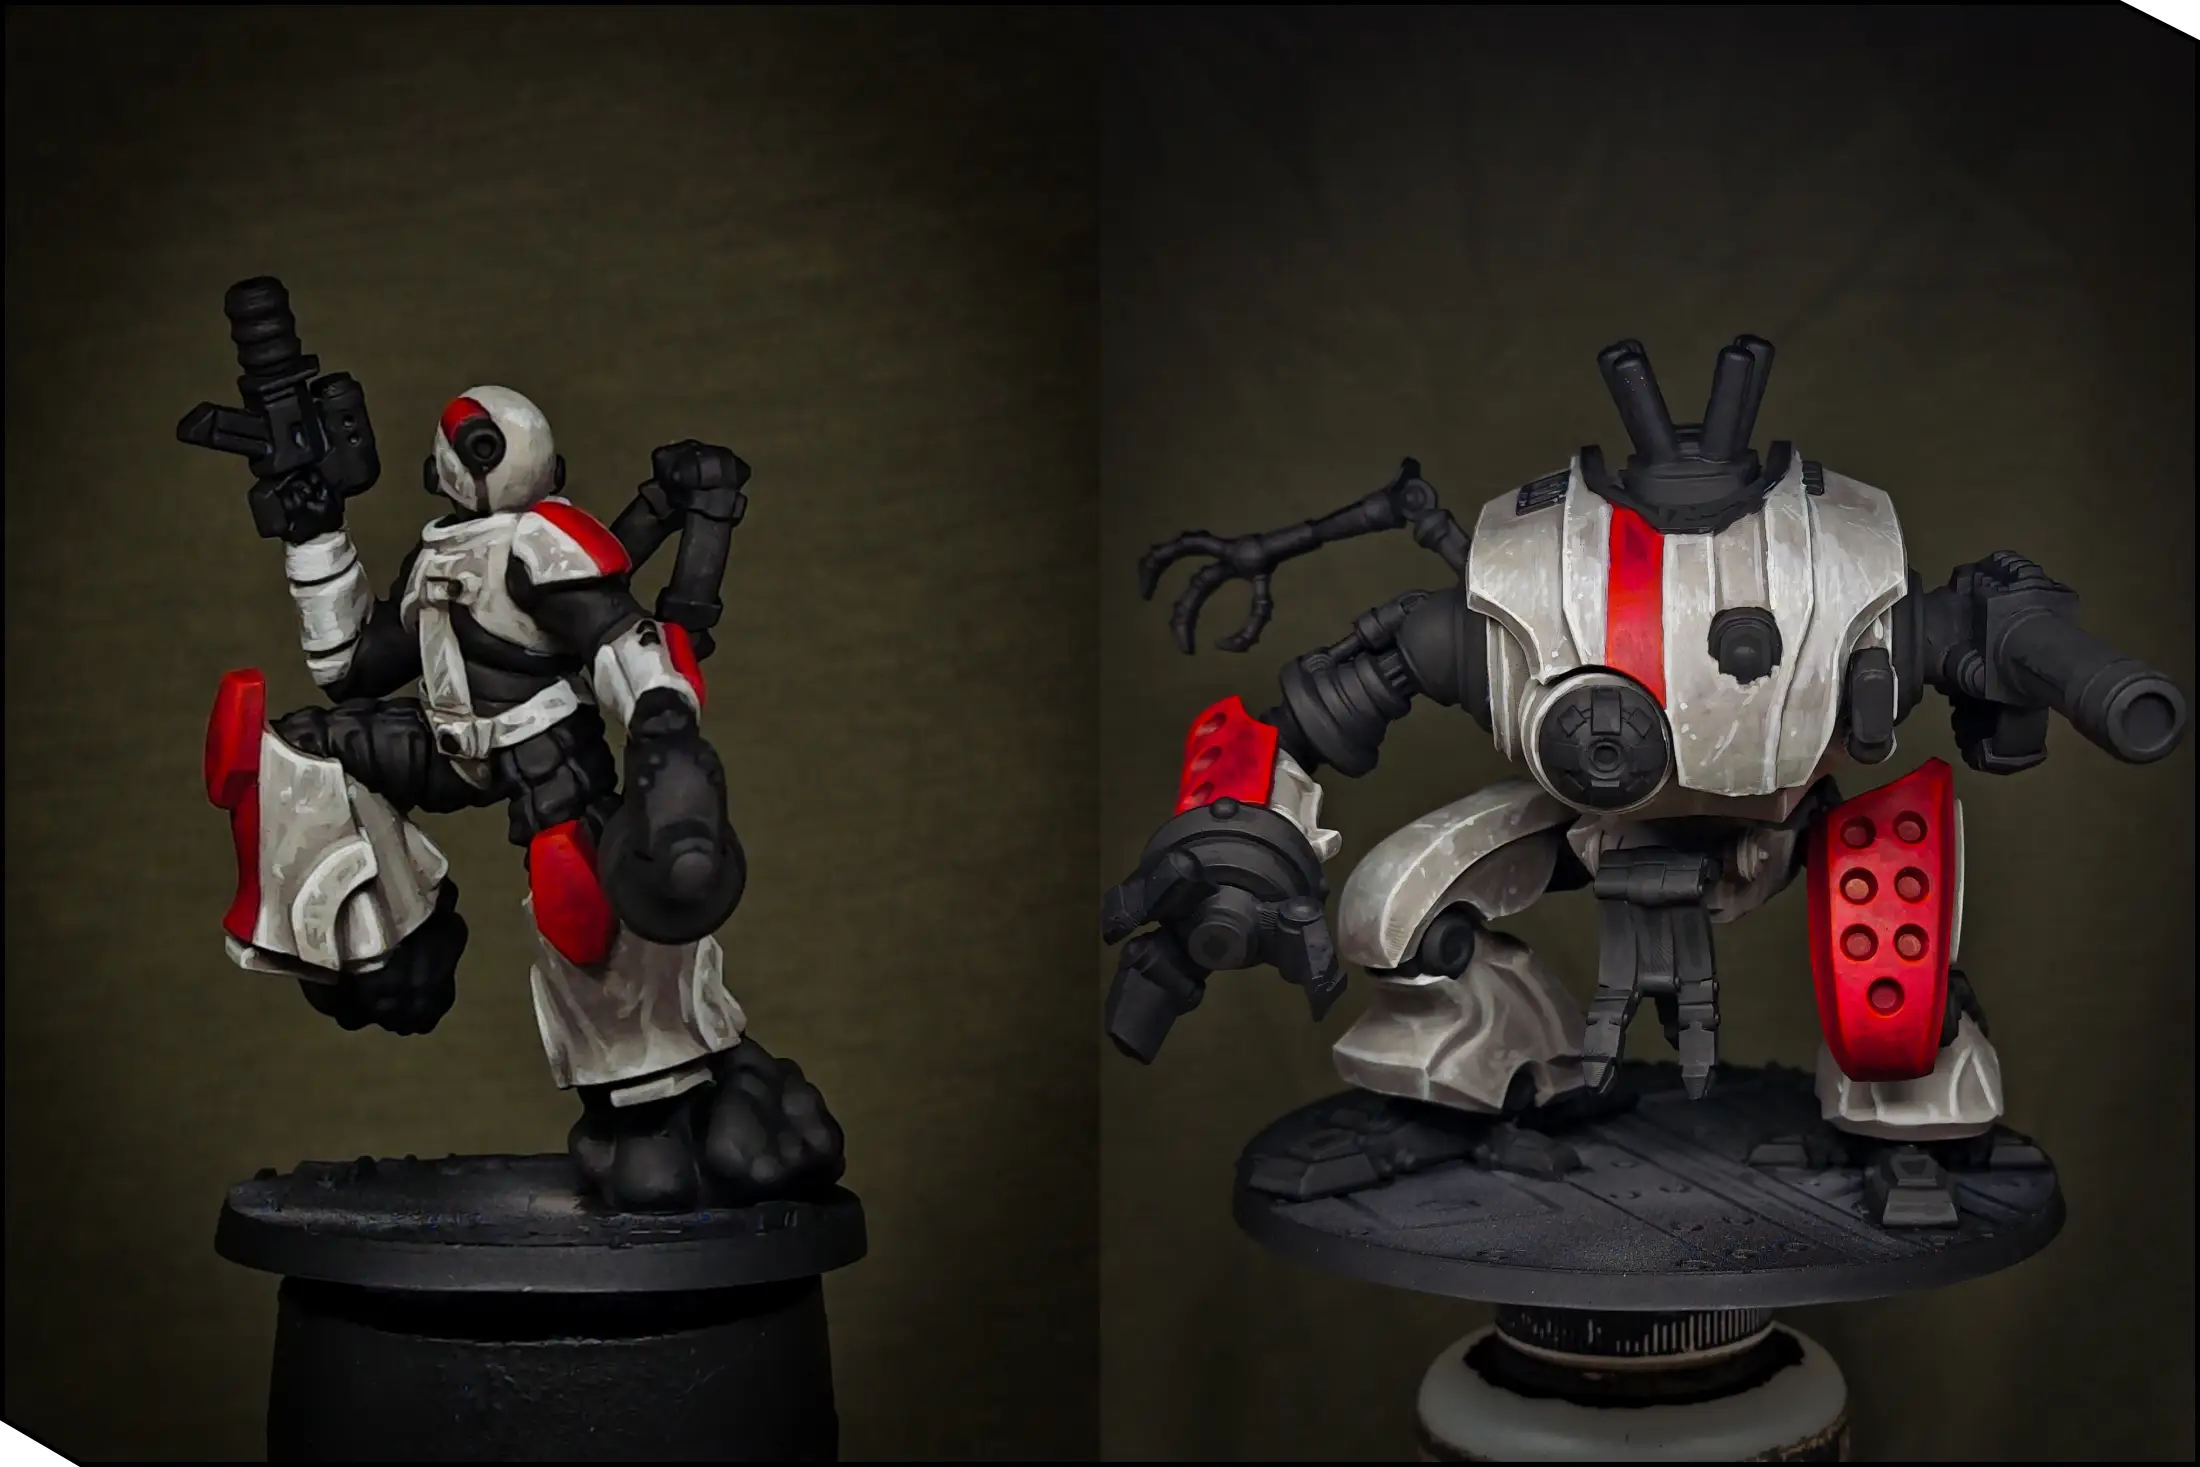
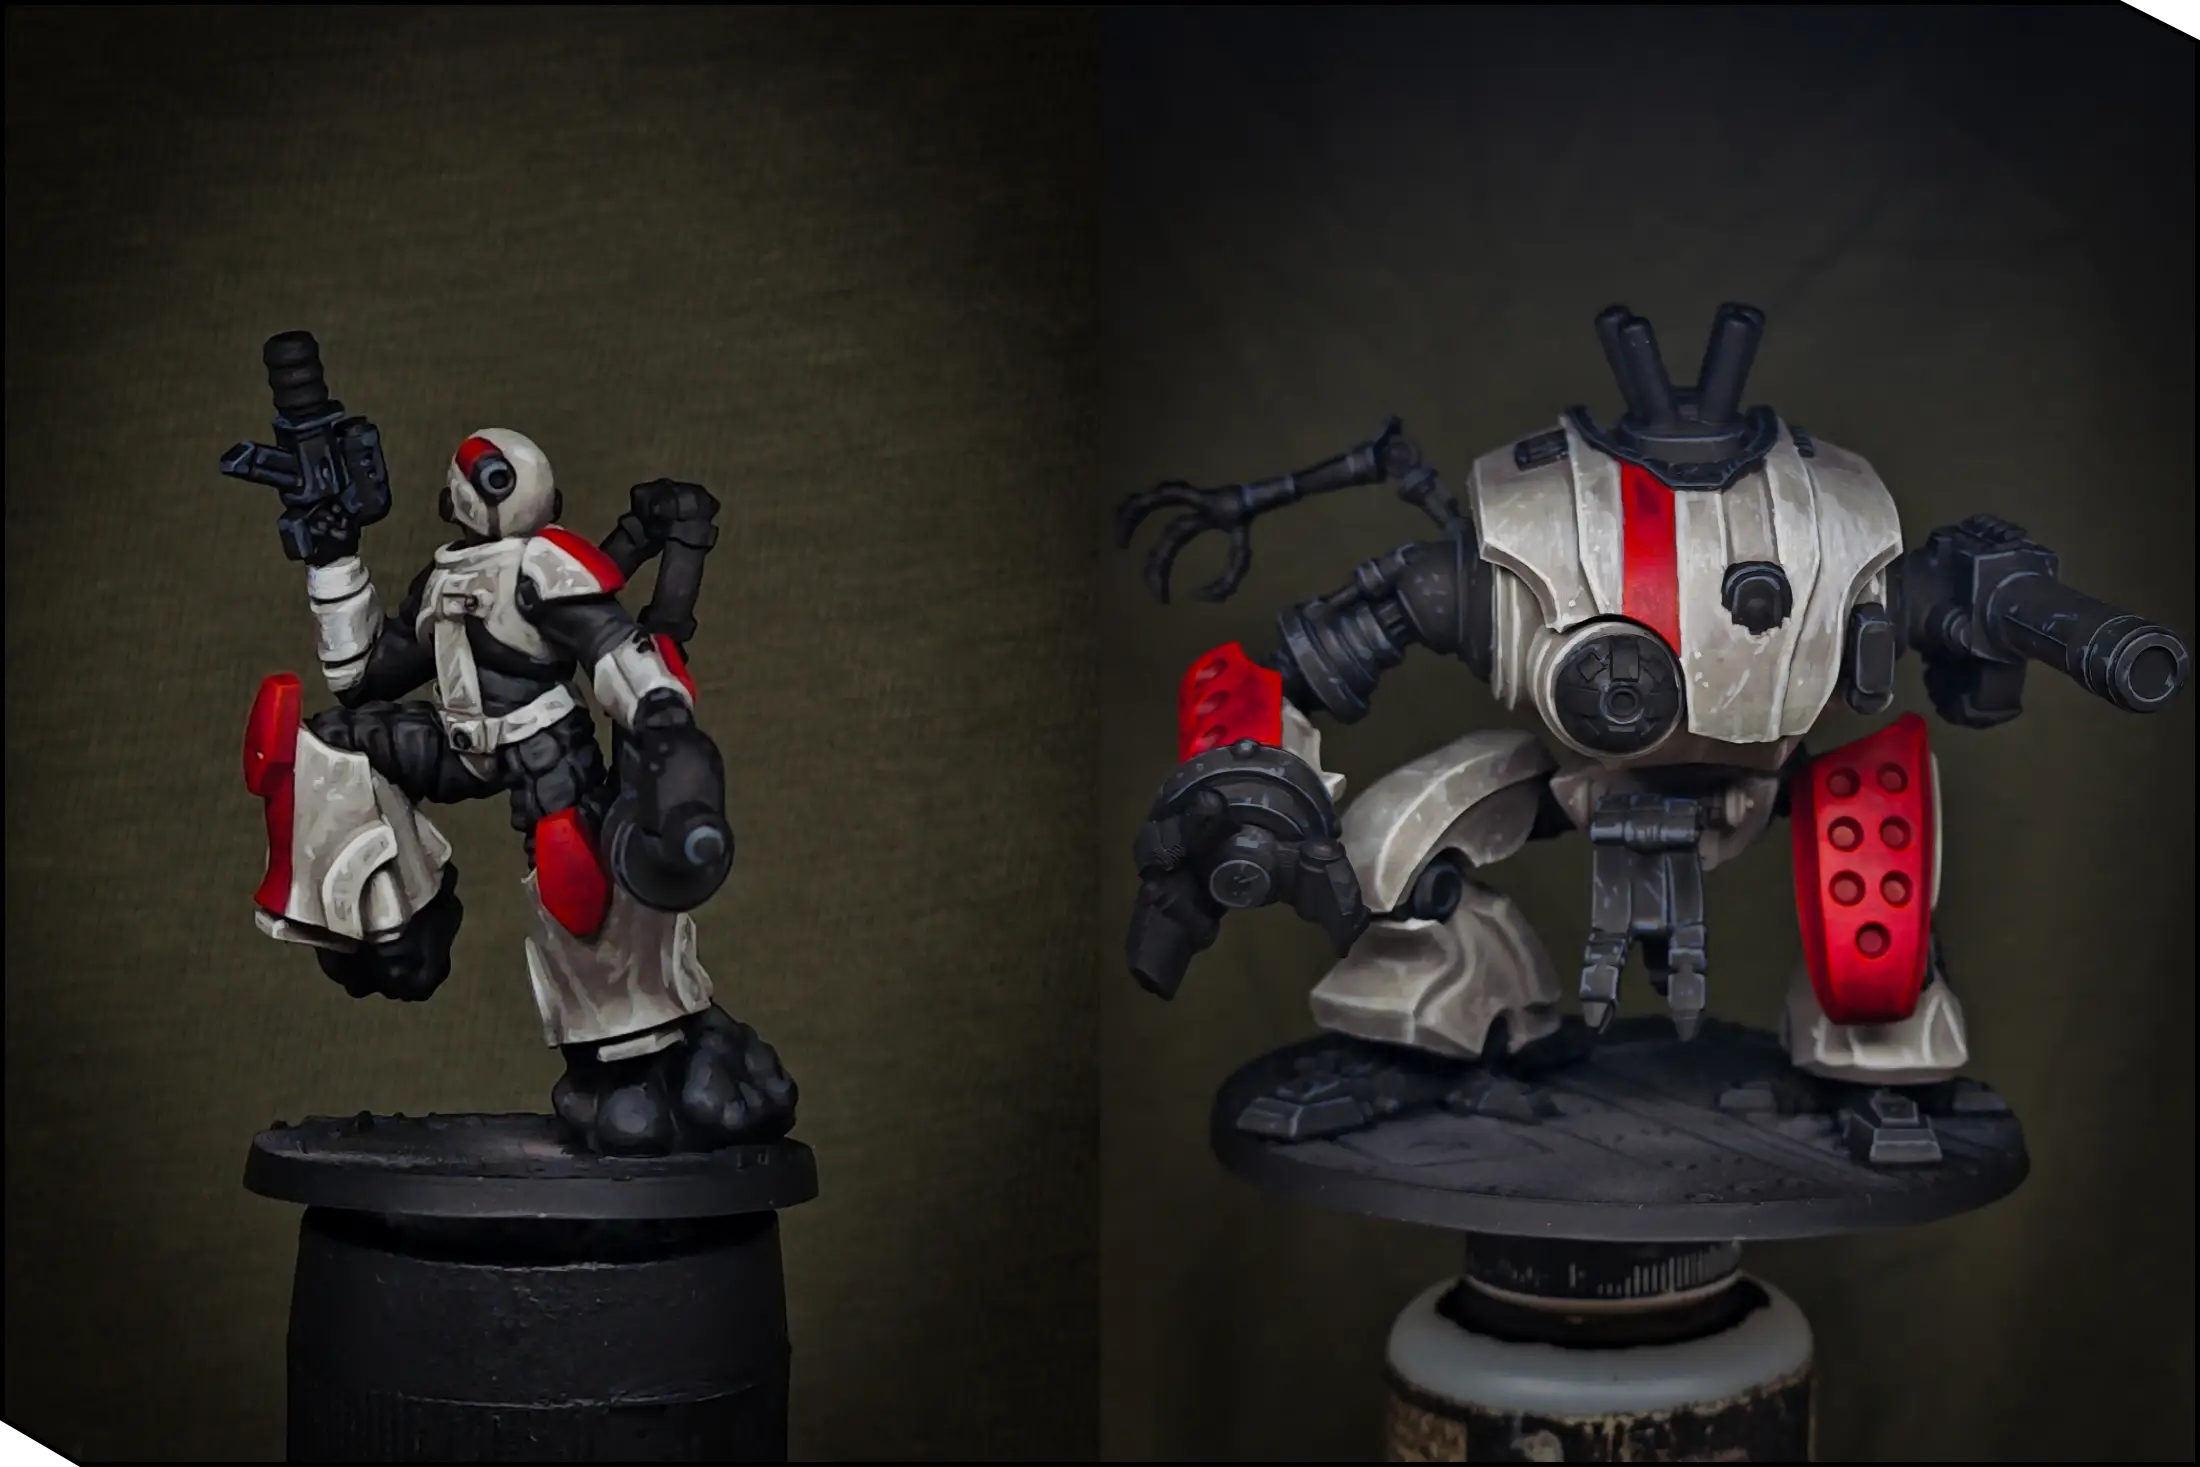
I wanted these miniatures to stand out on the battlefield, so I created this bright color scheme with off-white cream armor, punchy red markings, and calm black for the secondary elements. The white color may look really hard to paint, but don't worry—I’m going to show you a couple of tricks to make it much easier! And remember, this is just a guide, so feel free to change and adapt it so you can enjoy painting the way you like!
.webp)
Tools and Paints
Here is the list of paints and tools that I used for this project. Remember that these are just guidelines; you can probably find something similar in your favorite paint range.
Off-White Armor
- AK11017 Reddish Grey
- AK11009 Warm Grey
- AK11006 Silver Grey
Red Details
- AK11096 Wine Red
- AK11091 Carmine
- AK11279 Sun Red
Black Details
- AK11029 Black
- AK11027 Rubber Black
- AK11019 Graphite
Green Lenses
- AK11273 Cold Green
- AK11274 Greenskin Punch
- AK11275 Slime Green
Metal Parts
- AK11212 Gun Metal
- AK11193 Rusty Gold
- The Army Painter Grimdark Shadow
Dark Rust Bases
- AK11276 Afro Shadow
- AK11108 Hull Red
- AK11106 Mahogany Brown
Other Materials
- Vallejo 74.602 Black Primer (You can use any black rattle-can primer instead)
- AK11525 Ultra Matt Varnish
- Da-Vinci Maestro Kolinsky N4 Brush (You need a high-quality brush with a sharp tip. For me, it’s easier to work with the N4, but you absolutely can use a smaller one)
- Harder and Steenbeck Infinity CR+ Airbrush 0.4mm
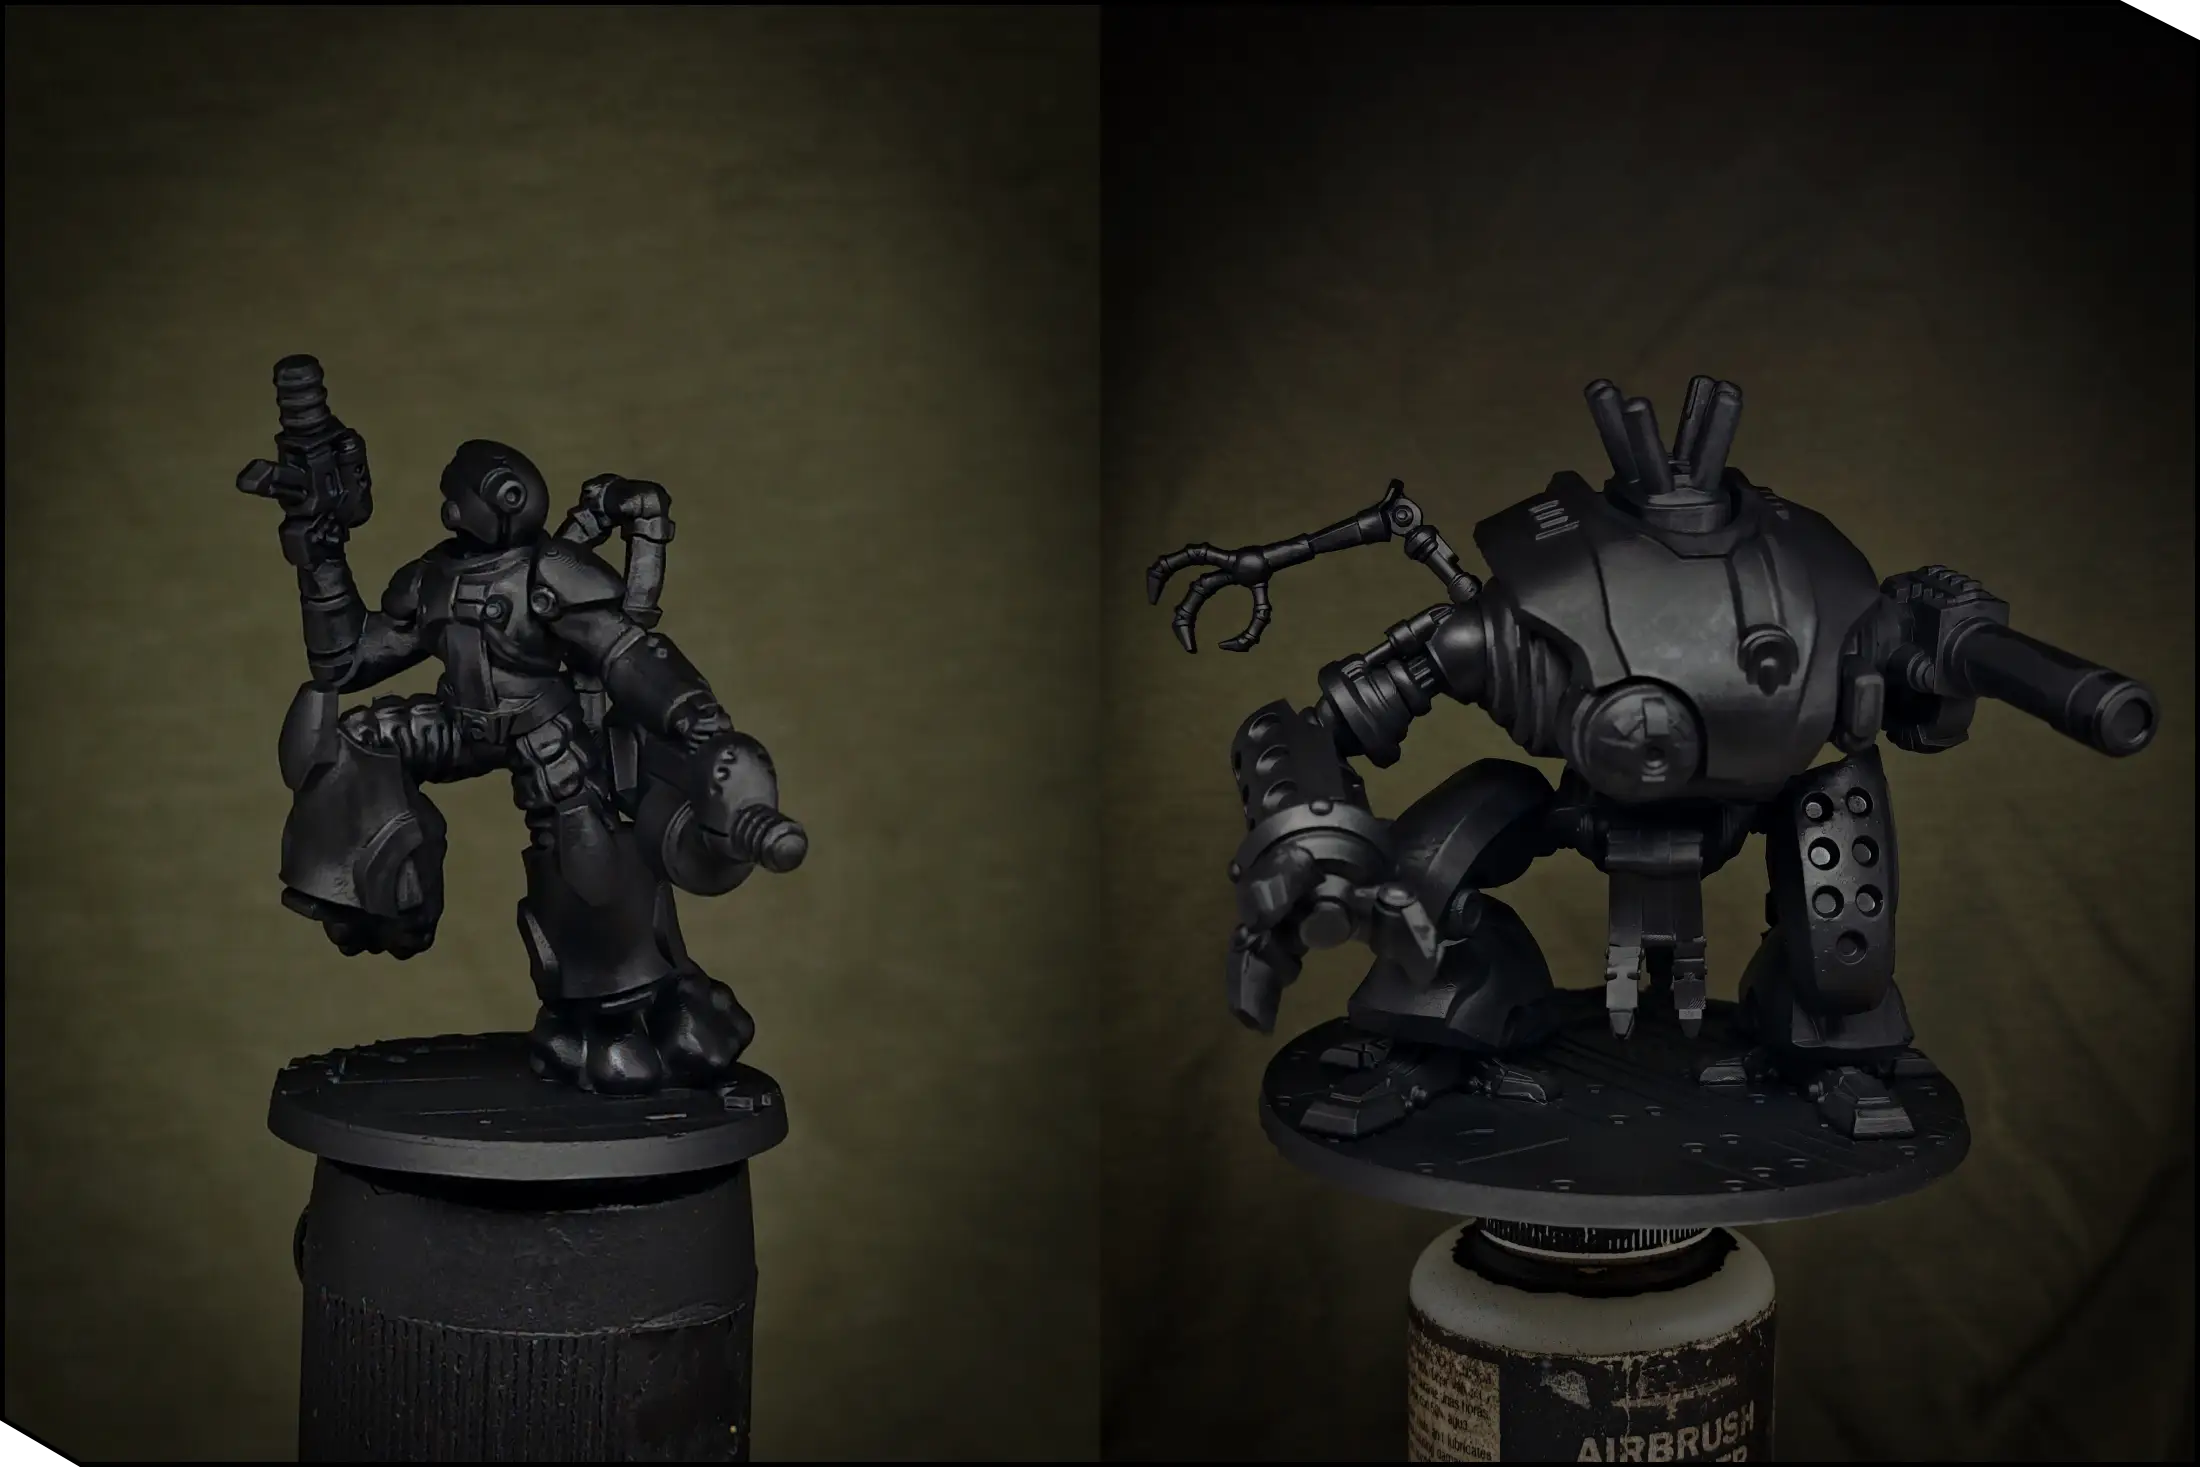
Priming
First of all, we need to prime our miniatures. I sprayed Vallejo Black Primer through the Harder & Steenbeck Infinity CR+ airbrush with a 0.4 mm needle. Even though I’m using quite a light color scheme, I find it easier to work over black—if you miss some details later, they will simply look like shadows.
You can absolutely use a rattle-can primer instead, but it’s quite cold outside right now, so I chose to airbrush indoors. Just make sure the room is well-ventilated and apply the primer in a couple of thin layers, covering all the details. To avoid clogging the details, let the first layer dry completely before applying the second.
Base Colors
Now let's establish the base coats for all the main areas. First, I sprayed the minis with Reddish Grey through the airbrush. Thanks to the brown pigments, it’s quite opaque, so you can get coverage in just a few layers. You can also use a normal brush, but the airbrush saves a lot of time on such a big model.
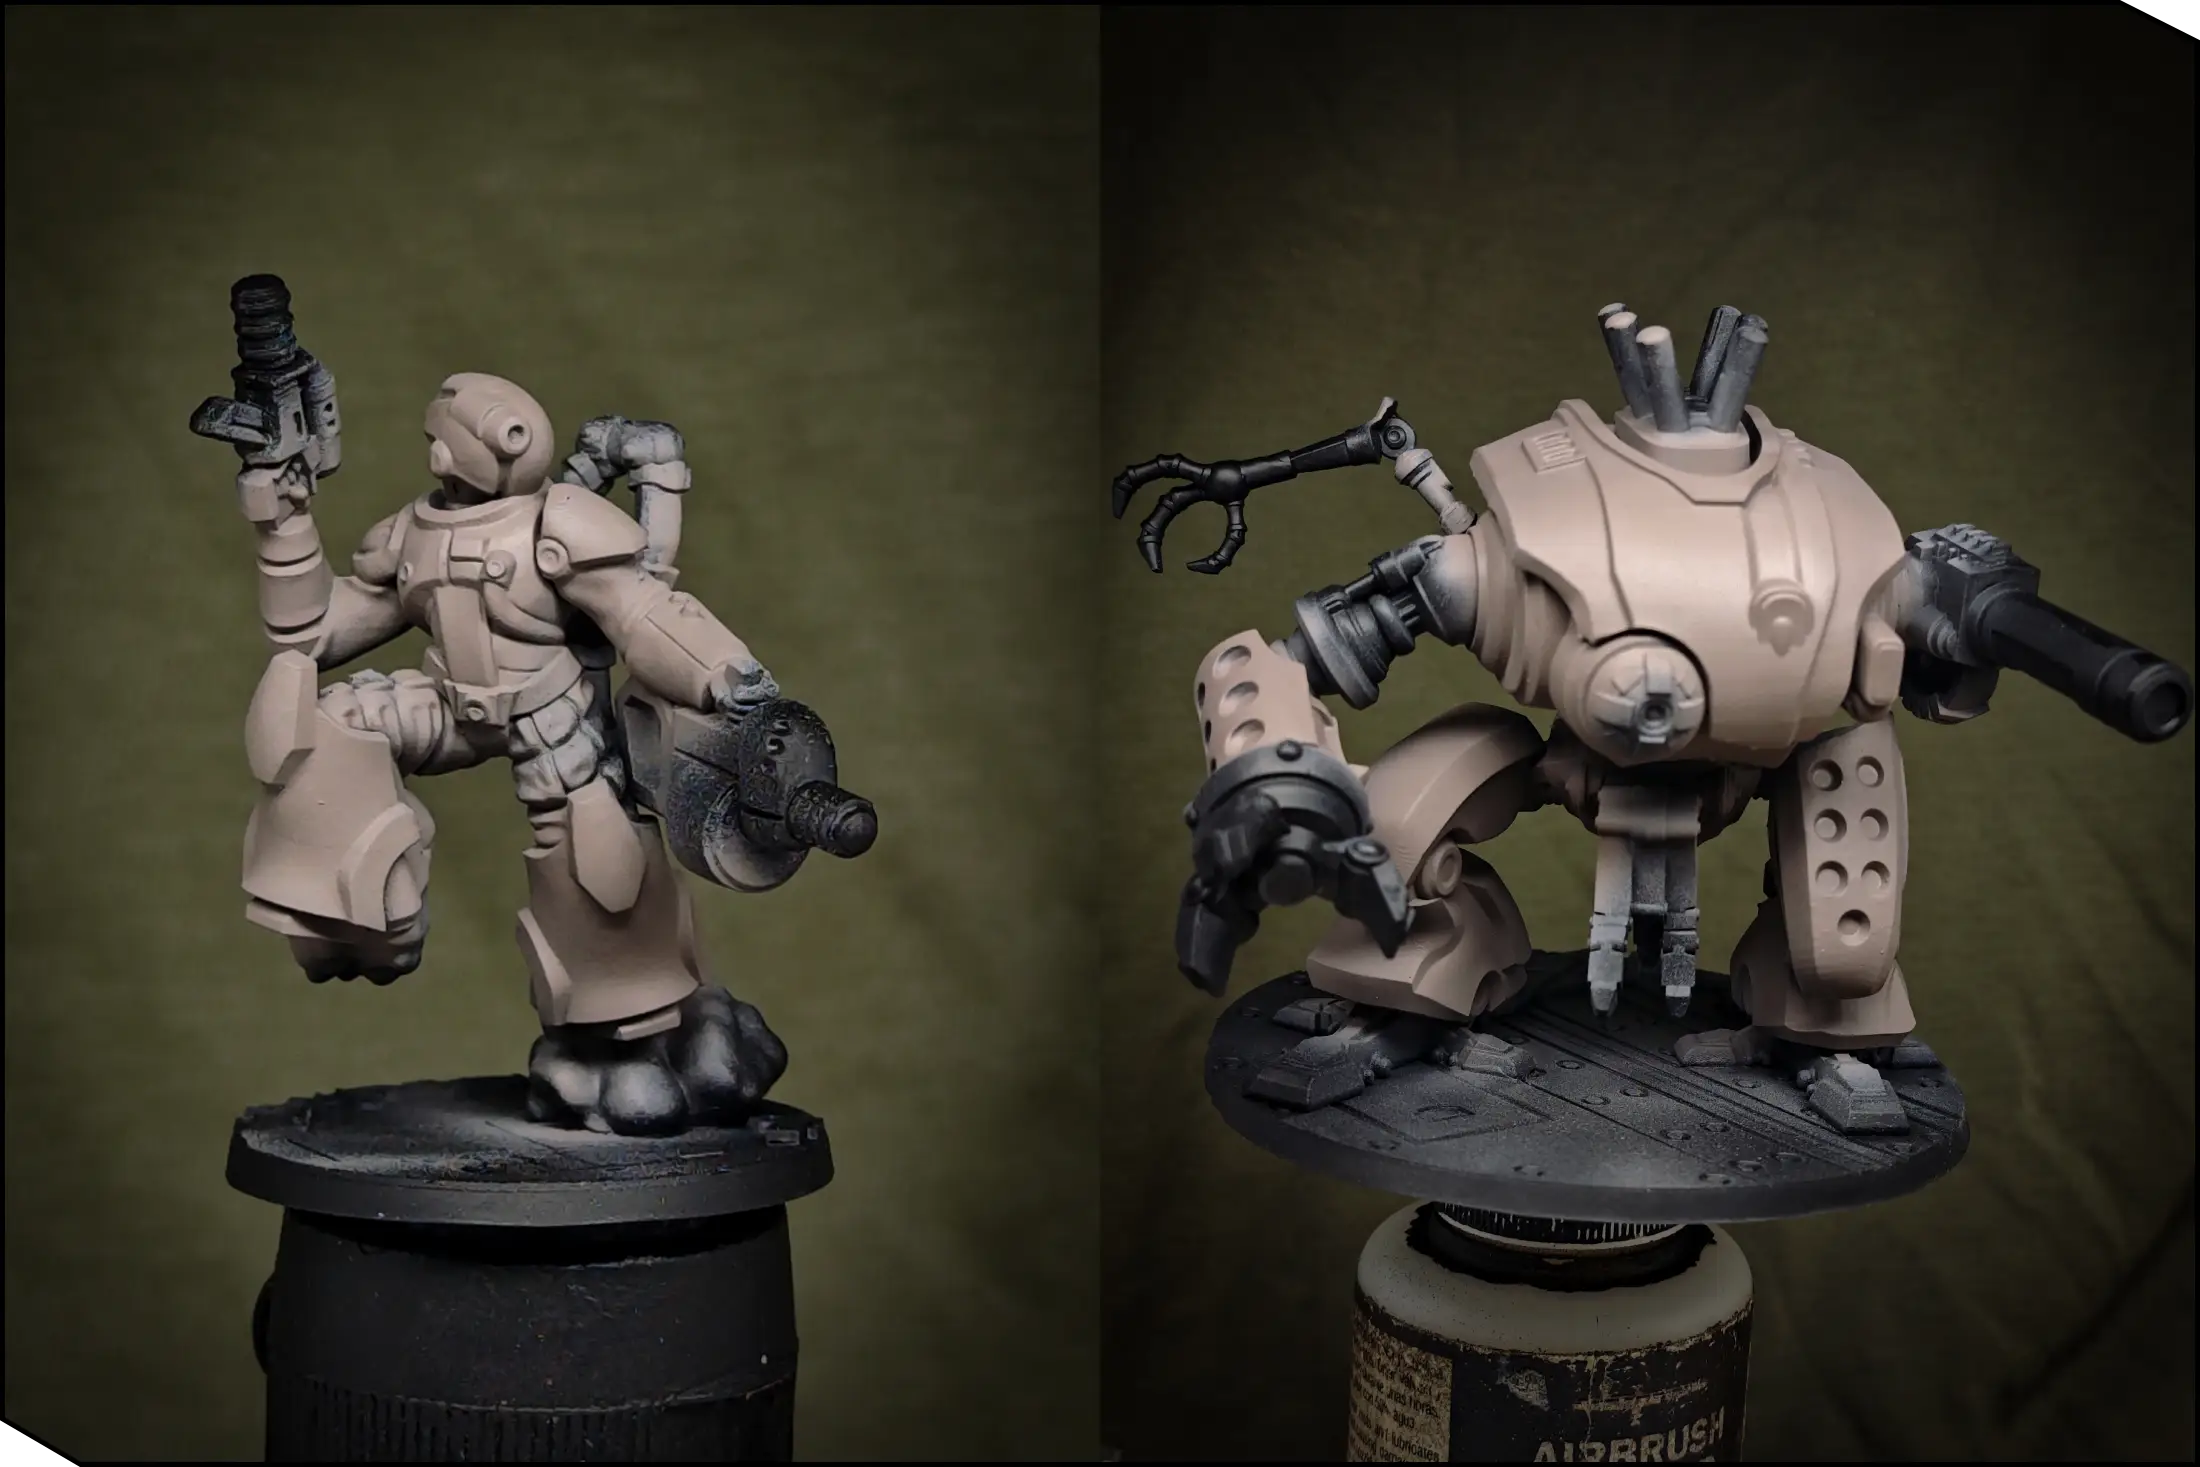
Next, let’s switch to the regular brush. To add more readability to the miniatures, I applied base colors for the main elements at this stage. I painted all the joints, weapons, and inner machinery parts with Black. Then, to add more visual interest, I picked several areas to paint with Wine Red.
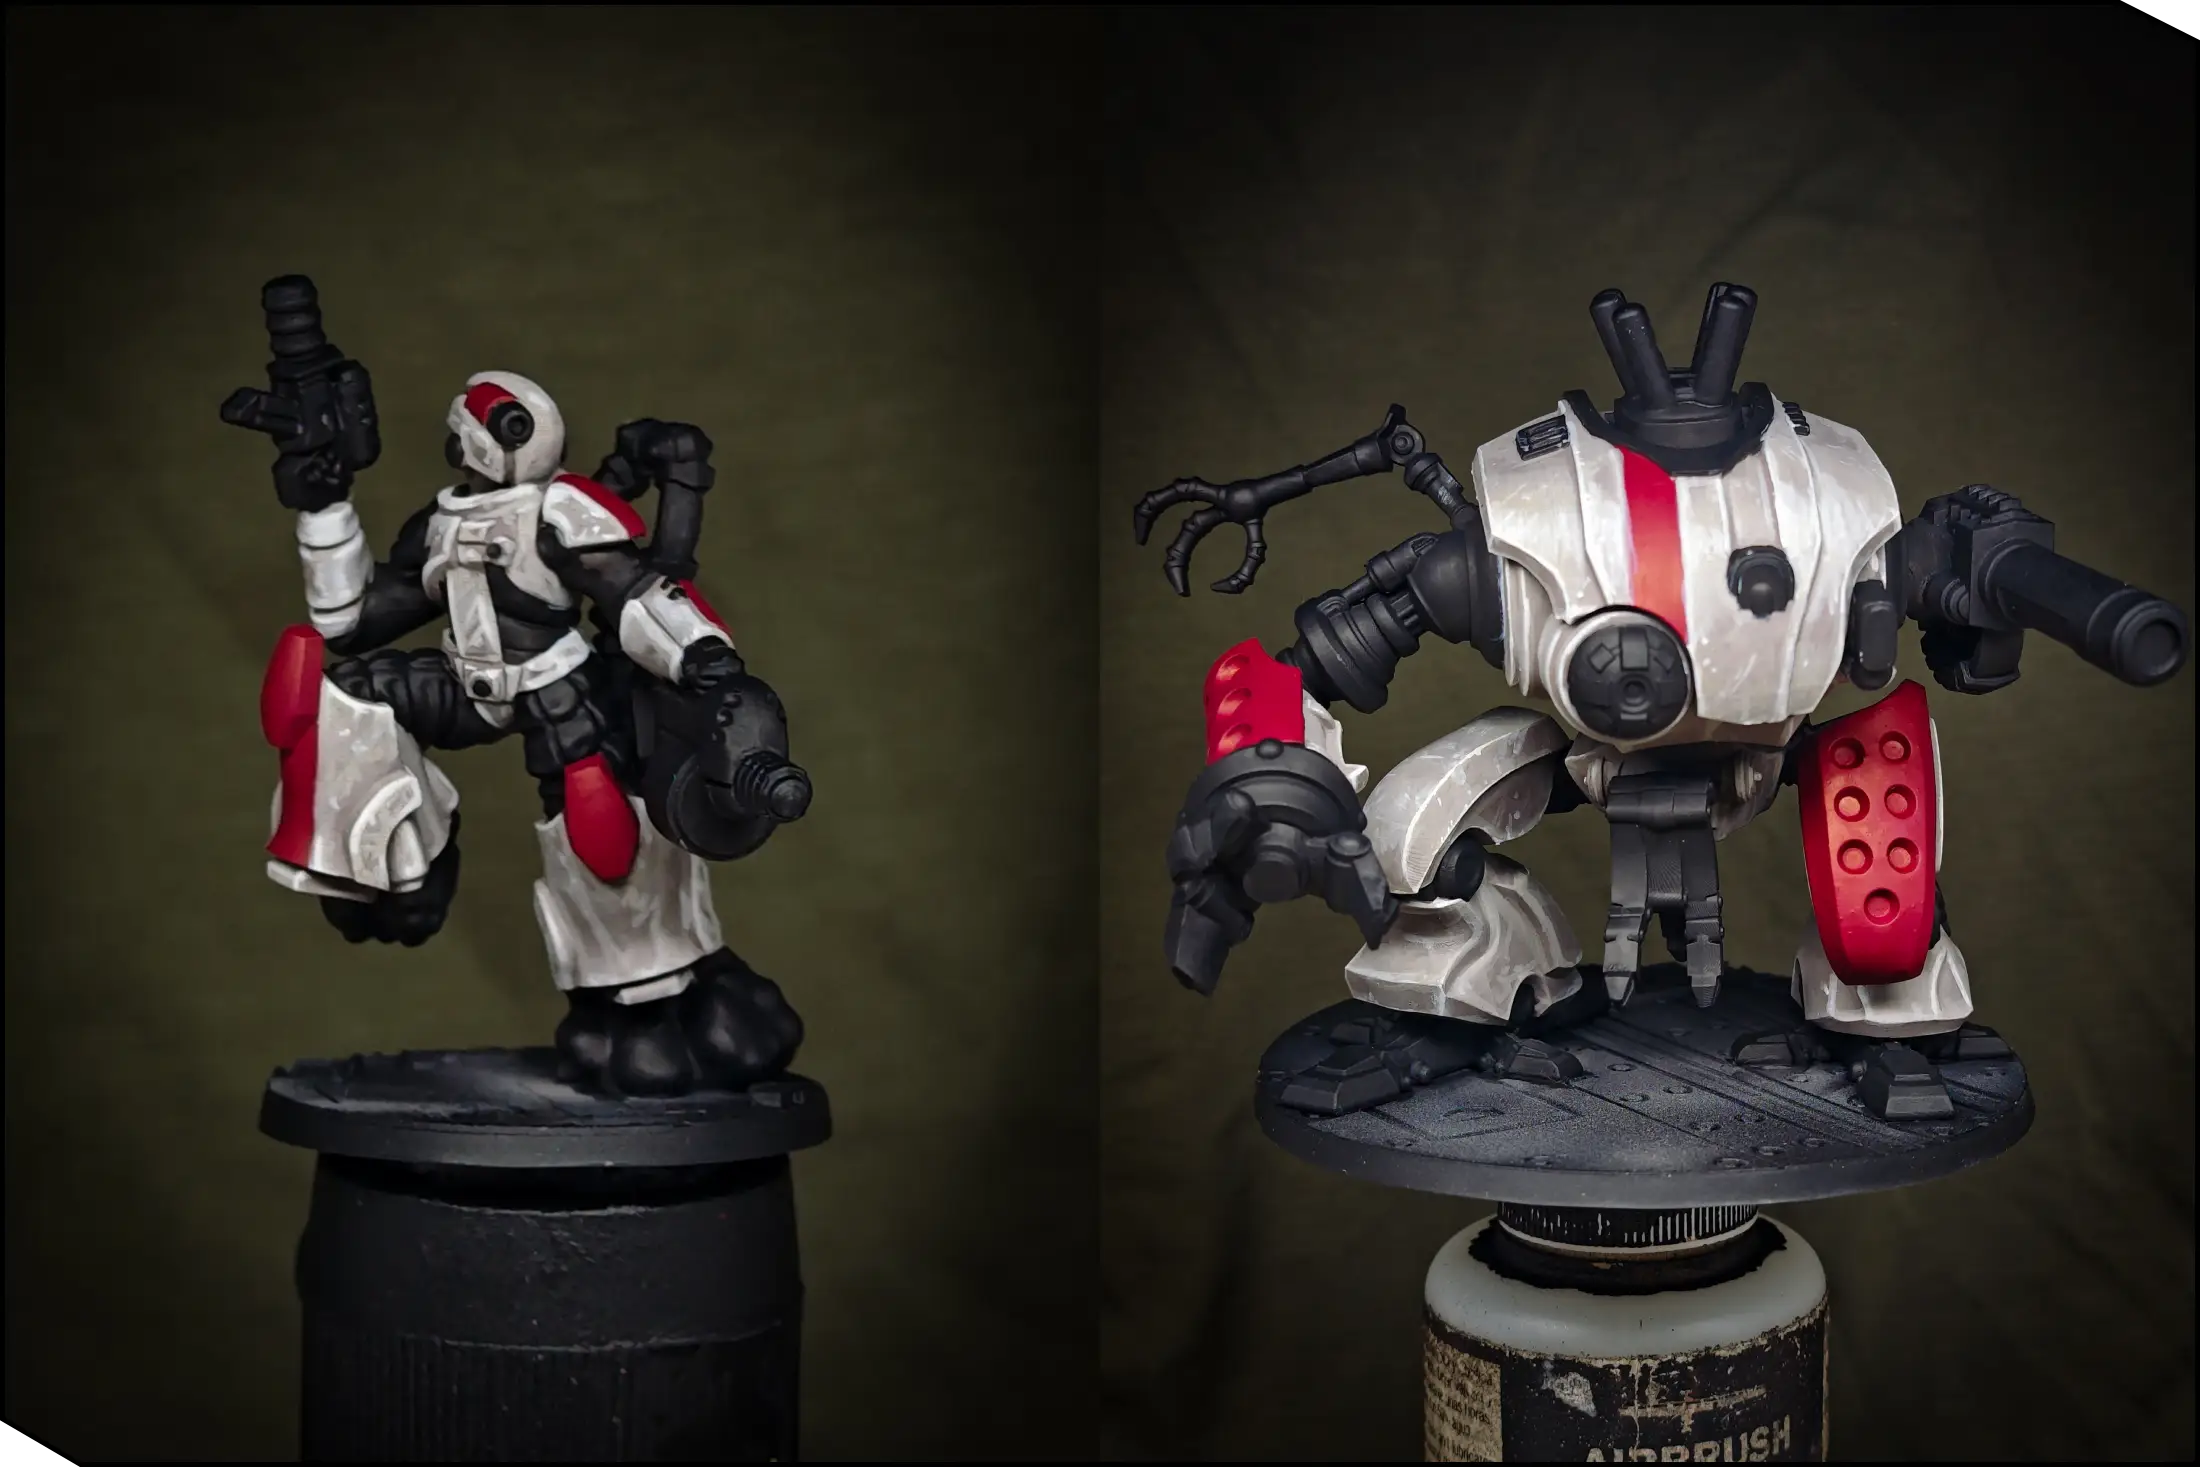
On the Kulak, I painted the perforated armor plates on the right arm and left leg, then the fuel tank on its back. Lastly, I added a long stripe across the carapace to break up the large surfaces. On the infantry models, I painted the knees, then the stripes on the shoulder pad, helmet, and on the leg. Feel free to choose any elements you like, but I recommend limiting yourself to about 3-4 red details per miniature—otherwise the scheme may start to look more red than white.
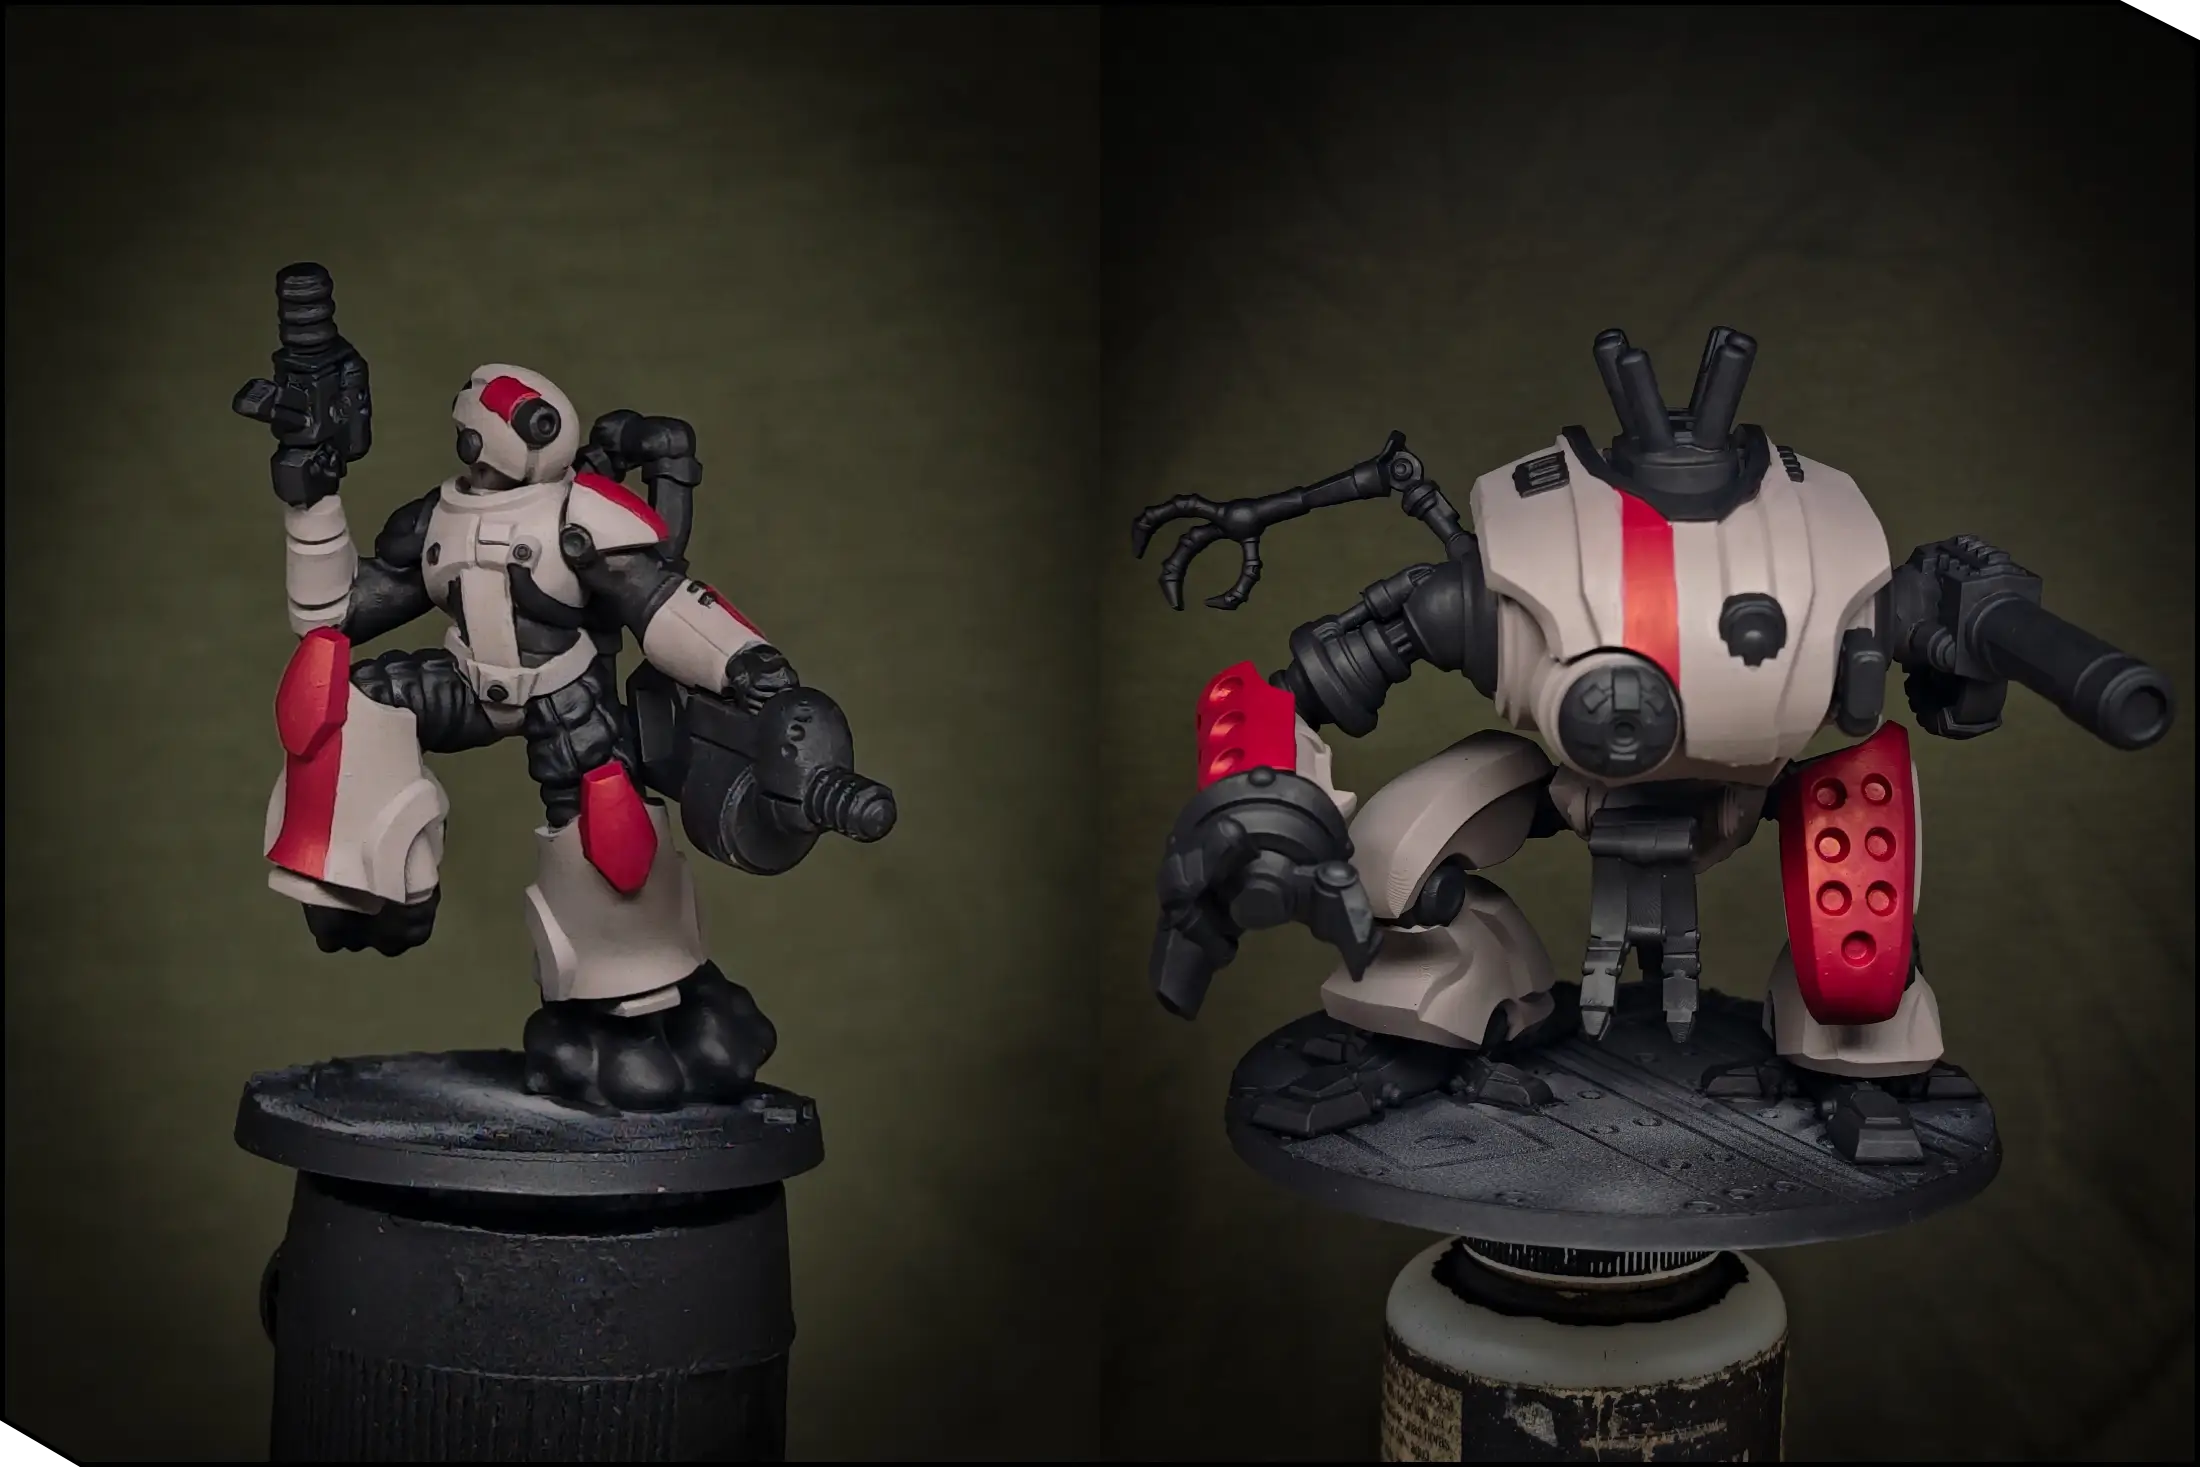
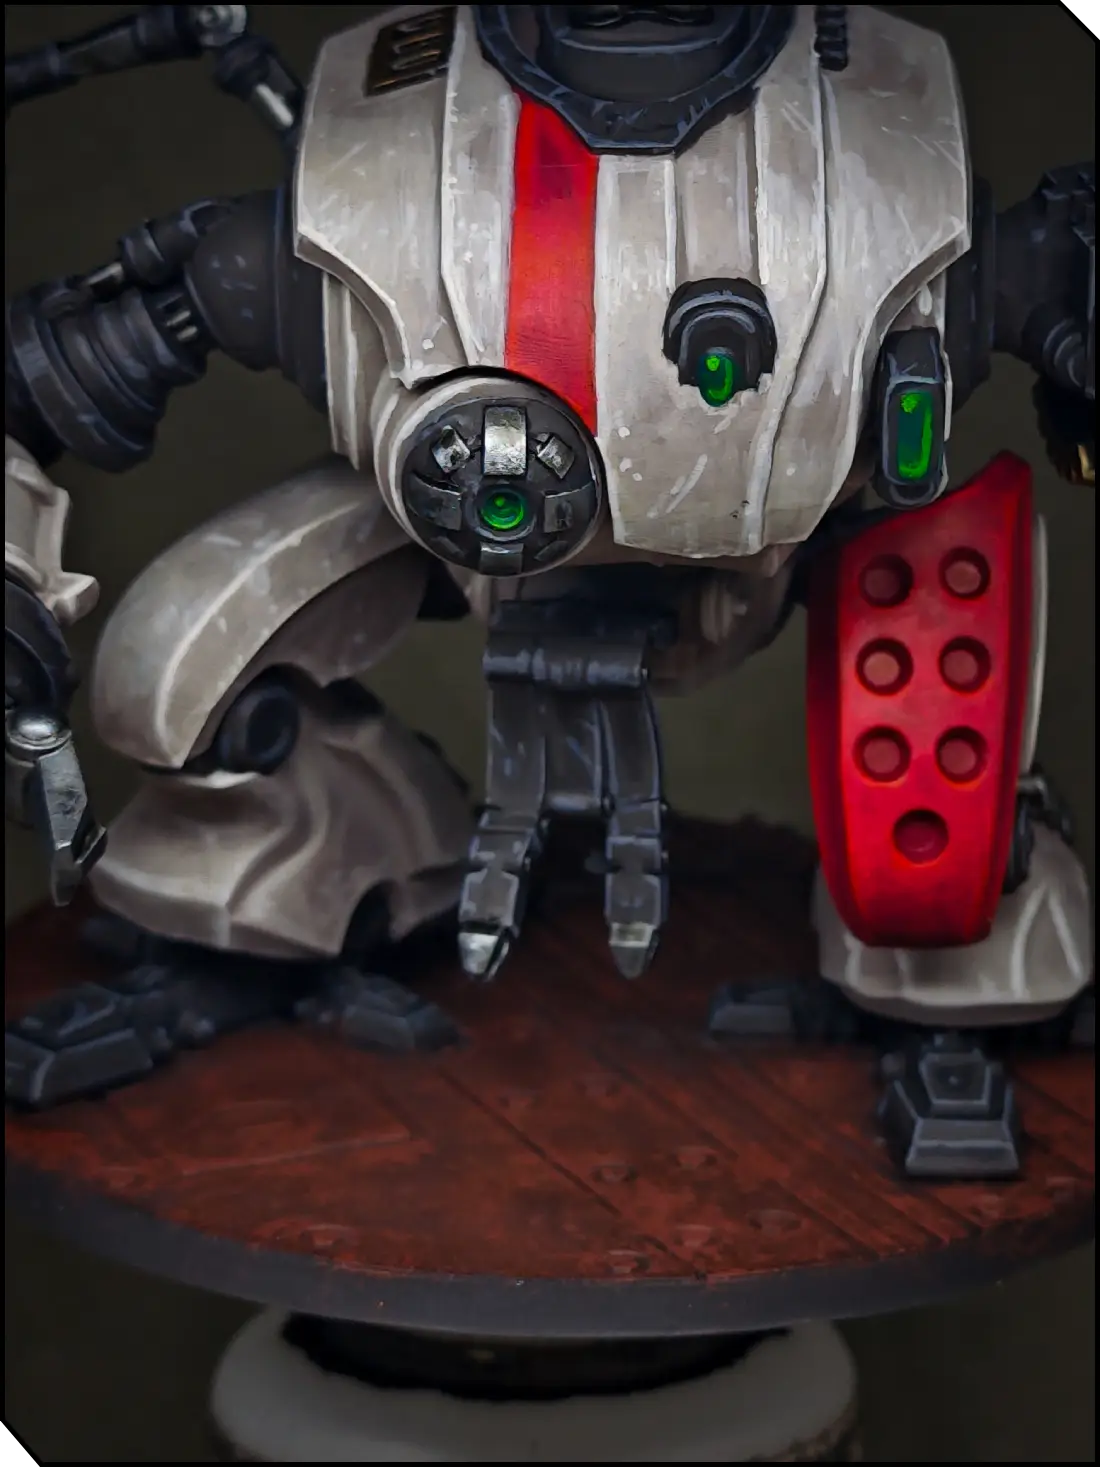
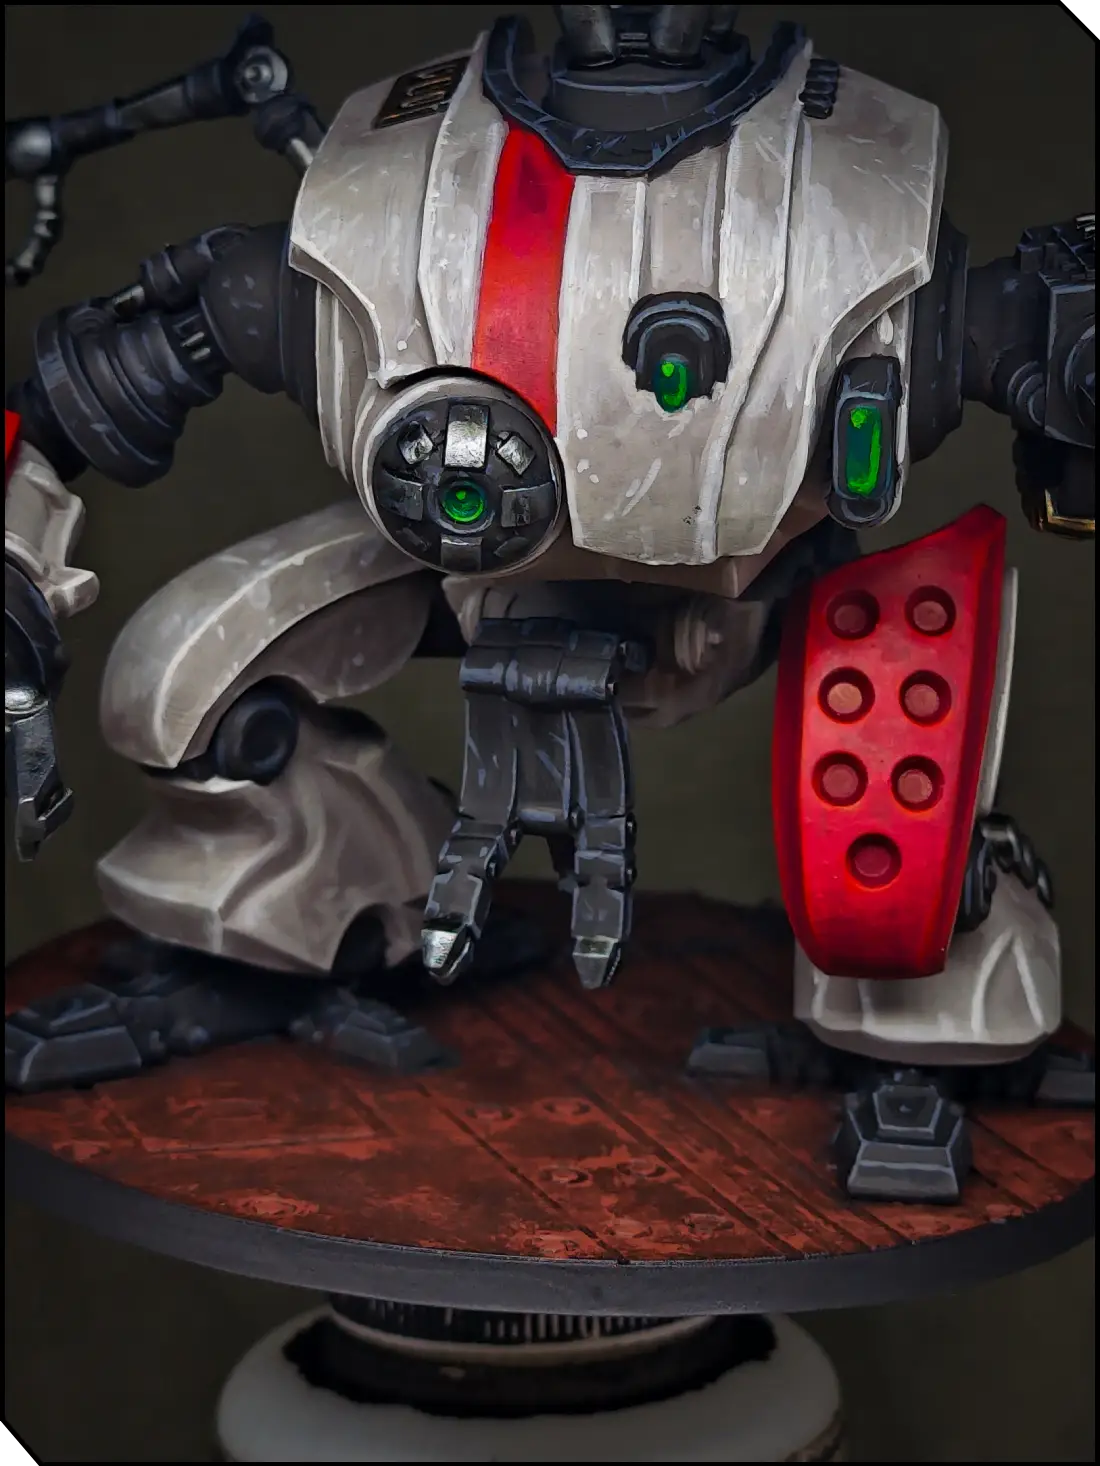
Off-White Armor
I started highlighting the white armor with a 50/50 mix of Reddish Grey and Warm Grey, covering about 60-70% of the original color. First, I established the general shapes by placing highlights on the upper-facing areas and around the edges. At this point, we’re just creating a rough light sketch, so don’t worry too much about smooth blends.
Next, I switched to pure Warm Grey and repeated the highlights on the same areas, again covering about 60-70% of the previous layer. Here I also began smoothing the transitions by glazing the borders with a diluted paint. You can skip this stage if you like, but since the white armor is the biggest and most eye-catching part of the models, I chose to spend a bit more time for a neater finish.
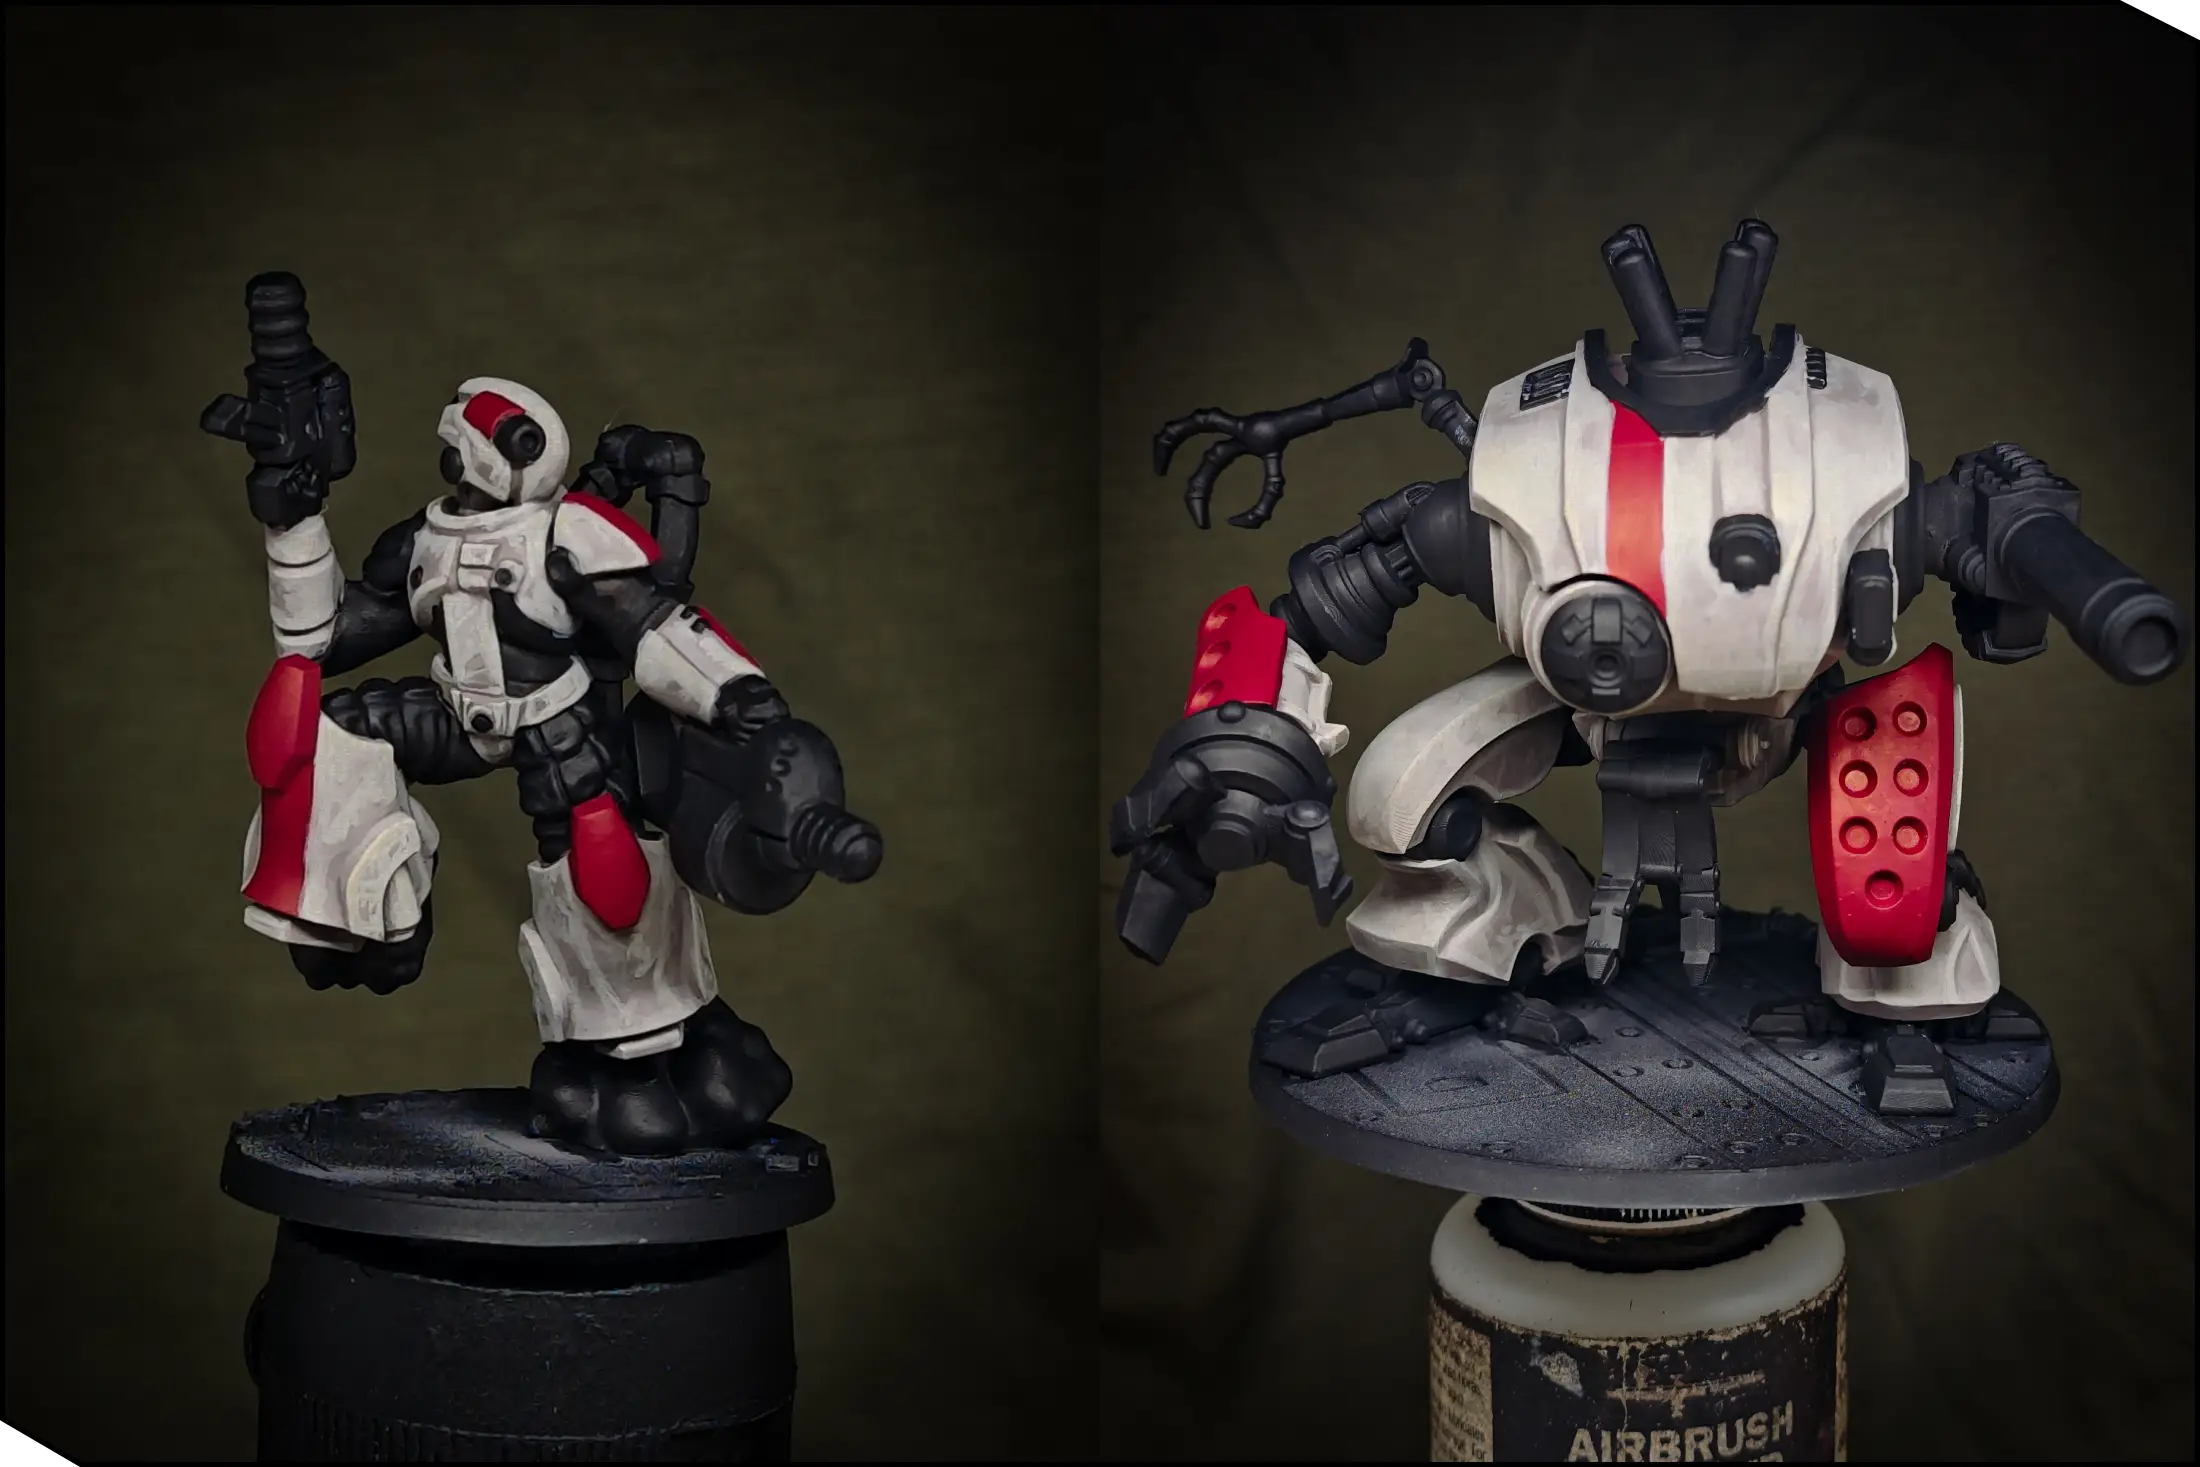
Finally, I applied the extreme highlights using Silver Grey. The color jump is quite strong, so I focused only on the most prominent points: sharp armor edges and on the carapace. As an optional step, I added some battle damage with small dots and short strokes.
Red Markings
Now let’s return to the red details. I followed the same principles as with the white armor. First, I established a light sketch on the upper-facing parts using Carmine. Then I softened the transitions with a glaze of the original Wine Red.
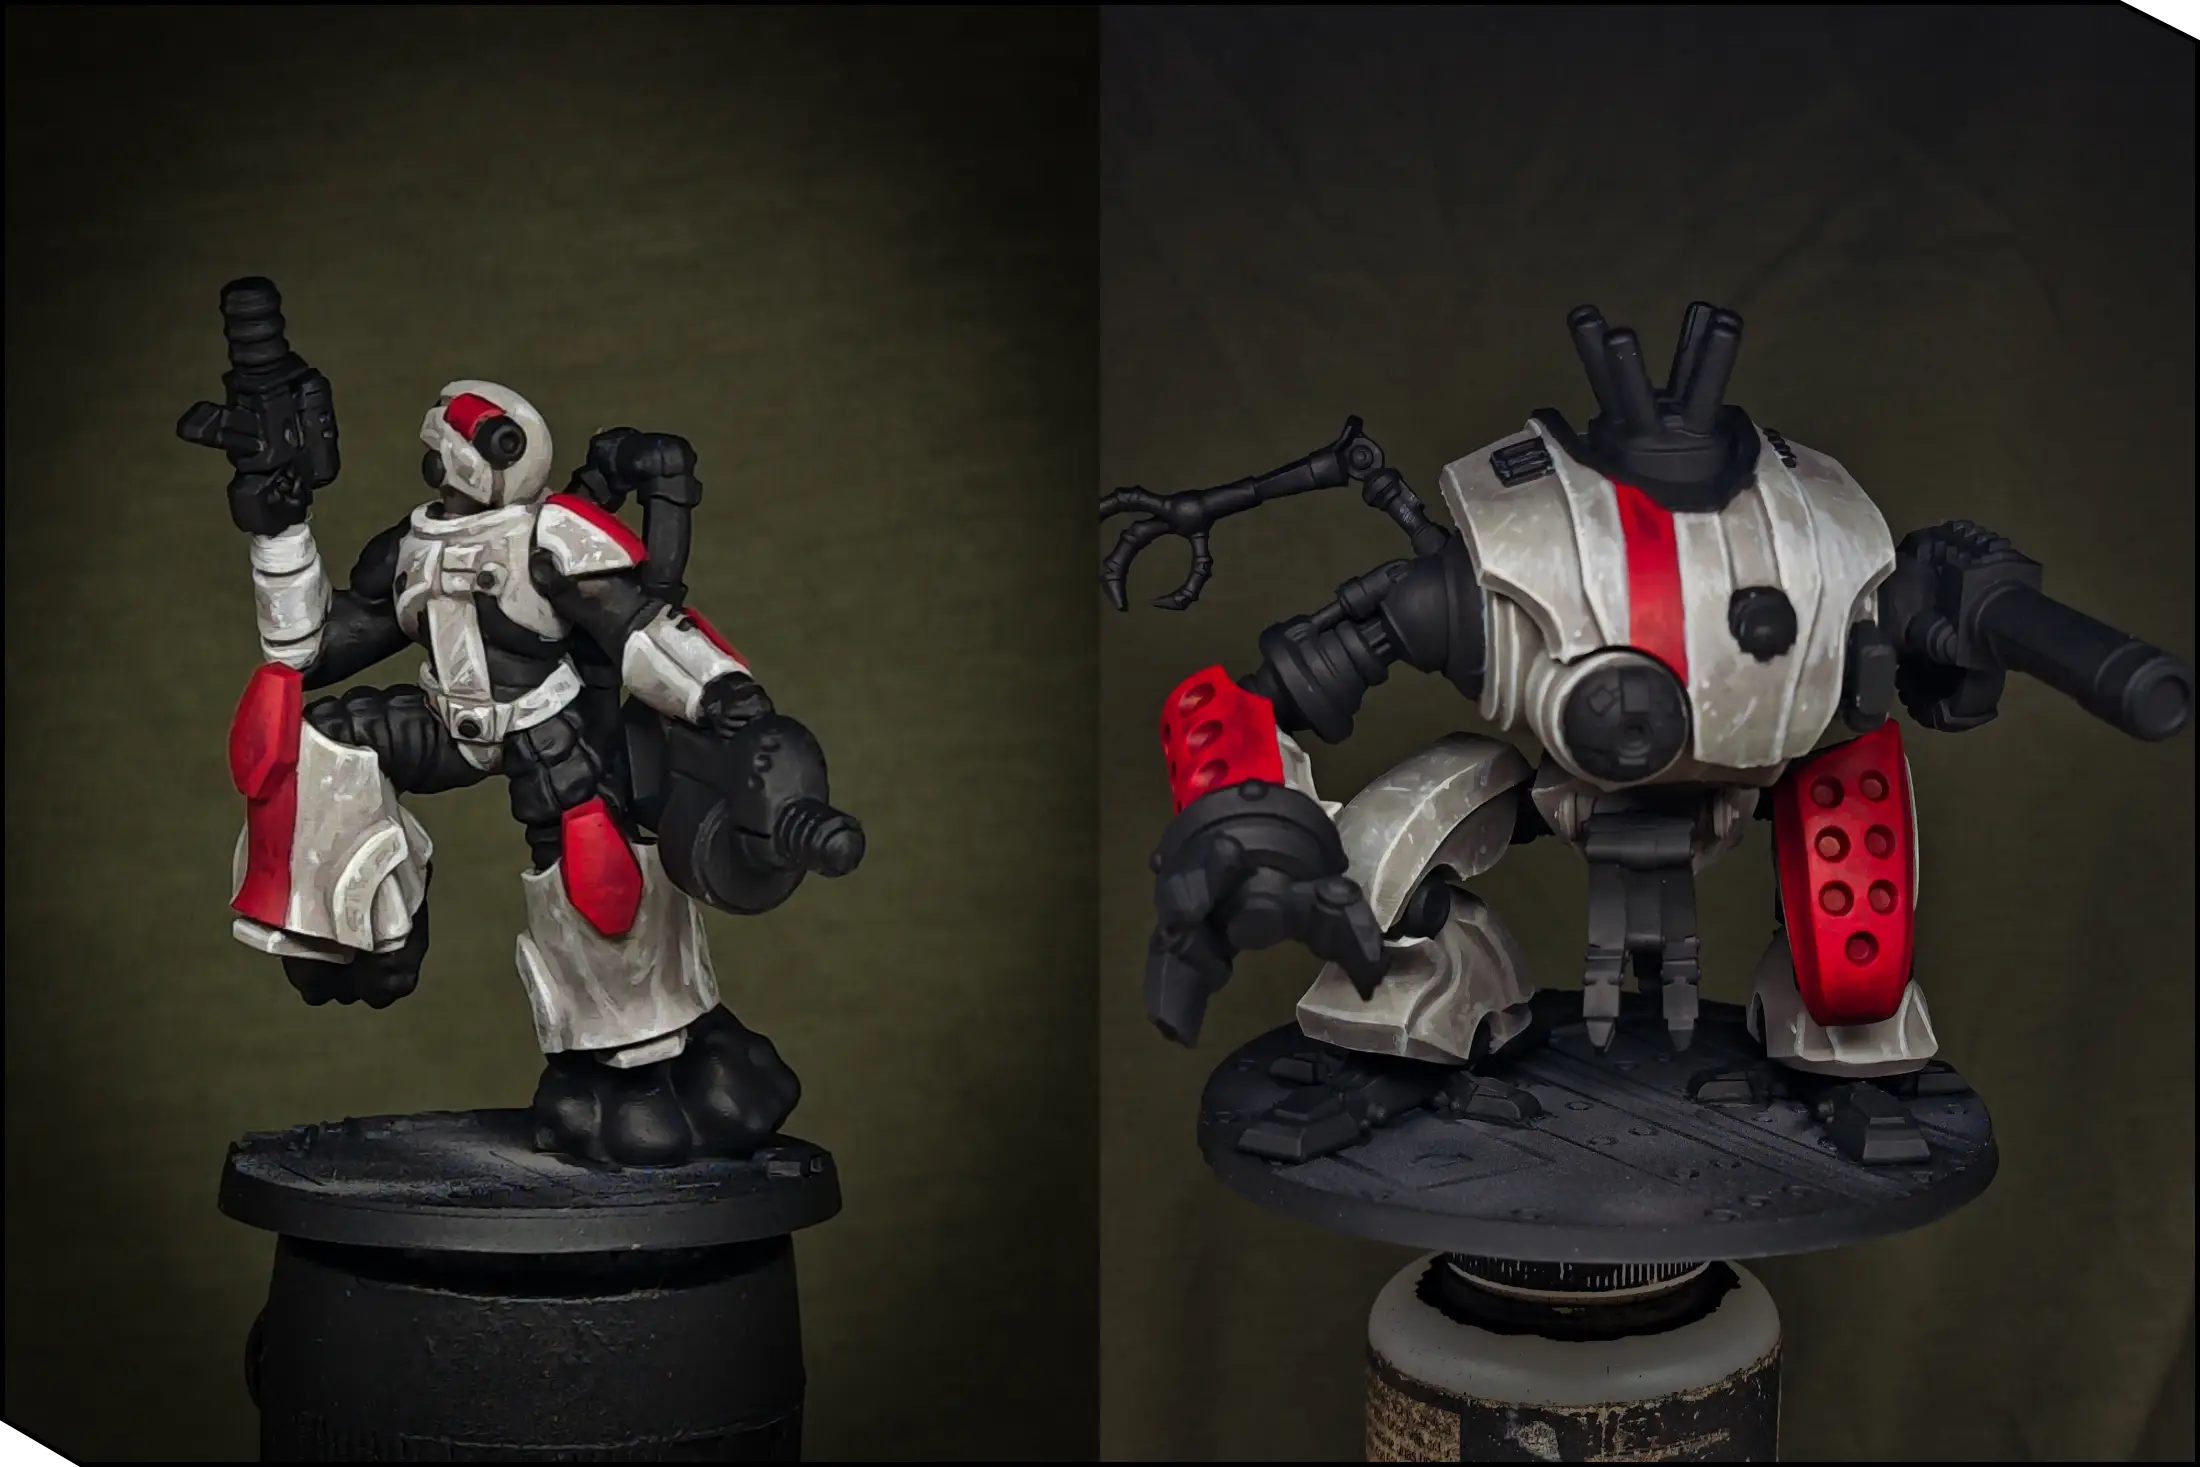
Finally, I painted the extreme edge highlights with Sun Red. Try to keep these highlights fairly small, or the red will start to look too orange. You can also add some battle damage here in the form of dots and scratches.
Black Elements
The main eye-catching parts of our miniatures are the white and red armor, so I want the black elements to play a secondary role. I began with a sketchy highlight using Rubber Black, covering about 70-80% of the original color. Since these parts are not very important, you don’t need to glaze or over-refine them.
For the final highlights, the approach depends on the material:
- For soft materials—such as the infantry undersuits, smoke, and rubber tubes—I used a 30/70 mix of Graphite and Rubber Black, covering about half of the previous highlight.
- For hard surfaces—such as guns and robotic parts—I used pure Graphite, painting only the edges and adding some battle damage. To keep these highlights fine and sharp, try painting with the side of the brush held perpendicular to the edges.
Green Lenses
Now let’s add a bit more color punch by painting the lenses. I chose glowing green for maximum contrast against the red details and overall matte color scheme. I started by covering all lenses and tubes with Cold Green. It’s not very opaque, so apply several layers for a smooth basecoat.
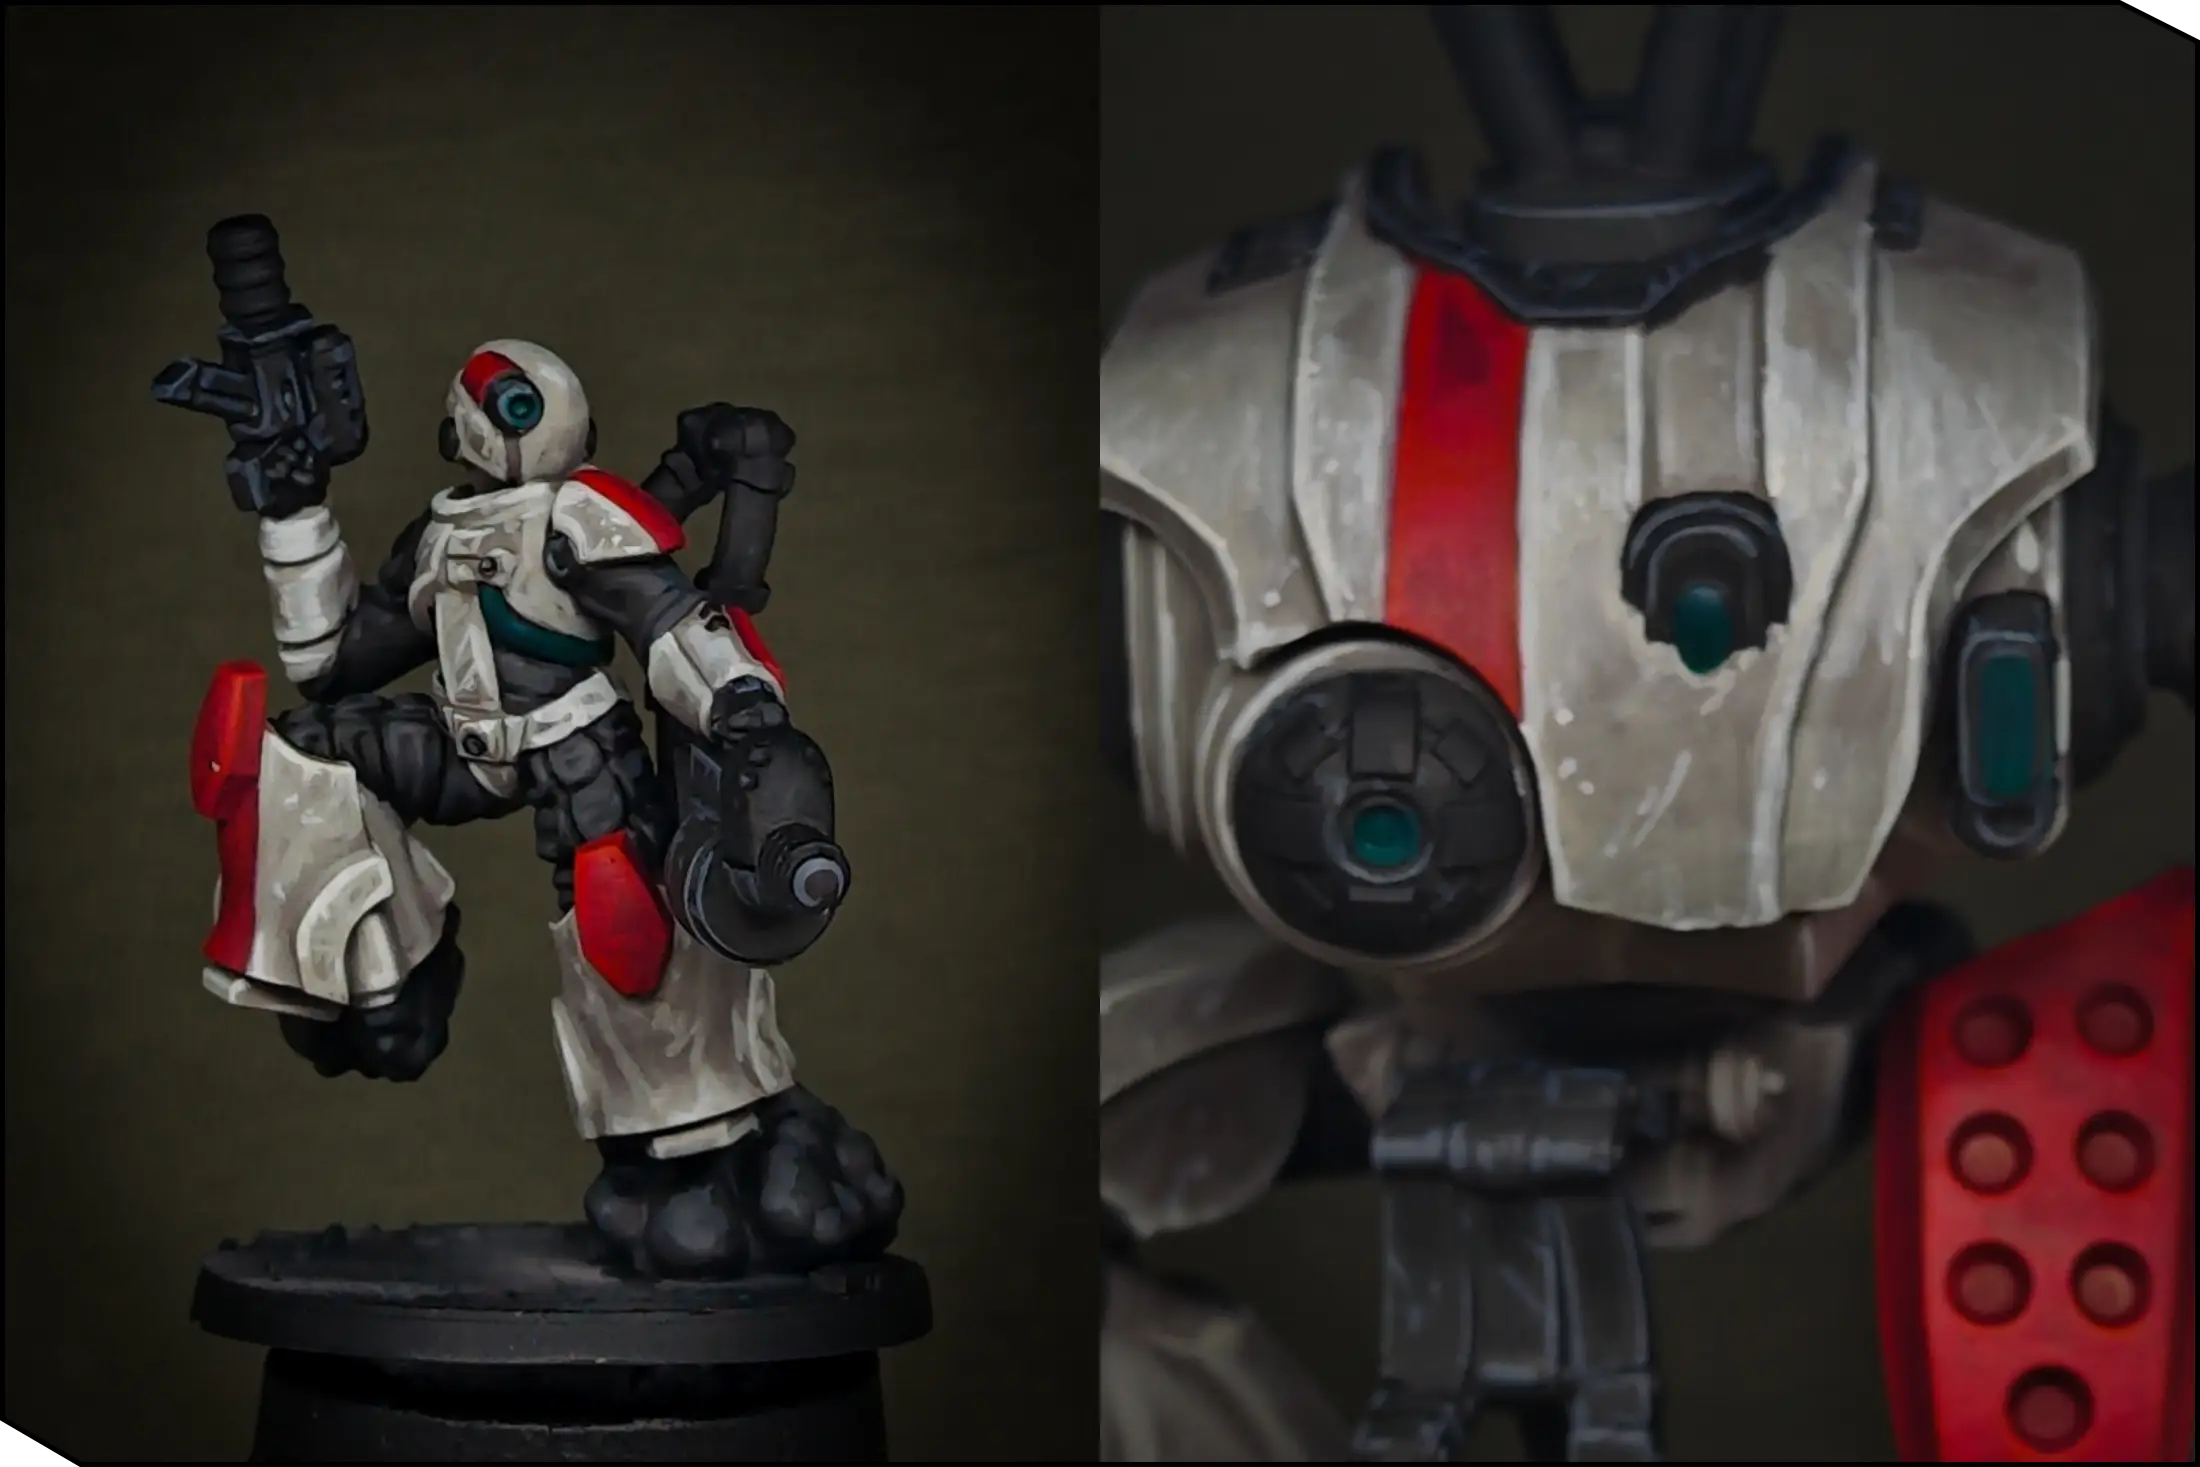
Then I painted the first highlight with Greenskin Punch on the lower-right side of each lens, covering about 40-50% of the area. Leave the upper-left corner untouched—this will help sell the glowing effect.
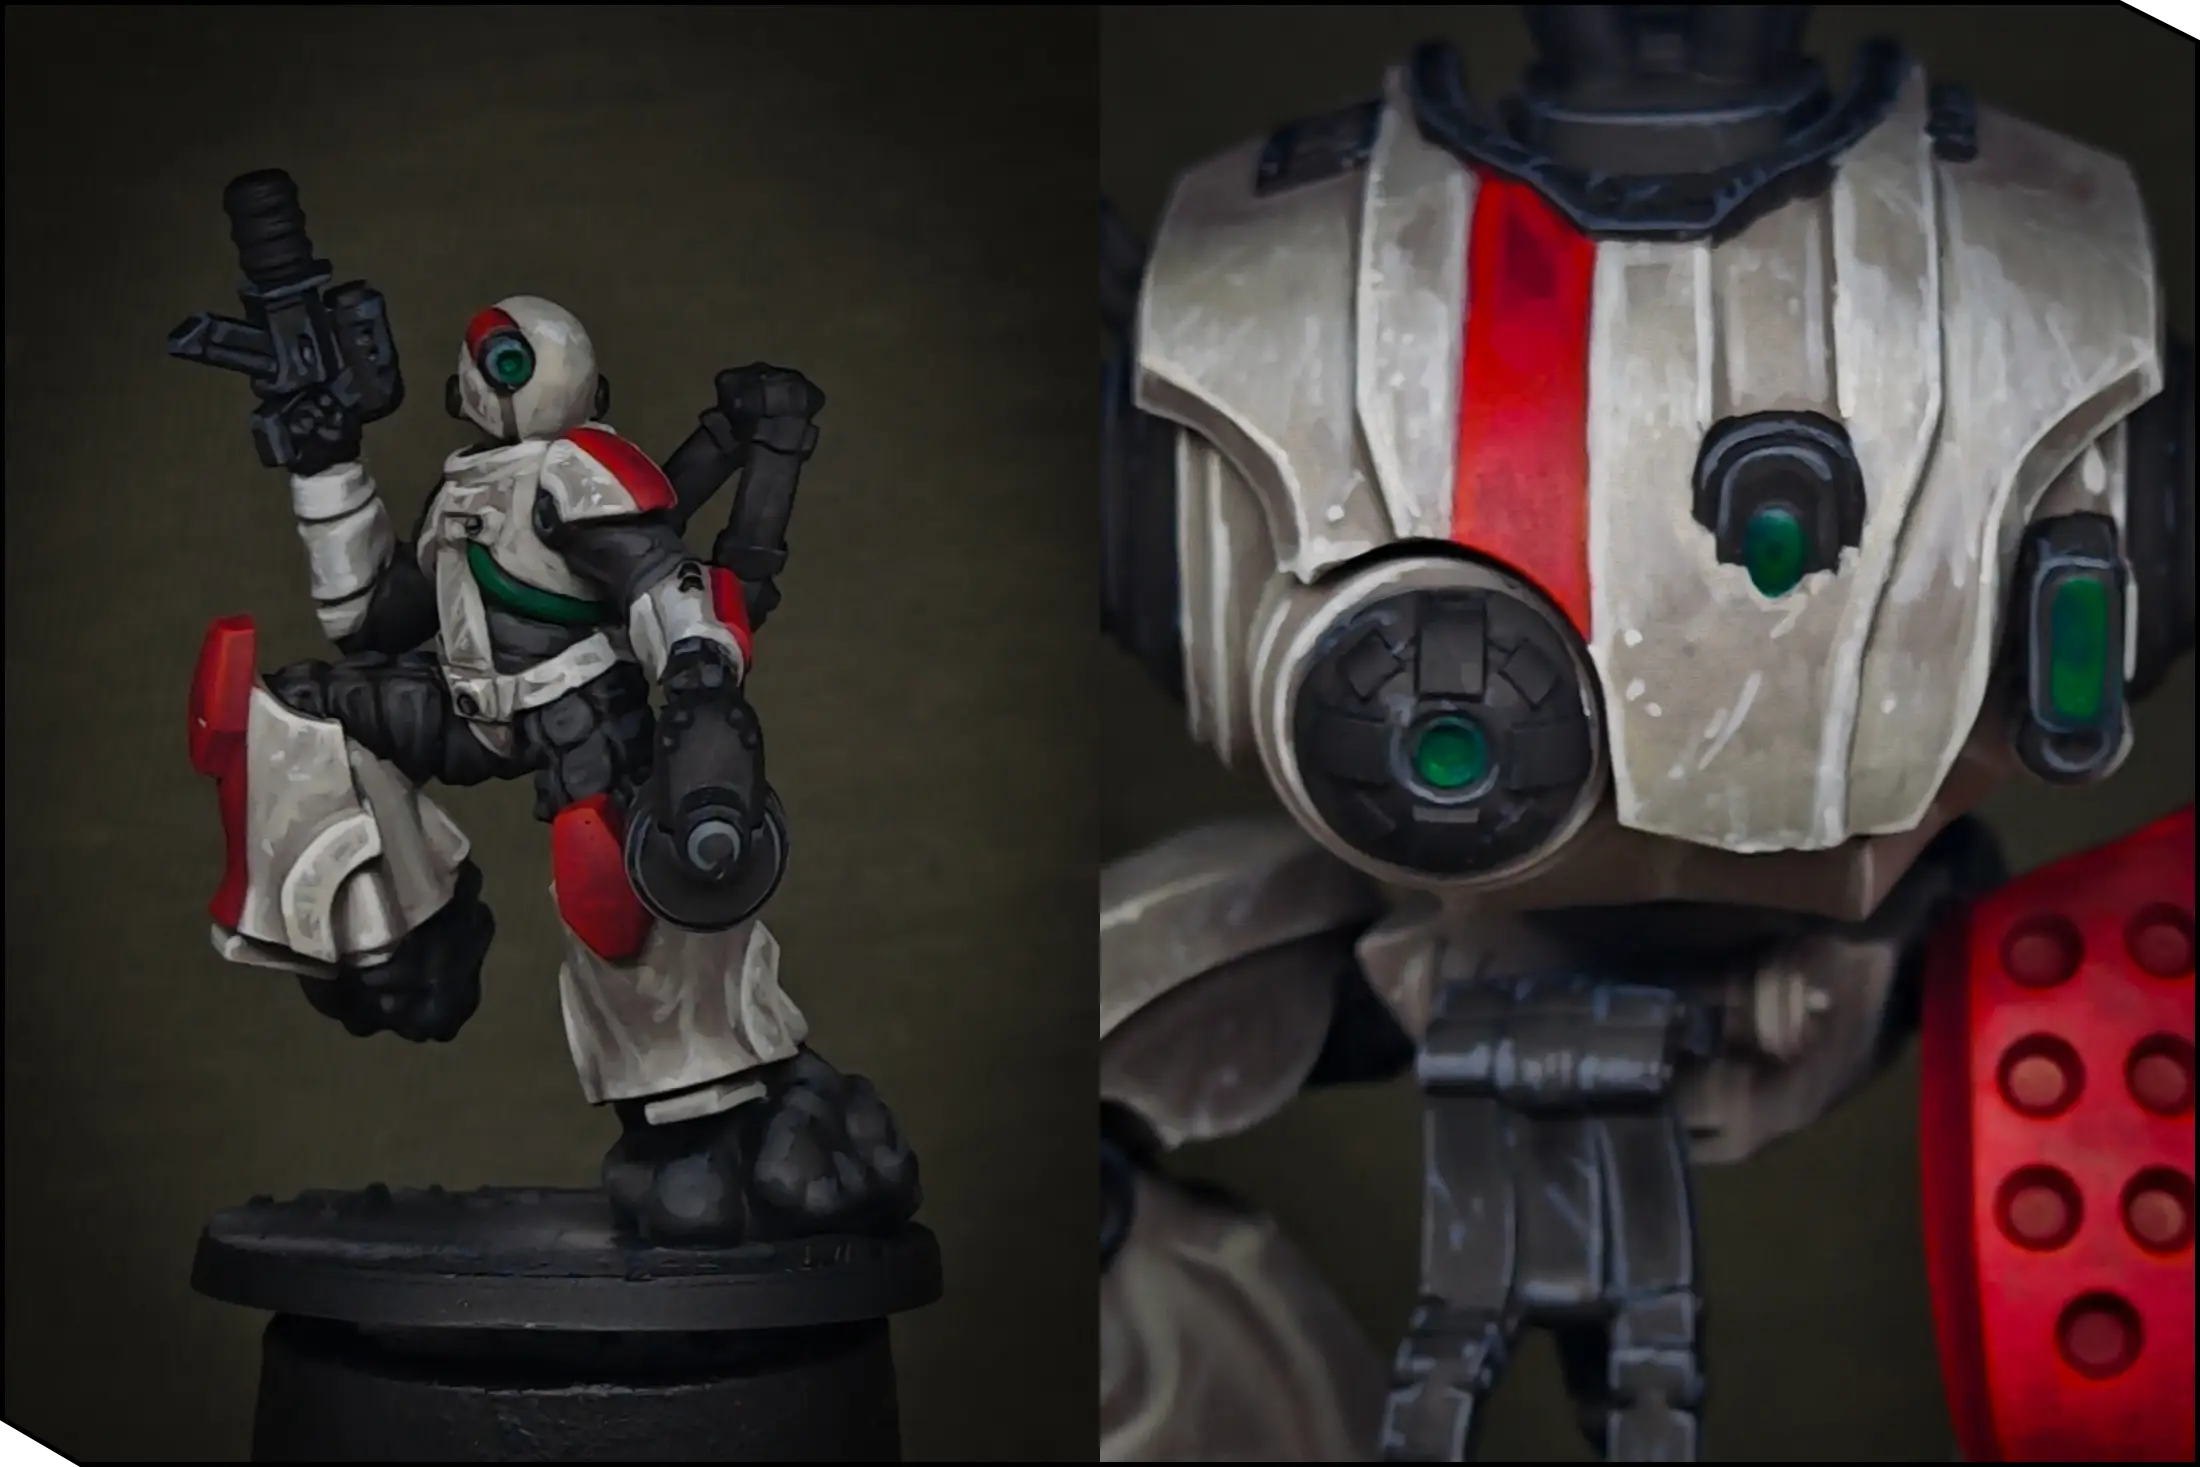
Finally, I added the extreme highlights using Slime Green: a thin line along the lower-right edge and a small dot in the upper-left corner. The placement and size of these highlights are extremely important, so don’t rush.

Metal Parts
To add a bit more interest to the large black areas, I painted some of the mechanical components in metal. I covered these parts with Gun Metal. I also painted the gun barrels and ammo coils with Rusty Gold.
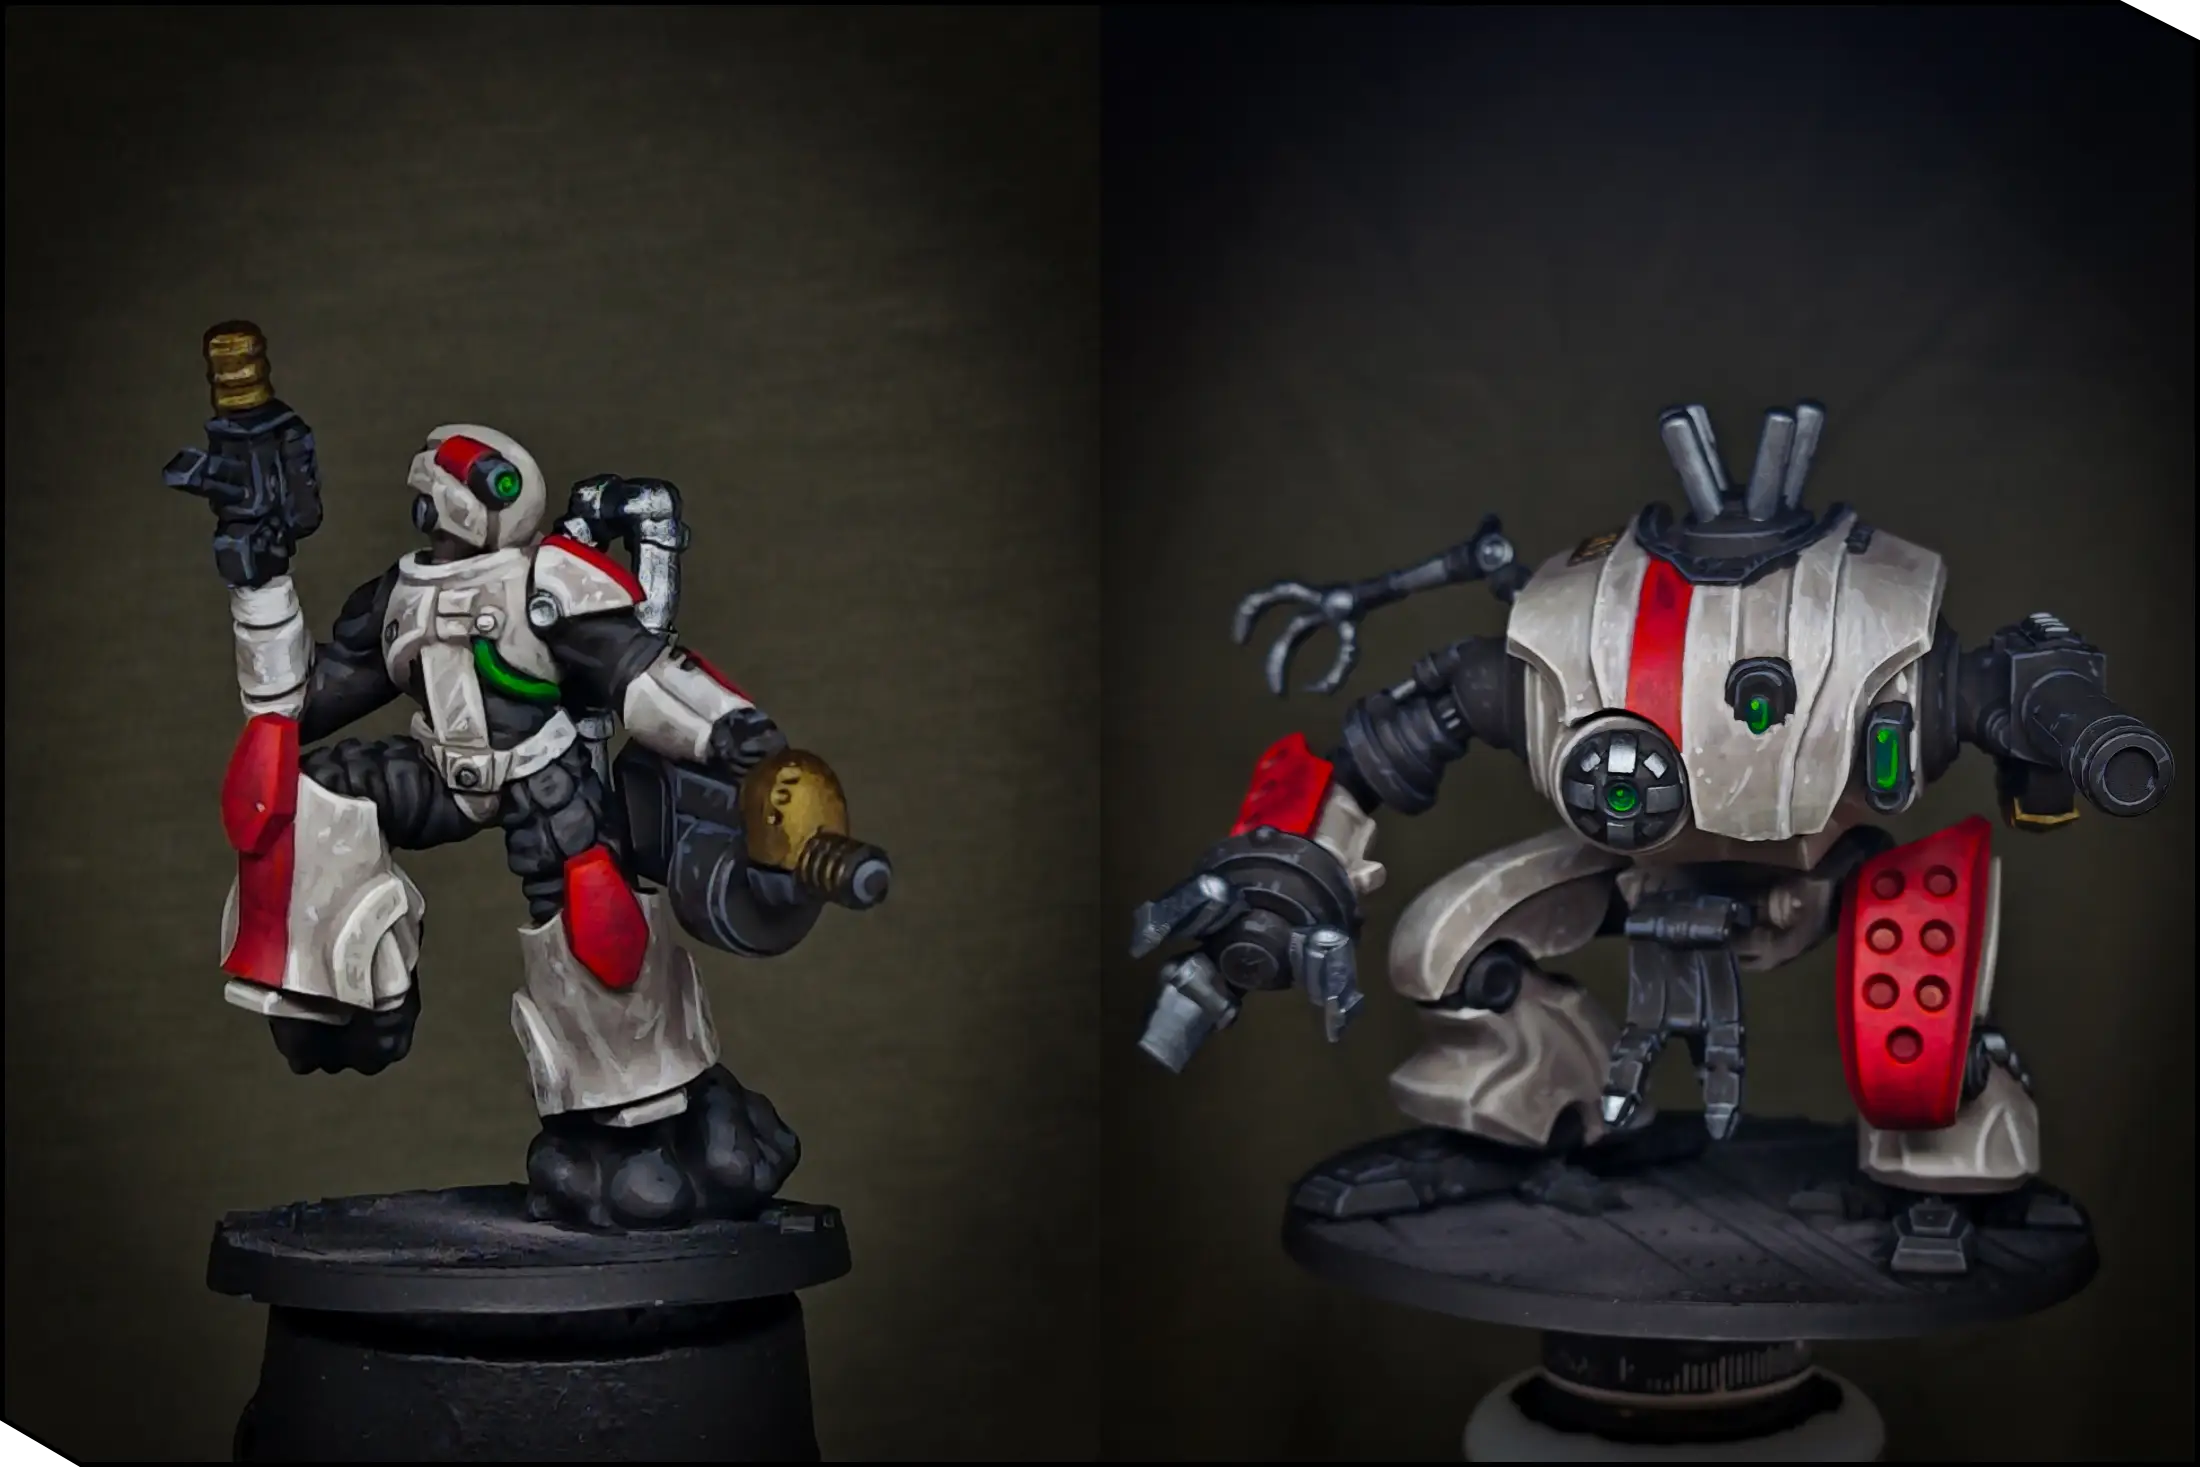
To tone down the metal and add rich shadows, I applied a wash of Grimdark Shadow. It’s a really nice brown-green shade that creates the look of old, oily metal.
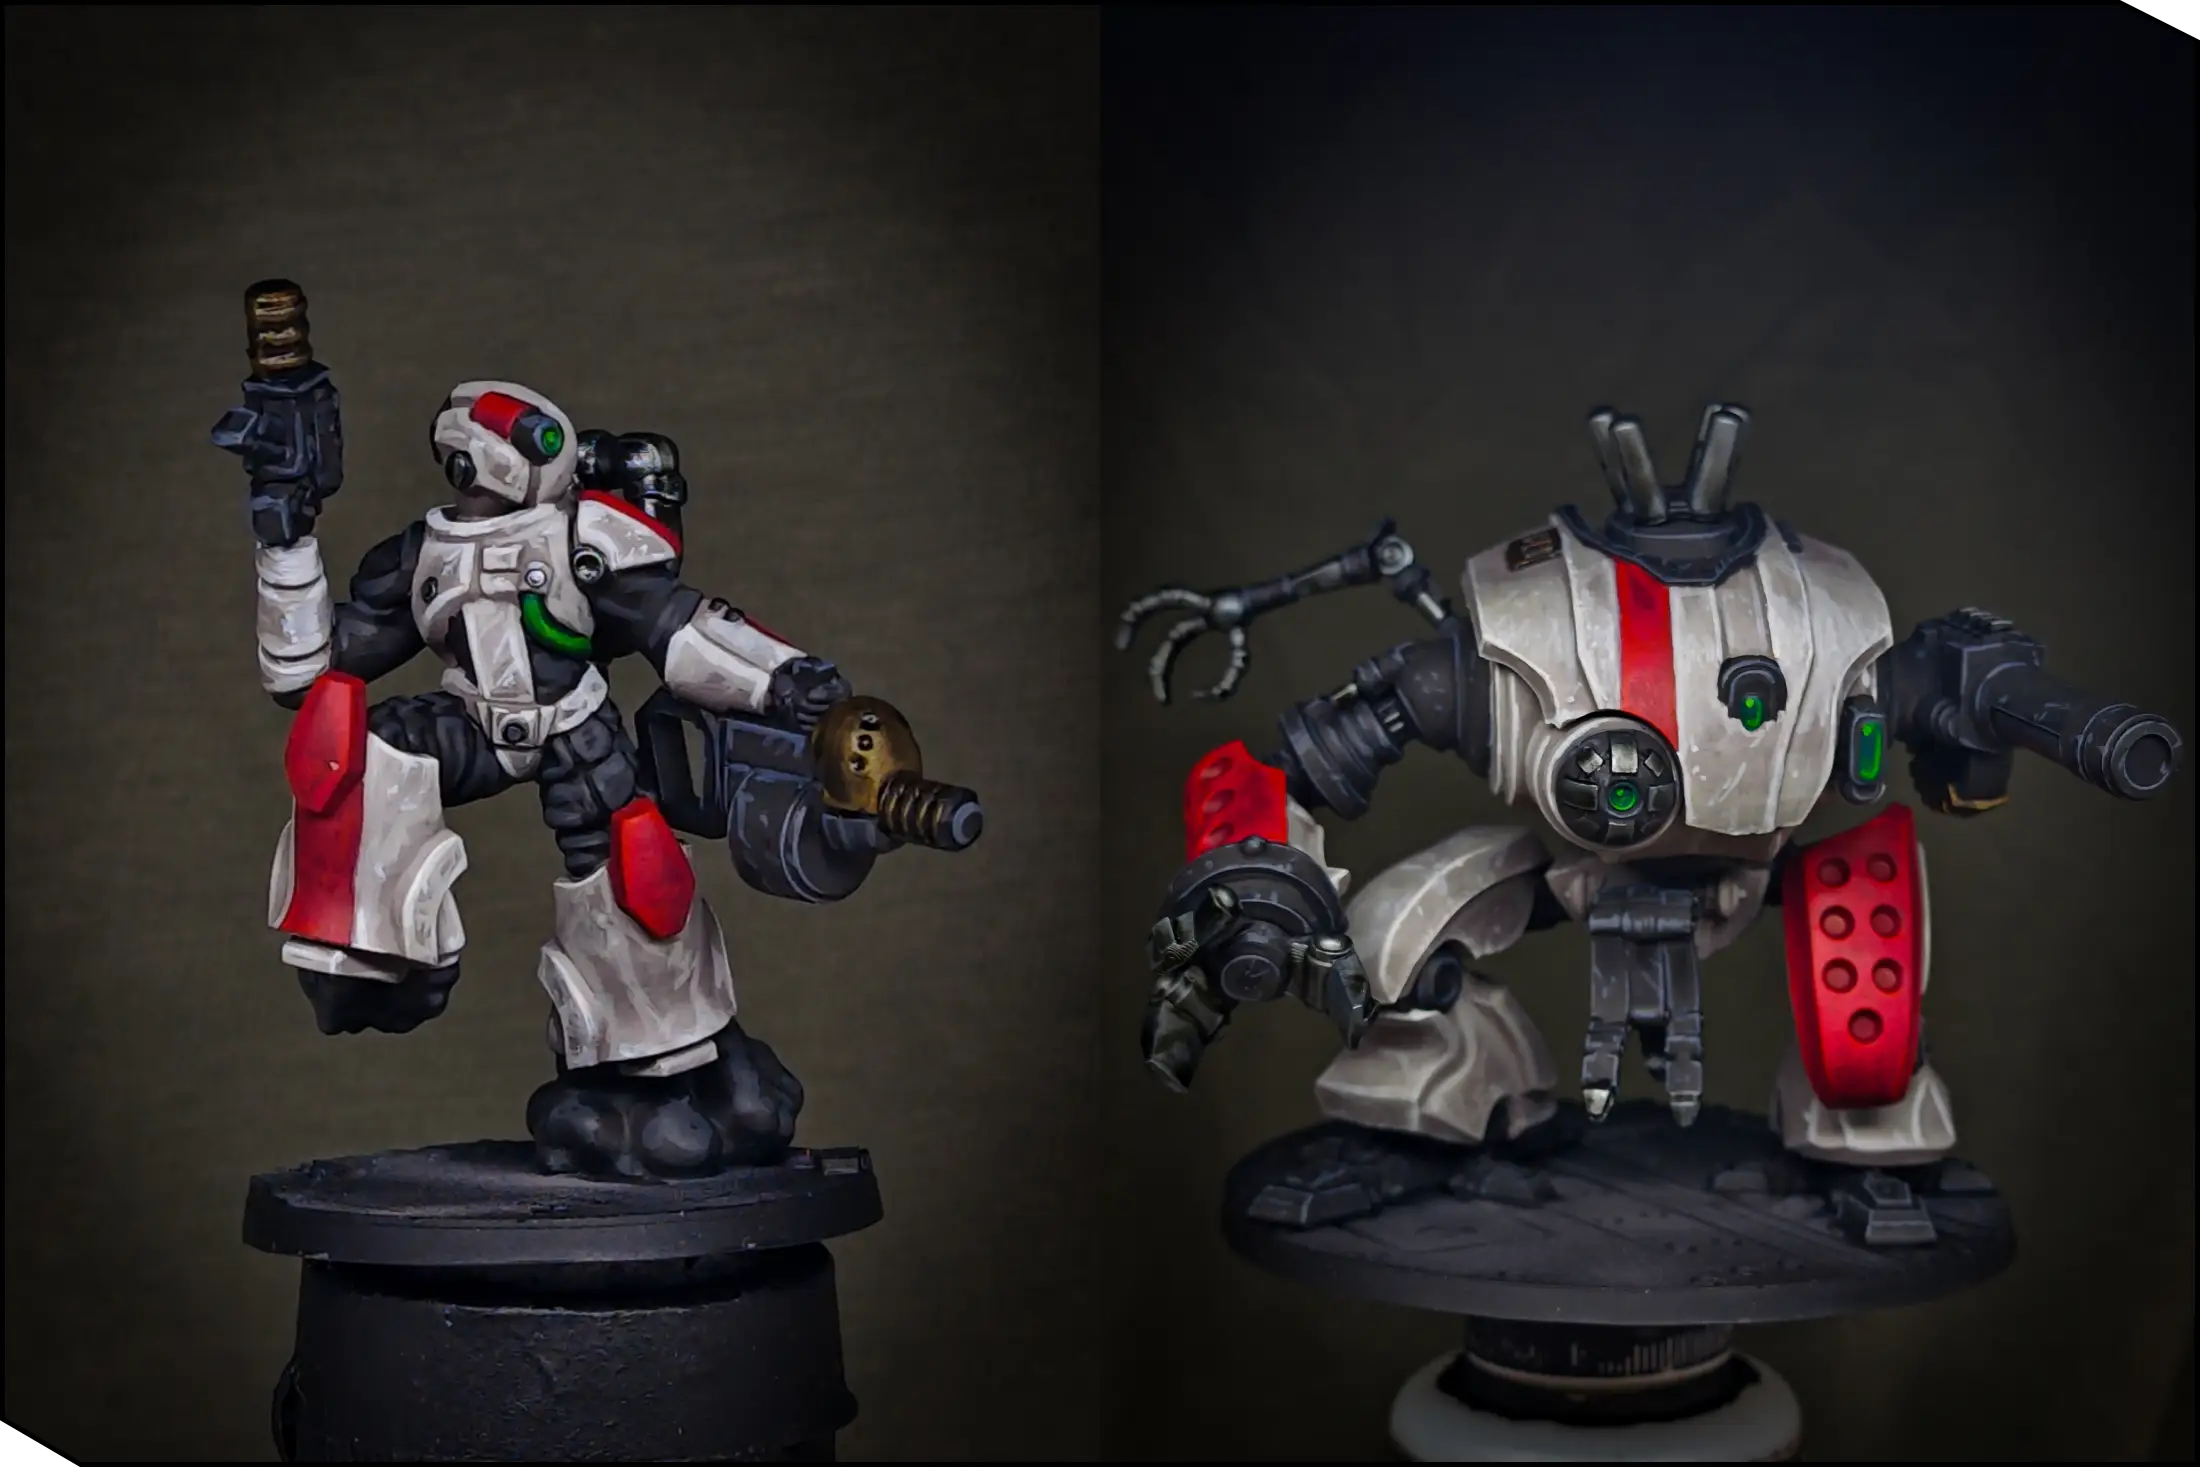
As a final touch, I picked out the edges with the original metals. When you do this, make sure the wash is completely dry first. You can speed up the process with a hair dryer.

Rusty Bases
The last step is painting the bases. Since the models themselves are quite bright, I wanted dark rusty bases for maximum contrast. I started by stippling Afro Shadow all over the base. Wipe some paint from the brush, then tap it onto the surface. Since this technique is hard on brushes, use old or cheap ones.
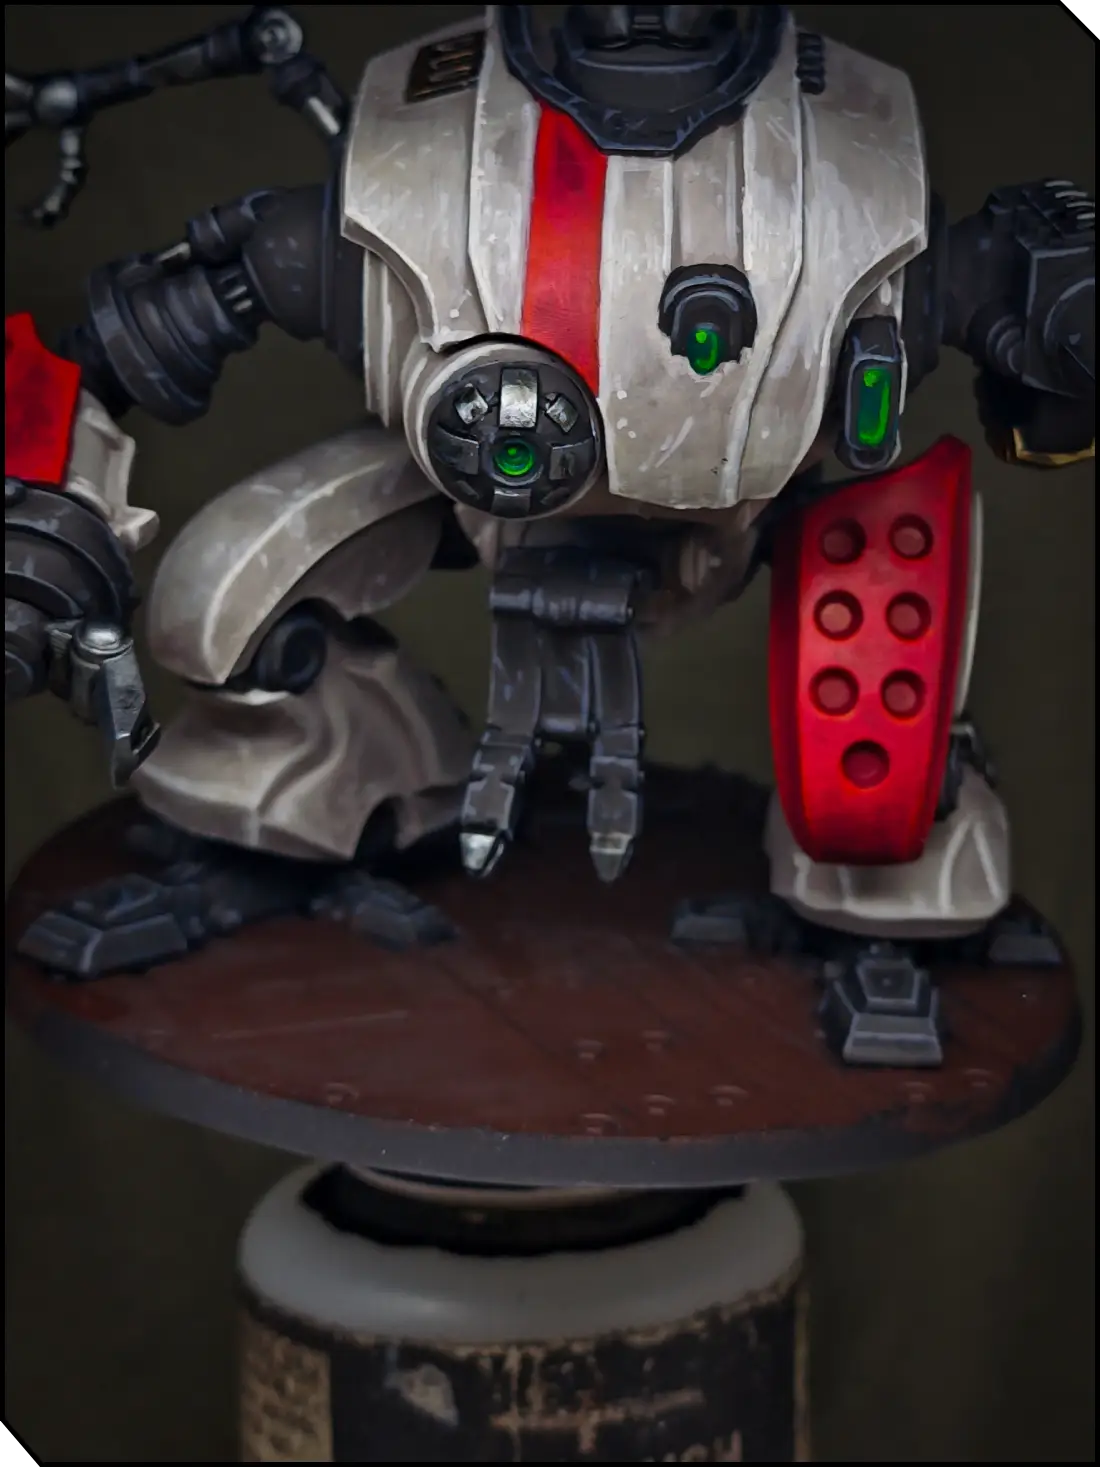
Next, I stippled Hull Red across the base, concentrating on the edges of the tiles, recesses, holes, and rivets.
Finally, I stippled Mahogany Brown in the same places, reducing the application area even further. The bases also have some pipes, which I painted the same way as the rubber-black elements on the miniatures.
As the very last step, paint the base rim black and cover your models with varnish to protect your paint job. You can use any varnish you prefer, but I personally like Ultra Matt by AK.
Now your models are ready for battle!
Check out Stan’s YouTube Channel for more painting tutorials!


.webp)
.webp)